During a Windows update, problems frequently occur and users may see error messages like the error code 0x800f081f. Often, the problem occurs during the update process in Windows because one important update file is missing. You may experience error 0x800f081f due to incompatibility issues caused by Microsoft .NET Framework 3.5. In this article, we will fix Windows Update Error 0x800f081f in Windows 11/10.
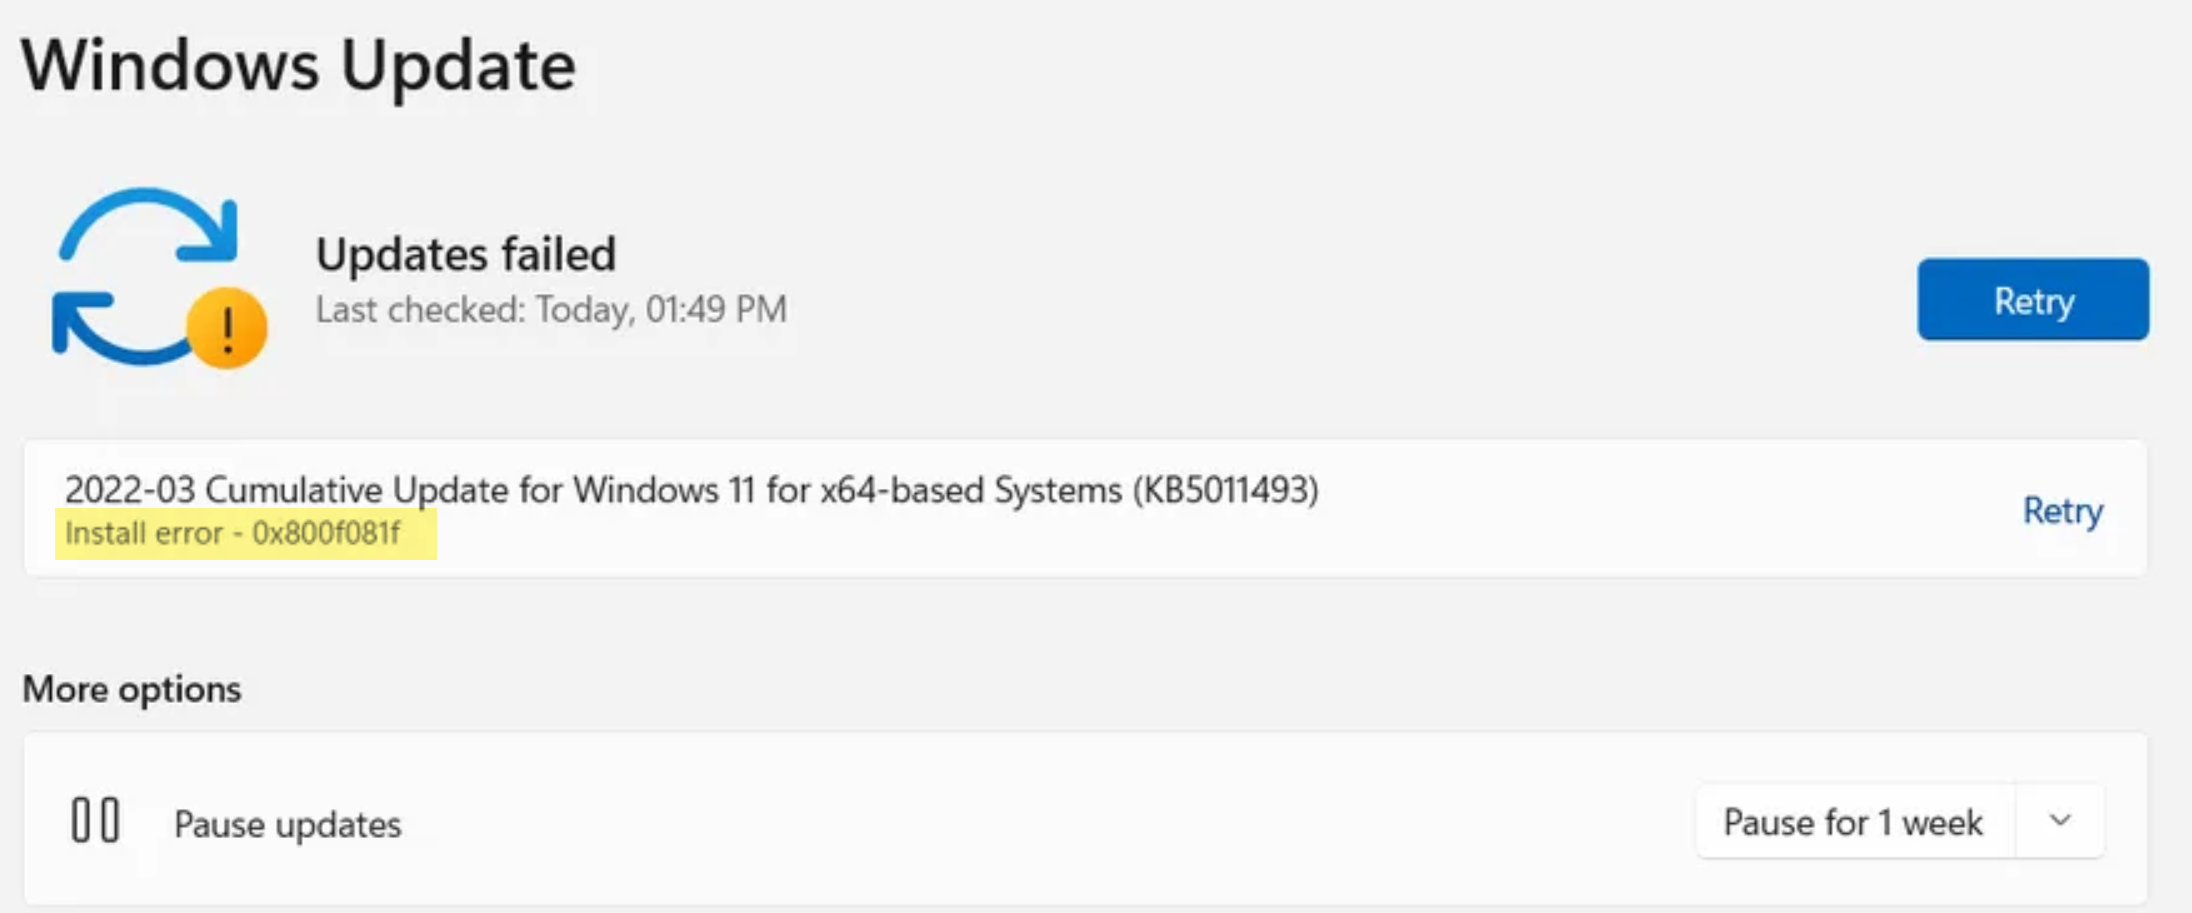
Various variations of the Windows Update 0x800f081f error, with varying causes. Below are some of the popular ones:
- 0x800f081f .NET 3.5 Windows 10: If you can’t install updates due to this error, the problem might be .NET Framework. To fix the problem, enable .NET Framework or use an offline .NET installer.
- 0x800f081f Surface Pro 3: This issue can affect Surface Pro and other laptop devices. If this happens, you should know that all of our solutions can be applied to laptops, so don’t hesitate to try them out.
- 0x800f081f Windows Update core agent: This error can affect other Windows Update components, and to fix the problem, it’s advised to reset all Windows Update components using the Command Prompt.
Page Contents
Windows Update Error 0x800f081f in Windows 11/10
Here, we have top 7 methods to solve the Windows Update Error 0x800f081f in Windows 11/10:
Method 1: Install the Update Manually
1. Check Microsoft’s Update History website to find the update code number.

2. Now, visit the Microsoft Update Catalog page. It should start with KB and some numbers.

3. Enter the Update code number in the search bar and list will appear.
4. Download the update.
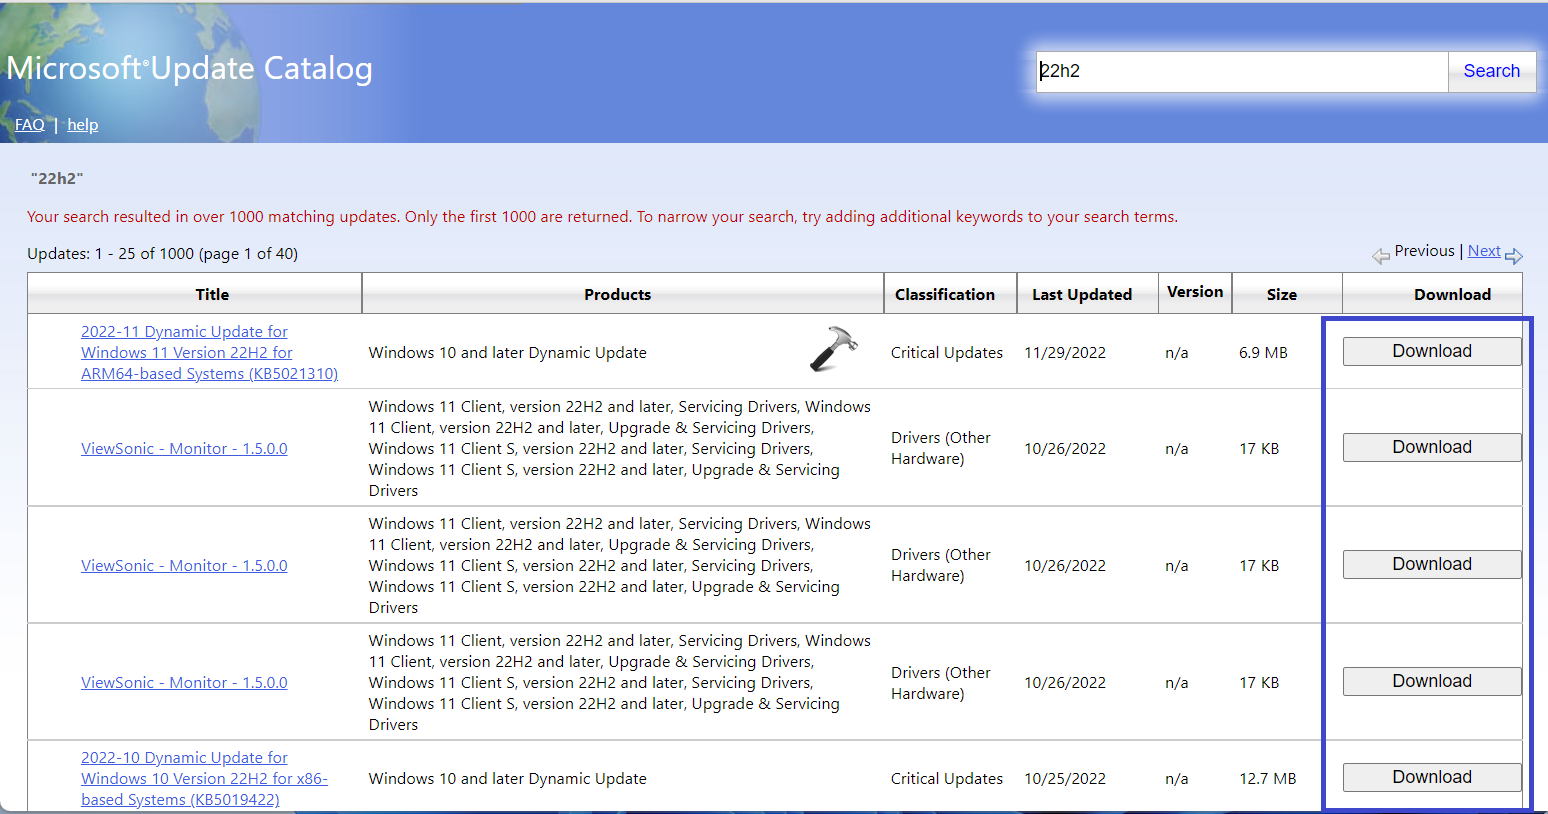
5. Now, run the setup file to install it.
Method 2: Restart Windows Update Components
1. Open Command Prompt and select “Run as administrator”.
2. Run the following commands:
Net Stop bits

Net Stop wuauserv

Net Stop appidsvc

Net Stop cryptsvc

Ren %systemroot%SoftwareDistribution SoftwareDistribution.bak

Ren %systemroot%system32catroot2 catroot2.bak

Net Start bits

Net Start wuauserv

Net Start appidsvc

Net Start cryptsvc

After running the above commands, check if the problem is resolved.
Method 3: SFC and DISM Scan
SFC (System File Checker) Scan
1. Open Command Prompt and select “Run as administrator”.
2. Copy and paste the below command:
sfc /scannow

3. Complete the process and this will take approximately 15 minutes.
Once the scan is complete, check if the problem is resolved.
DISM (Deployment Image Servicing and Management) Scan
1. Open the Command Prompt and select “Run as administrator”.
2. Copy and paste the below command:
DISM.exe /Online /Cleanup-image /Restorehealth

3. Complete the process.
After completing the process, check if the issue is resolved.
Error 0x800f081f when running DISM
If there is error 0x800f081f while running DISM, you will likely stumble across this error message: Error: 0x800f081f. The source files could not be found. Use the Source option to specify the location of the files required to restore the feature. Follow the steps to fix the error:
1. Copy and paste the below command:
dism.exe /online /Cleanup-Image /StartComponentCleanup

2. After that, run the initial command;
Dism /Online /Cleanup-Image /RestoreHealth
Method 4: Use Offline .NET Framework Installer
You must use Offline Microsoft version from the verifies site. Follow the below steps:
1. Search latest “Offline .NET Framework installer” on the web.

2. Download the installer and start the installation process.
3. The installation will take some time. Follow the instruction.
4. When the process is finished, restart your PC.
Method 5: Enable .NET Framework
1. Press the Windows key + S and click on “Windows features”.

2. Now, select “Turn Windows features on or off”.
3. Prompt box will appear.
Check the “.NET Framework 3.5” box. Click OK.
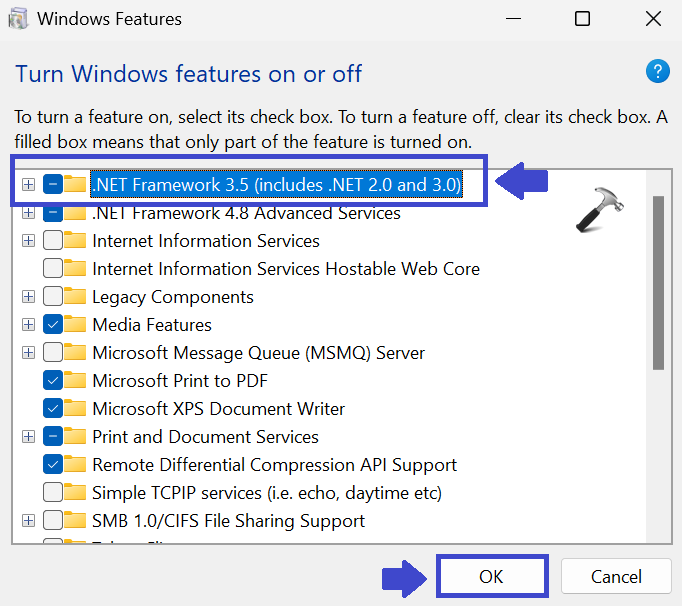
After enabling the .NET Framework, perform the update and check if it works.
Method 6: Perform Clean Install
1. Firstly, backup your files and the license key.
2. Download the Media Creation Tool and use USB to install the system.
3. Once you have the bootable source, plug it into the affected device.
4. Open the Start Menu and click on Power button.
5. Now, press and hold the Shift key and choose “Restart” from the menu.
or go to your BIOS and change your boot priority settings.
6. Select Troubleshoot and then click Advanced options.

7. Now, choose Startup repair and follow the instructions.
8. This process will take time and might reboot the system again.
After this you will have the fresh installation of the Windows. It will repair any corrupted files and fixes error caused by misconfiguration.
Method 7: Use Windows Update Troubleshooter
1. Open the Settings App and select “System” option.
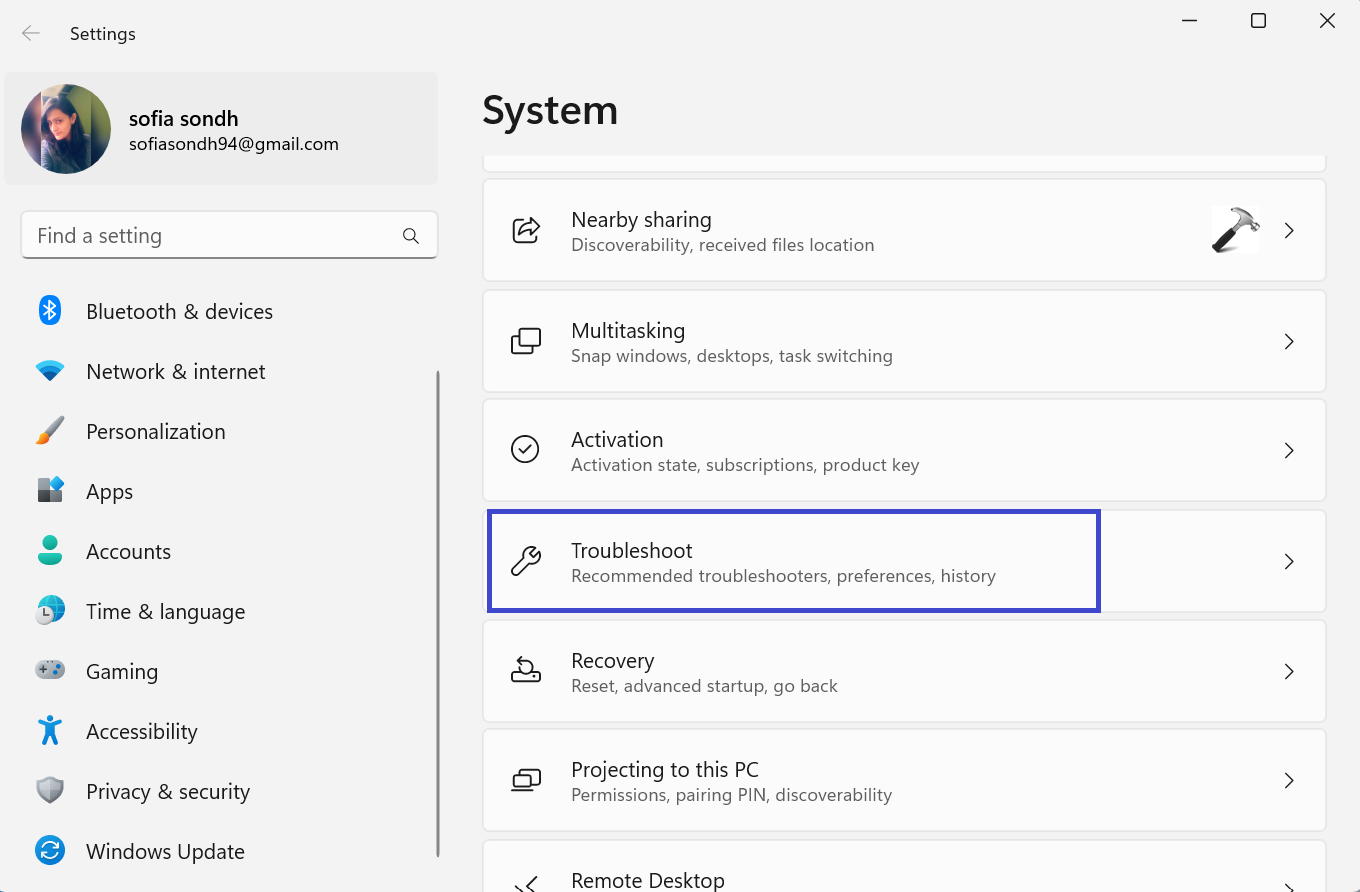
2. Now, choose Troubleshoot from the right panel.
3. Click the “Other troubleshooters” option.
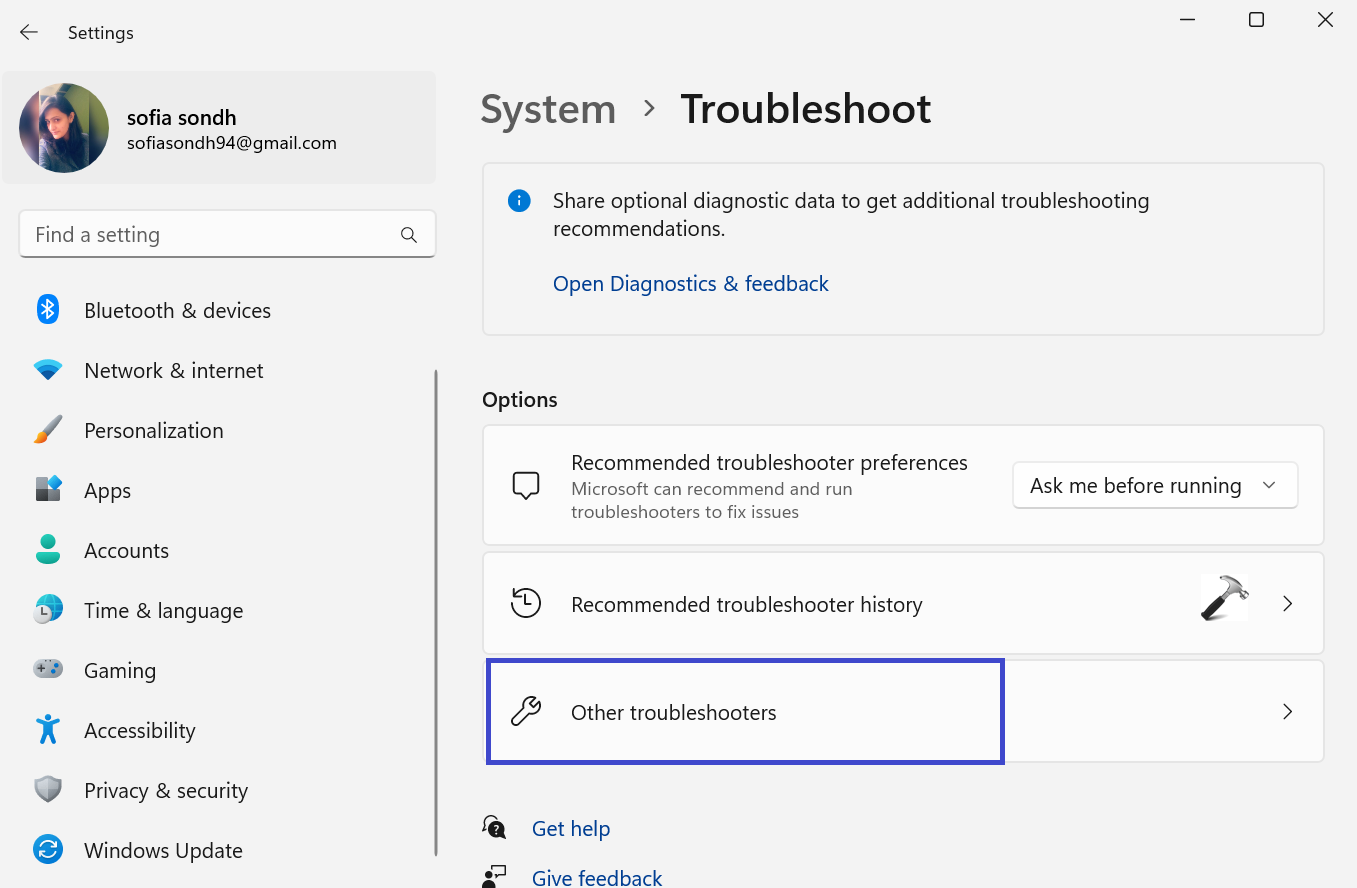
4. Now, click on the “Run”.
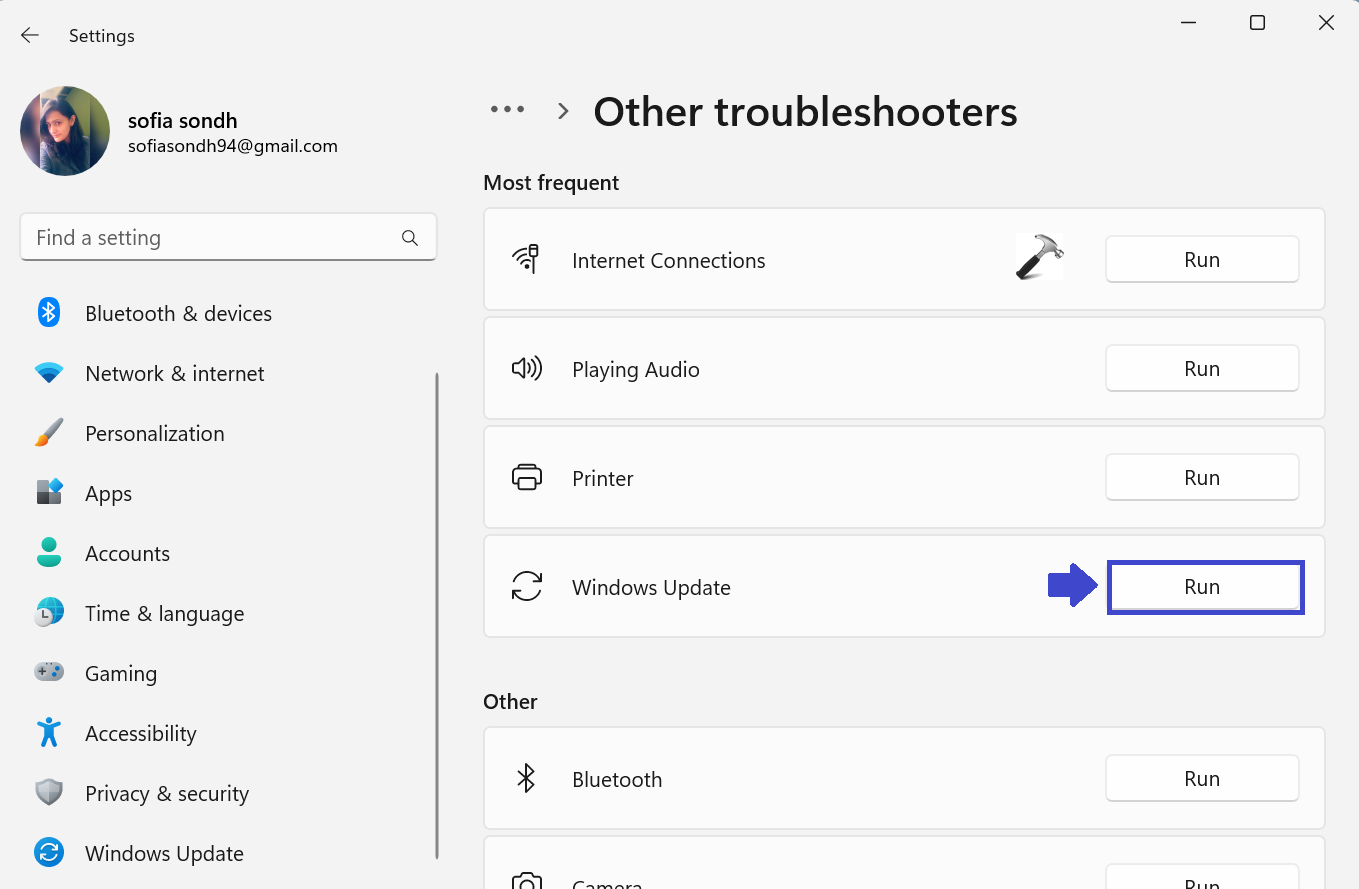
5. Follow the instructions on the screen to complete. Once the troubleshooter is finished, check if the Windows 11/10 update 0x800f081f error is resolved.
That’s It!
![KapilArya.com is a Windows troubleshooting & how to tutorials blog from Kapil Arya [Microsoft MVP (Windows IT Pro)]. KapilArya.com](https://images.kapilarya.com/Logo1.svg)


![[Latest Windows 10 Update] What’s new in KB5055612? [Latest Windows 10 Update] What’s new in KB5055612?](https://www.kapilarya.com/assets/Windows10-Update.png)


Leave a Reply