To keep your system working perfectly, Windows perform automatic scheduled maintenance daily. By default, this maintenance time is set to 3 AM and users may customize it, if they like. Windows automatic maintenance acts in such a way that if your system is running critical process as the time of scheduled maintenance, the wizard tends to defer it and looks forward to perform the same when computer is on and is idle. Also if your system is off at the automatic scheduled maintenance time, it will performed next time you turn on your machine and obviously when system will be idle.
Sometimes, automatic scheduled maintenance may not be able to perform scan of your system with the help of Windows Defender. As a result of this, you’ll see a notification in Action Center regarding this with following message:
Page Contents
Windows Defender needs to scan your computer
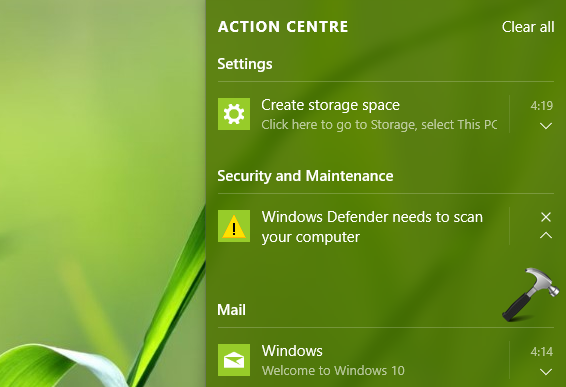
You can easily suppress this message for once by clicking on it which would launch Windows Defender and you’ve to perform scan manually there. But if you’re getting this notification everyday, you’ll got frustrated with it and you need to fix it permanently. So to resolve this message, you should create a task which will run Windows Defender scan automatically and daily. Once this task is created and run daily, Windows automatic scheduled maintenance will no longer push notifications to scan your machine. Here is how you’ll create the task and fix this issue.
FIX : Windows Defender Needs To Scan Your Computer Message In Windows 10
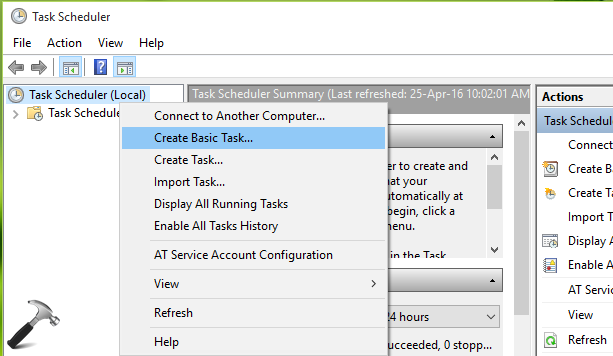
1. Open Task Scheduler by running taskschd.msc command in Run or Command Prompt. In this Task Scheduler window, right click on Task Scheduler (Local) entry and then click Create Basic Task option.
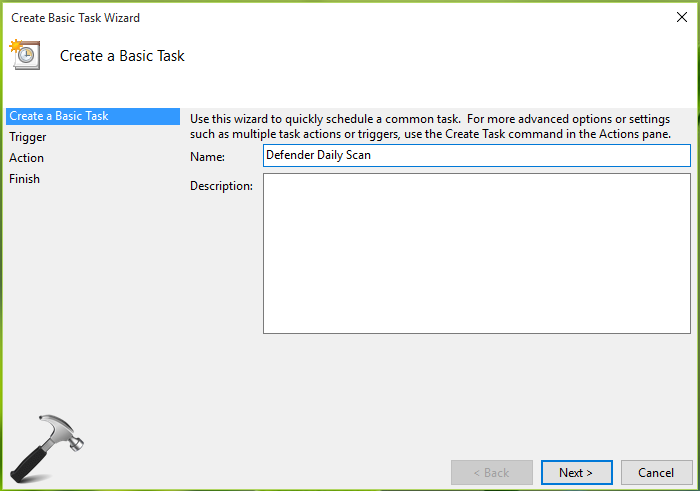
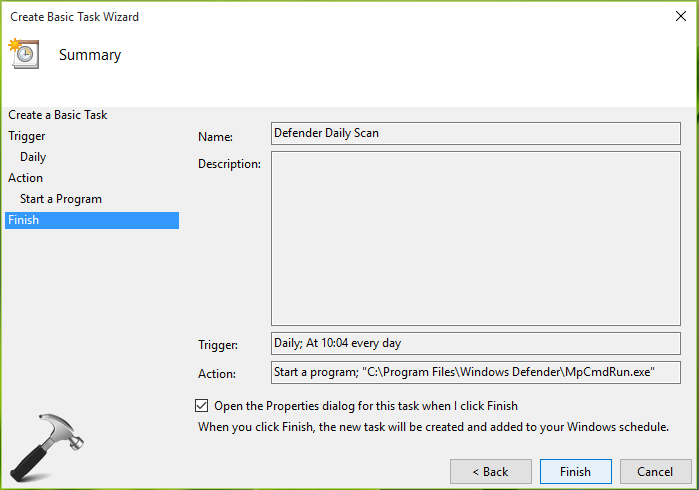
2. Last step will result launching Create Basic Task Wizard. In the below shown window, type the name of this task. Use that name which you can easily memorize, for example, Defender Daily Scan. Click Next.
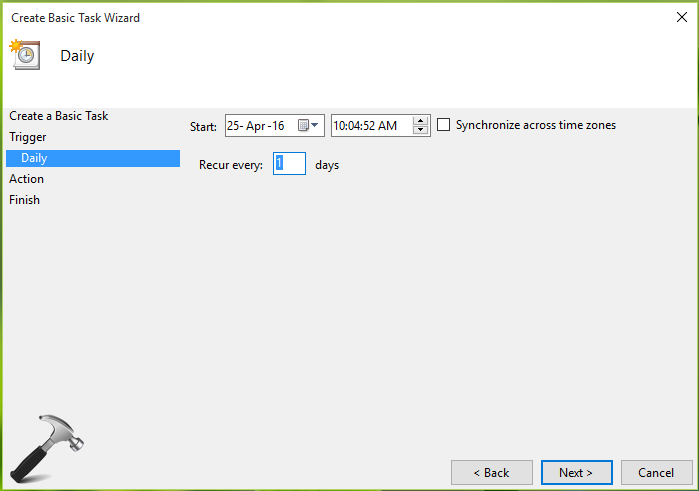
3. Then in the Trigger section, choose Daily option and hit Next.
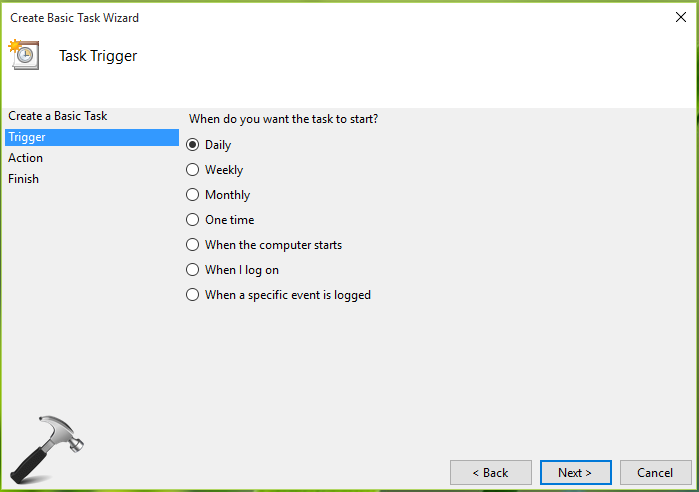
On next screen, you can adjust the time from which this task should start. I’d leave this as it is and click Next, if I’ve to let the automatic scan run by today/tomorrow.
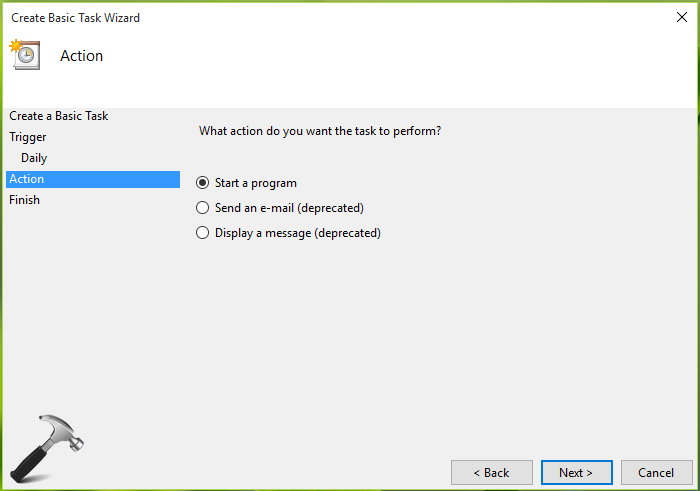
4. Then select an Action for your task in the next screen. Here you’ve to choose Start a program option. Click Next.
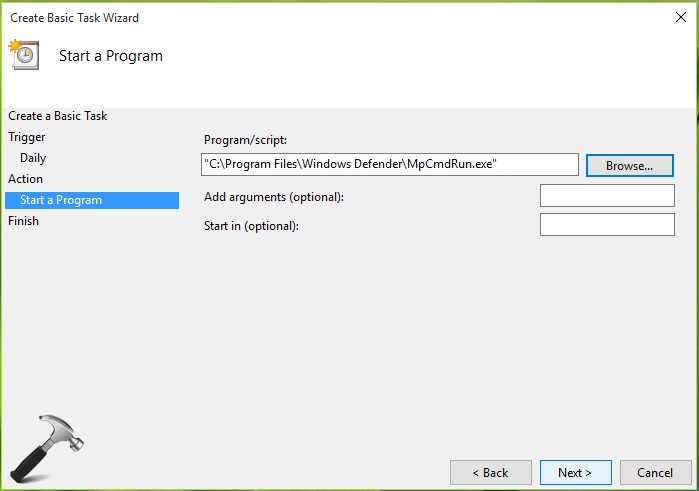
5. Under Start a program section, you need to specify Windows Defender as the target program. Click Browse and navigate to the drive on which Windows is installed. Click Program Files > Windows Defender and select MpCmdRun.exe file in this folder. So now the MpCmdRun.exe file location will be mentioned in Program/script section. Click Next.
6. Finally, click Finish to close Create Basic Task Wizard screen.
Close Task Scheduler. From now onwards, the task will run automatic scan using Windows Defender, and the notification will no longer appear.
Hope this helps! Go here to learn how to turn on/off automatic maintenance messages in Windows 10.
![KapilArya.com is a Windows troubleshooting & how to tutorials blog from Kapil Arya [Microsoft MVP (Windows IT Pro)]. KapilArya.com](https://images.kapilarya.com/Logo1.svg)





Leave a Reply