

When the PC is not able to detect the Wi-Fi automatically, the users can start the WLAN AutoConfig manually. However, sometimes while doing the same the users come across an error message displaying “Windows could not start the WLAN AutoConfig Service” which can hinder the process of connecting the PC to the wi-fi network. In this blog, we will discover all the methods using which the users of Windows 11 can easily fix the problem of WLAN AutoConfig not starting.
Page Contents
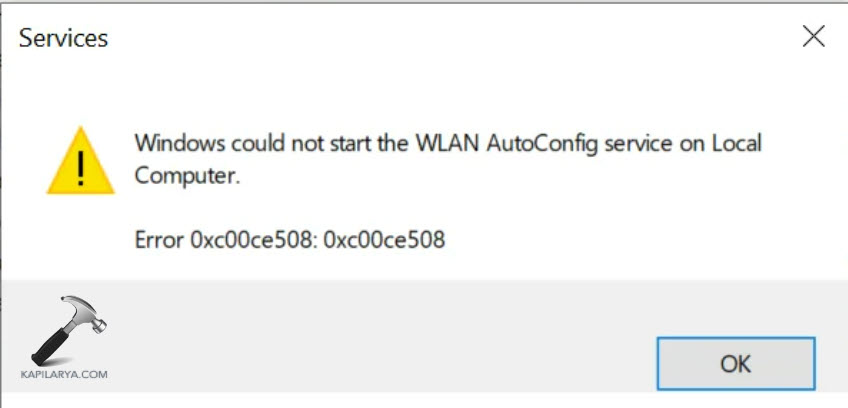
Windows could not start the WLAN AutoConfig Service
Now, let us check all the fixes which will help the users of Windows to fix the issue of WLAN AutoConfig not being able to start.
Fix 1: Re-installation of Network Adapter
By reinstalling the Network Adapter, one can easily fix WLAN AutoConfig not starting. Hence, follow these steps to reinstall the Network Adapter.
Step 1– At first, launch Device Manager.

Step 2- Next, select Uninstall Device with a right-click on the wireless adapter.

Step 3- Further, a box will appear asking for confirmation, select Uninstall again and follow any prompt that may appear on the screen.

Step 4- Lastly, restart the computer, and Windows will reinstall the driver automatically.
Fix 2: Running Network Troubleshooter
Running of the in-built Windows Troubleshooter will help in identifying and fix WLAN AutoConfig not starting issue present in the desktop. Thus, the steps to follow for this method are-
Step1- At first, go to Settings.

Step 2- Select System. Go to Troubleshoot and then to Other Troubleshooters.


Step 3- Thirdly, click on Network and Internet and then select Run. Follow the instructions that will pop up on your screen to check if there are any identifiable issues by Windows.

Fix 3: Resetting of Network Settings
By following this method, all network adapters can be erased, and the constituents of networking can be reset to the original setting which will help to solve the issue of WLAN AutoConfig not starting. This method consists of the following steps-
Step 1- Firstly, visit Network & Internet under Settings.

Step 2- Next, scroll down to Advanced Network Settings option.

Step 3- Again, tap on Network Reset under More Settings.
Step 4- Lastly, tap on Reset Now and restart your desktop as soon as prompted.

Fix 4: Checking of WLAN Auto Configuration Service
Checking the WLAN Auto Configuration service is another fix which can aid in fixing the problem. The steps to check the WLAN service are-
Step 1- Primarily, type Windows + R and open the Run dialog box.
Step 2- Next, copy and paste the command below and then type Enter for opening Services window.
services.msc

Step 3- Go down and select WLAN AutoConfig.

Step 4- Select the Properties Option via a right-click on the WLAN Config.
Step 5- Further, verify that the Startup type is Automatic and if it is somehow not running, click the Start button.

Step 6- Lastly, to save the modifications, click OK.
Fix 5: Editing the Registry
Editing the registry is another solution which can help the users in solving the issue. Now, let us check the steps for doing the same.
Step 1: Firstly, open the Registry Editor.

Step 2: Next copy and paste the path below and press Enter.
HKEY_LOCAL_MACHINE\SYSTEM\CurrentControlSet\Services\Dhcp
Step 3: Further, double-click Depend on Service and delete all except Afd.

Step 4: Lastly, press Ok, close the Registry Editor and restart the PC.
Fix 6: Restarting the Router
Someimes just restarting the router can too be a solution for the issue. For restarting the router, unplug the router and wait for 30 seconds. Thereafter, again plug it again and wait for a couple of minutes and allow the router to boot up again.

Fix 7: Checking Adapter Settings
The disability of Wireless Adapter can too lead in the occurrence of the WLAN AutoConfig not starting mishap. Thus, the steps for checking the adapter settings are given below.
Step 1: Firstly, go to Control Panel.

Step 2: Next, visit Network and Sharing Center > Change adapter settings.


Step 3: Lastly, check the wireless adapter. If it is disabled, Enable it.

Lastly, wishing that the users of Windows can easily solve the issue of WLAN AutoConfig not starting with all the fixes mentioned in this post.


![[Latest Windows 10 Update] What’s new in KB5055612?](https://www.kapilarya.com/assets/Windows10-Update.png "[Latest Windows 10 Update] What’s new in KB5055612?")


Leave a Reply