While making clean install, sometimes you may be treated with different errors. One error that comes in while you choose the installation location will be discussed here. This error usually prevents you to install Windows at the drive location of your choice.
Following is the error message displayed while choosing location:
Page Contents
Windows can’t be installed on this drive.
which resolves into:
Windows cannot be installed to this disk. This computer’s hardware may not support booting to this disk. Ensure that the disk’s controller is enabled in the computer’s BIOS menu.
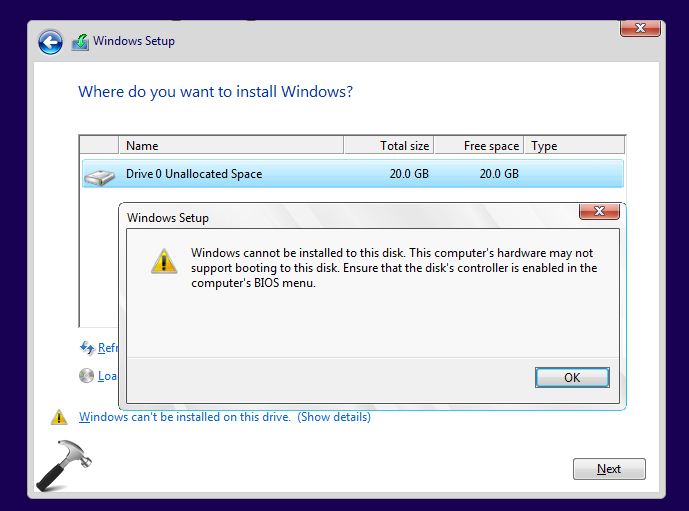
This error may occur while installing any Windows edition after Windows Vista. So if you’re also the victim of this issue, here are few things you can try and bypass the error.
FIX: ‘Windows Cannot Be Installed To This Disk. This Computer’s Hardware May Not Support Booting To This Disk. Ensure That The Disk’s Controller Is Enabled In The Computer’s BIOS Menu.’ In Windows 10
FIX 1 – Create Initialized Disk Partition
This problem may occur if Windows setup is unable to distinguish the disk partition on your machine. This happens if there exists a data corruption over the disk. By creating an initialized disk partition, you can retry the installation and it is supposed to work, if Windows correctly identifies the partition.
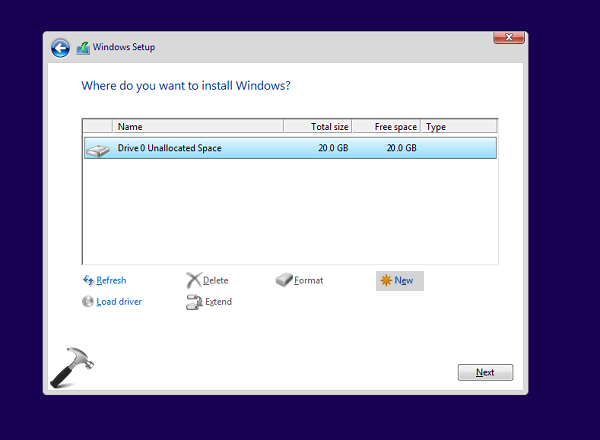
So users making clean install can itself hit the New button/option on the install location selection screen (refer above show screenshot) and create the new partition. Then they need to restart the setup from scratch and thus should be able to go ahead with the installation.
In case if you’re upgrading your machine, you may also abort the installation and create new disk partition using more familiar Disk Management snap-in.
FIX 2 – Restore Default BIOS/UEFI Settings
Users facing this issue may first make sure that they’re updated BIOS/UEFI firmware installed. Also, to deal with this issue, they can try restoring the default BIOS/UEFI settings by booting into corresponding setup utilities.
1. Check the list of access key (step 1 of this post) you need to press in order to enter BIOS/UEFI setup screen.
2. On the Save & Exit tab, select Load Optimized Defaults and select Yes. On older BIOS machines, you may spot Restore defaults or similar terms, but you need to do same job.
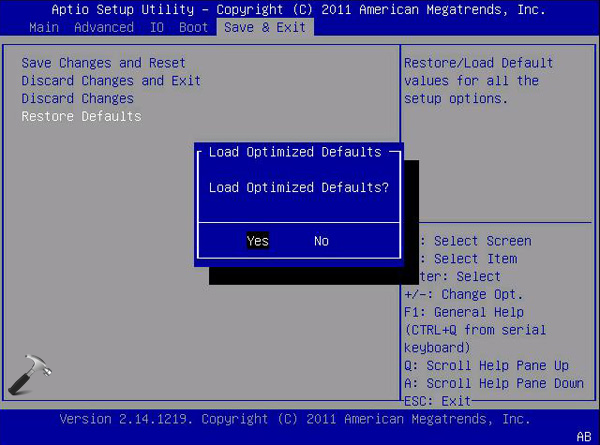
3. Once you restored defaults, reboot and re-try the installation. It should work fine now.
Hope this helps!
![KapilArya.com is a Windows troubleshooting & how to tutorials blog from Kapil Arya [Microsoft MVP (Windows IT Pro)]. KapilArya.com](https://images.kapilarya.com/Logo1.svg)




![[Latest Windows 10 Update] What’s new in KB5055612? [Latest Windows 10 Update] What’s new in KB5055612?](https://www.kapilarya.com/assets/Windows10-Update.png)


Leave a Reply