Till now, we have seen many issues in which users are not able to upgrade to Windows 10 from their existing Windows OS. You can see all of them listed here. Today, we’re back once with yet another issue that users have faced during Windows 10 upgrade. The problem is related with System Reserved Partition (SRP). When you install Windows 7 or later edition on a clean disk, the SRP is automatically created. Though Windows 7 installation creates SRP of 100MB, while Windows 8, 8.1 and 10 creates SRP of 350MB.
So on a system with SRP, when you run the Windows 10 Setup, following error may appear:
Page Contents
This PC can’t run Windows 10
We couldn’t update the system reserved partition.
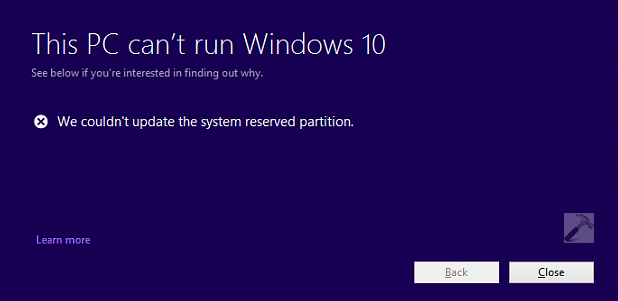
Generally, it is suggested that we shouldn’t mess with SRP and leave it as it be. That is why Windows hides it by default and don’t assign any drive letter to it. Hence, the SRP is only view-able with Disk Management utility and not via Command Prompt. But here we have to deal especially with this SRP so that we can continue to install Windows 10.
Here are the steps you need to follow. Make sure you create a System Restore point before proceeding:
FIX : This PC Can’t Run Windows 10 – We Couldn’t Update The System Reserved Partition
1. On your existing Windows installation, press  + R and put diskmgmt.msc in Run dialog box to open Disk Management. Locate the System Reserved Partition and right click it, select Change Drive Letter and Paths option.
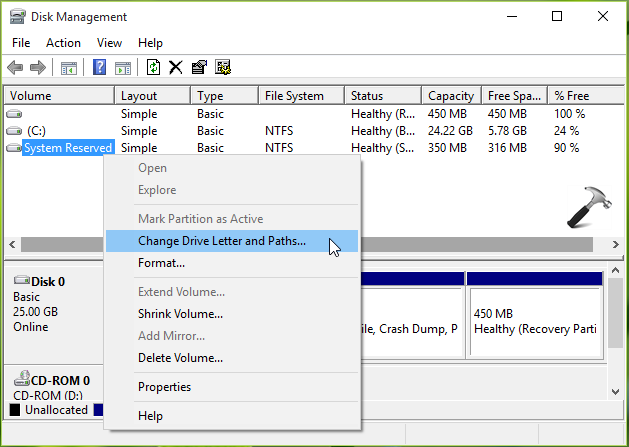
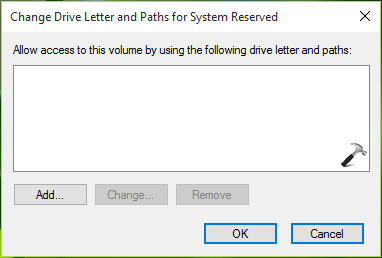
2. Then click Add on Change Drive Letter and Paths for System Reserved window:
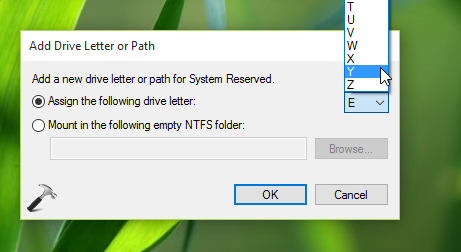
3. In the Add Drive Letter or Path, select Y from drop down against Assign the following drive letter option. In this way, we’ve assigned Y: as temporary drive letter to SRP and the partition can now be viewed via File Explorer. Minimize the Disk Management utility.
4. Next, open administrative Command Prompt and type following command, press Enter key then:
takeown /f . /r /d y
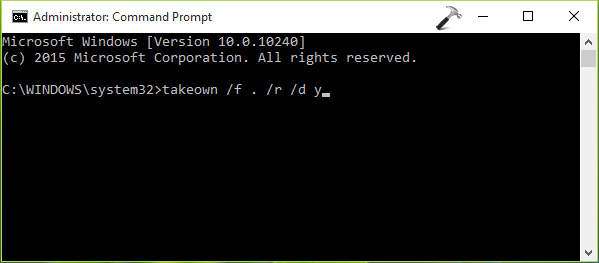
The command execution may take some time, so keep patience.
5. Now once command mentioned in previous step successfully executed, type following command and hit Enter:
icacls . /grant administrators:F /t
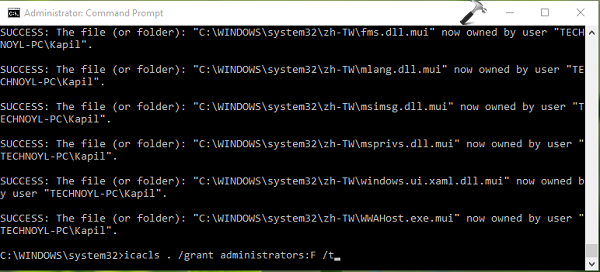
This command will also take some time to complete execution, so please bear with it and wait for a while.
6. Moving on, type command once previous command is executed:
attrib -h -s -r bootmgr
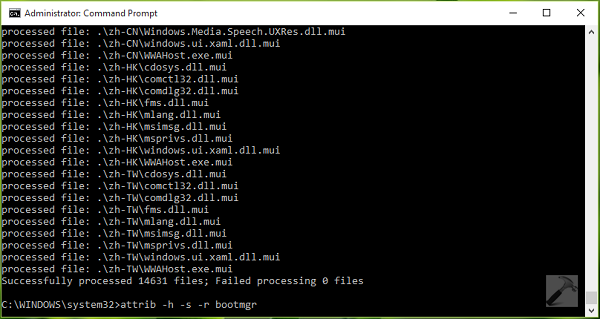
7. Finally, type this command followed by Enter key:
chkdsk Y: /F /X /sdcleanup /L:5000
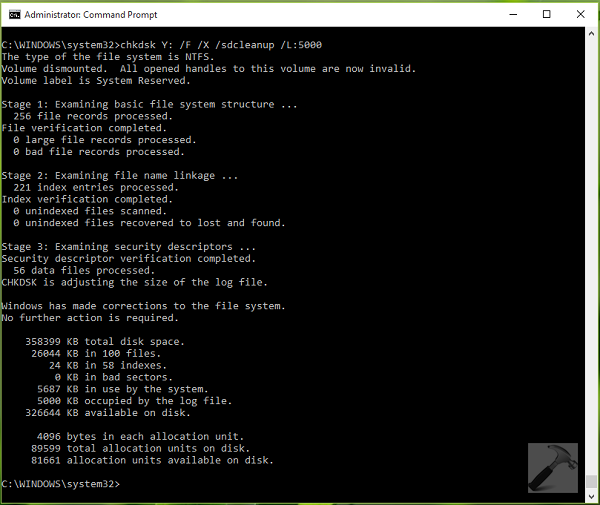
You can now close Command Prompt.
8. Open File Explorer by pressing  + E and locate the System Reserved partition drive i.e. Y: drive. Make sure you checked Hidden items option under View tab of File Explorer‘s ribbon.
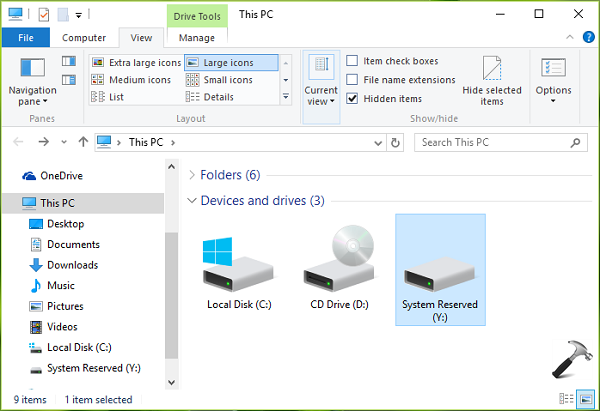
Inside Y: drive, you may find a folder named Boot. In Boot folder, you’ll have various language folders like en-US, en-GB etc. etc. You have to permanently delete (using Shift+Delete shortcut) all of those language folders except en-Us folder.
Now you can try to upgrade to Windows 10 and this should work.
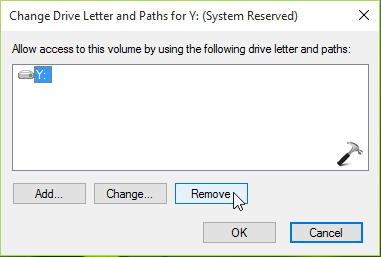
9. Once you upgraded to Windows 10, come to Disk Management utility (step 1) and Remove the temporary drive letter under Change Drive Letter and Paths for Y: (System Reserved) window:
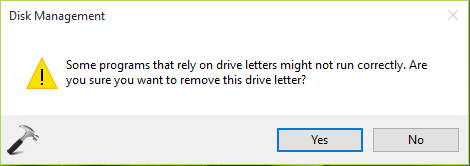
Lastly, provide you confirmation with selecting Yes option here:
Update (10/3/2023): You can checkout this update video fix alternatively:
Let us know if this helps or if you have further queries. Also check how to make a clean install of Windows 10.
![KapilArya.com is a Windows troubleshooting & how to tutorials blog from Kapil Arya [Microsoft MVP (Windows IT Pro)]. KapilArya.com](https://images.kapilarya.com/Logo1.svg)




20 Comments
Add your comment
I am getting the same message; “We couldn’t update the system recovery partition” when trying to run the Windows 10 Anniversary Update 1607. Sometimes I fail with error code 0xc1900200 or 0xc1900201. My srp is 450 mb and is 100% free space. My ZT computer speed is 3.2ghz, I have 16 gb of ram, I have over 1 Tb of free harddisk space, and my display is set for 1600 X 900. I have even disabled my McAfee virus program while trying to update.
I am lost as to what could be causing this problem. Windows 10 is working fine, otherwise.
Is this update mandatory for future updates or can it be ignored?
^^ The update is Redstone 1 and IMO, it will be necessary to have it to get Redstone 2. Suggest you to try steps mentioned here and see if it helps.
You forgot the critical step “CD Y:”. In the screen shots you’re applying Takedown, icacls, and attrib to C: partition instead of the system reserved partition.
^^ Thanks for your efforts on this. Please elaborate the steps numbers which need correction.
Hello, my name is Sonny.
I’ve had this very error, in which the System Reserved Partition prevents me from updating to the Anniversary Edition of Windows 10. I followed your directions and opened Disk Management to locate the System Reserved Partition, but I found instead the EFI System Partition, with 100% of the 260MB capacity available. When I right-click the System Partition row, intending to select the Change Drive Letter and Paths dropdown option, I find all of the options (except Help) grayed out. Do you suggest a clean install of Windows 10? Or is there another solution?
Thanks,
Sonny Bohanan
^^ In that case, go for clean install.
Didn’t work for me. Couldn’t delete the folders suggested. Still can’t perform the update. Thanks for the suggestion anyway.
I have no drive in the Disk Management called System Reserved.
I’m attempting to upgrade a desktop to Windows 10. I got the 0xc1900201 error msg. I’m working my way through the screen shots where Victor mentioned a step was missing. I’ve reached attrib -h -s -r bootmgr and keep getting “file not found”. It was suggested that I go back to step one, back up all the files on my desktop, then do a clean install of Windows 7 from the disk, however, the desktop was sold to us with it W7 already installed and had no disk with it. Suggestions?
^^ If you can’t follow the steps successfully, suggest you to download Windows 10 ISO and make clean install with it:
https://www.kapilarya.com/download-latest-windows-10-iso-files
https://www.kapilarya.com/how-to-make-clean-install-of-windows-10
Kapil,
I tried follow steps you said, but their is one problem when I select change Drive Letter and Paths and try to add drive letter ‘Y’ but there is already have drive ‘G” hence not possible to add ‘Y’. what should I do.
Please reply
thanking you.
^^ Which step you’re at?
I did as you described and was able to delete the files on the hidden partition. However it only freed up a few megabytes. I now have 3.98MB out of 321MB total free. Tried running the update again and it gave the same error of not being able to update the system reserve partition. The partition is 321 MB, and I tried to unhide all the files so that I could see everything in there. But really didn’t get that far. I did not get any disks with my computer (bought it used) and it looks like it was previously upgraded from Windows 7. Anything else I can try?
I am currently running Windows 10: Version 10.0.10240, the same version in your screen shots.
Thanks!
Im at this step attrib -h -s -r bootmgr but it gives me “file not found – bootmgr” after i hit enter.
^^ Repair Master Boot Record, see if it helps: https://www.kapilarya.com/fix-windows-10-master-boot-record-corrupted
Followed the instructions and got operation completed successfully, but im still getting the same message, file not found bootmgr in this step.
hello, im just trying to follow the step 5, but i just cant do it because it says that there wasn’t made a mapping among the accounts and the seccurity id , so it fails
could please help me?
Hi, I’m getting the same message when trying to run an update. I get to the step attrib -h -s -r bootmgr and get the message “file not found – bootmgr”
^^ Did previous commands to this worked for you?
Yes all the commands before it worked flawlessly. That command was the only hiccup.