We all know that Windows Security (Windows Defender/Windows Defender Security Center in earlier versions) is built-in program available in Windows 10. It can act as primary anti-virus program on your system and hence it eliminates need for third-party anti-virus program. Thus it will save your money and safeguard your system against security threats.
However, if you still plan to go for third-party antivirus program, you might need to disable real-time protection by Windows Security. You can apply either of the methods below to manage real-time protection in Windows Security/Defender.
Page Contents
How To Turn On/Off Real-time Protection In Windows Security/Defender
Method 1 – Via Windows Security/Defender
1. Double click on Windows Security icon present on the taskbar.

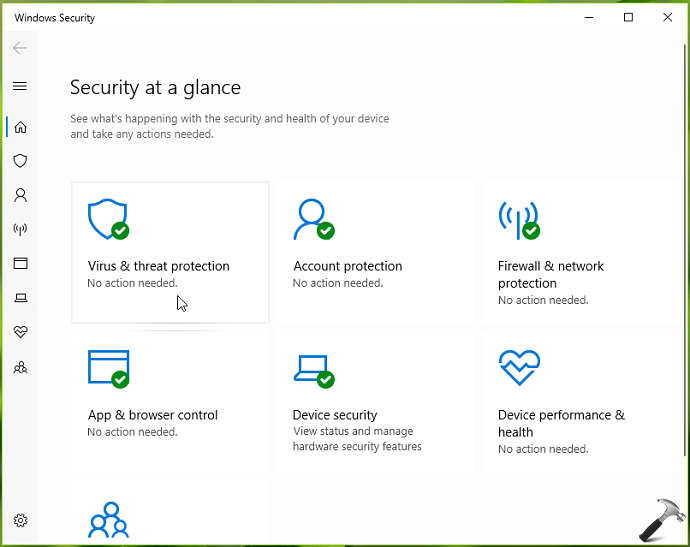
2. In Windows Security window/dashboard, click on Virus & threat protection tile.
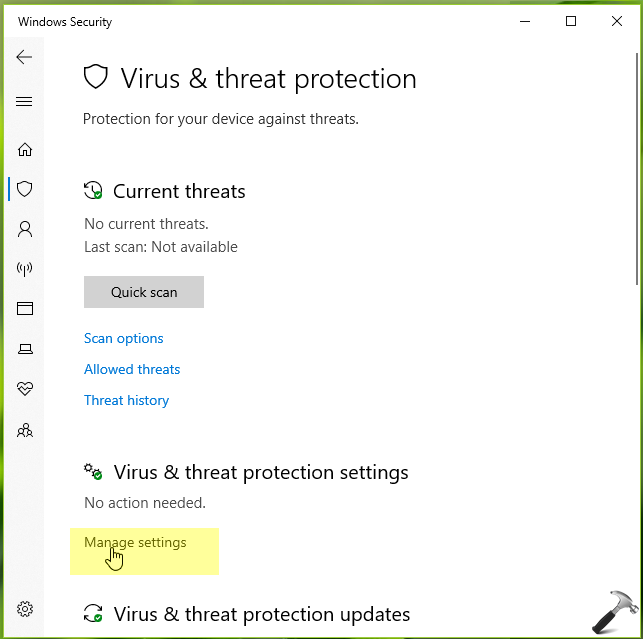
3. Moving on, in Virus & threat protection screen, under Virus & threat protection settings, click Manage settings.
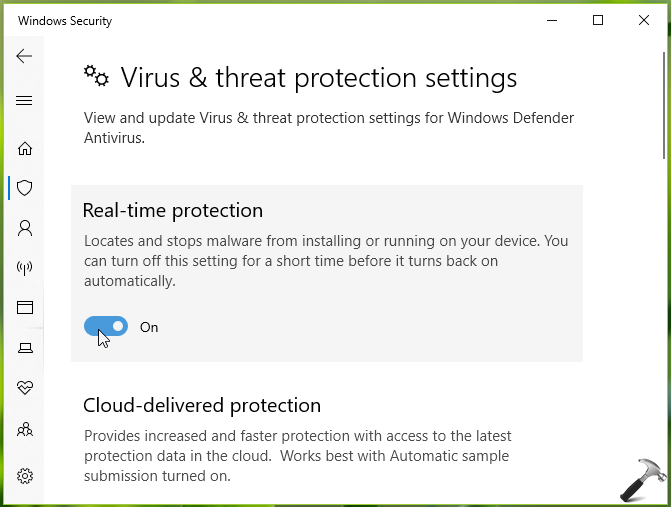
4. Finally on next screen, under Real-time protection, you can turn On or Off the option to enable or disable real-time protection, respectively. Note that the settings for this option is saved automatically and applied immediately.
Close Windows Security and return to Desktop, if you like.
You can also disable real-time protection via registry, as mentioned below.
Method 2 – Via Registry
Registry Disclaimer: The further steps will involve registry manipulation. Making mistakes while manipulating registry could affect your system adversely. So be careful while editing registry entries and create a System Restore point first.
1. Press  + R and put
 regedit in Run dialog box to open Registry Editor (if you’re not familiar with Registry Editor, then click here). Click OK.

2. In left pane of Registry Editor window, navigate to following registry key:
HKEY_LOCAL_MACHINE\SOFTWARE\Policies\Microsoft\Windows Defender
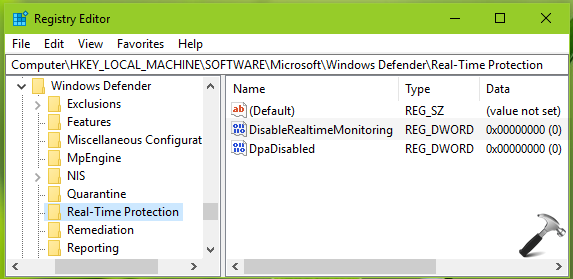
3. Right click Windows registry key, select New > Key. Name the newly created sub-key as Real-Time Protection. Now in the right pane of Real-Time Protection registry key (HKEY_LOCAL_MACHINE\SOFTWARE\Policies\Microsoft\Windows Defender\Real-Time Protection), right click and select New > DWORD Value. Name the newly created registry DWORD (REG_DWORD) as DisableRealtimeMonitoring. Double click on the DWORD to modify its Value data:
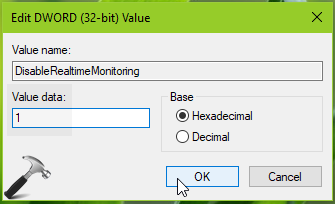
4. Set the Value data to 1 and click OK. Close Registry Editor and reboot the machine. This would finally disable real-time protection in Windows Security.
To enable real-time protection again, you can set DisableRealtimeMonitoring registry DWORD to 0 or simply delete it.
That’s it!
![KapilArya.com is a Windows troubleshooting & how to tutorials blog from Kapil Arya [Microsoft MVP (Windows IT Pro)]. KapilArya.com](https://images.kapilarya.com/Logo1.svg)


3 Comments
Add your comment
how to turn on/off by code?
just like manual toggle on/off
^^ You can create batch file of registry manipulation.
What if we are getting an error says cannot edit DisableAntivirus. Error writting the values new contents.