Are you also confused what are the necessary things you should do after installing Windows 11? If you are also finding the right Windows 11 setup guide, you are in the right place.
Things to do after installing latest Windows 11 are crucial for improving your system’s performance and comfort as well as decor. What you do immediately after the installation of Windows 11 depends on whether you are using it for the first time or after upgrading from another version of the operating system. Hence, you should follow the best practices to ensure that the Post-installation tasks for Windows 11 system functions smoothly and as per your choice.
Page Contents
Why You Need to Perform These Steps After Installation in Windows 11 setup guide
Some of these tasks are applied to enhance the security and efficiency of Windows 11 after the installation process along with customization. It updates your system with the latest files you have been downloading and eradicates the unwanted files you do not need. Also, it gets customized in a way that will suit you.
Windows 11 setup guide: Things to Do After Installing Windows 11
#1 Delete Previous Versions of Windows
Old files after the upgrade from Windows 10 to Windows 11 take up space on the disk unnecessarily. To free up storage-
1. Go to Settings app from Start icon or directly press Win+I.

2. Then, click on System, and finally tap on Storage.

3. Go to Temporary files, choose “Windows Update Cleanup” and click “Remove files” button.

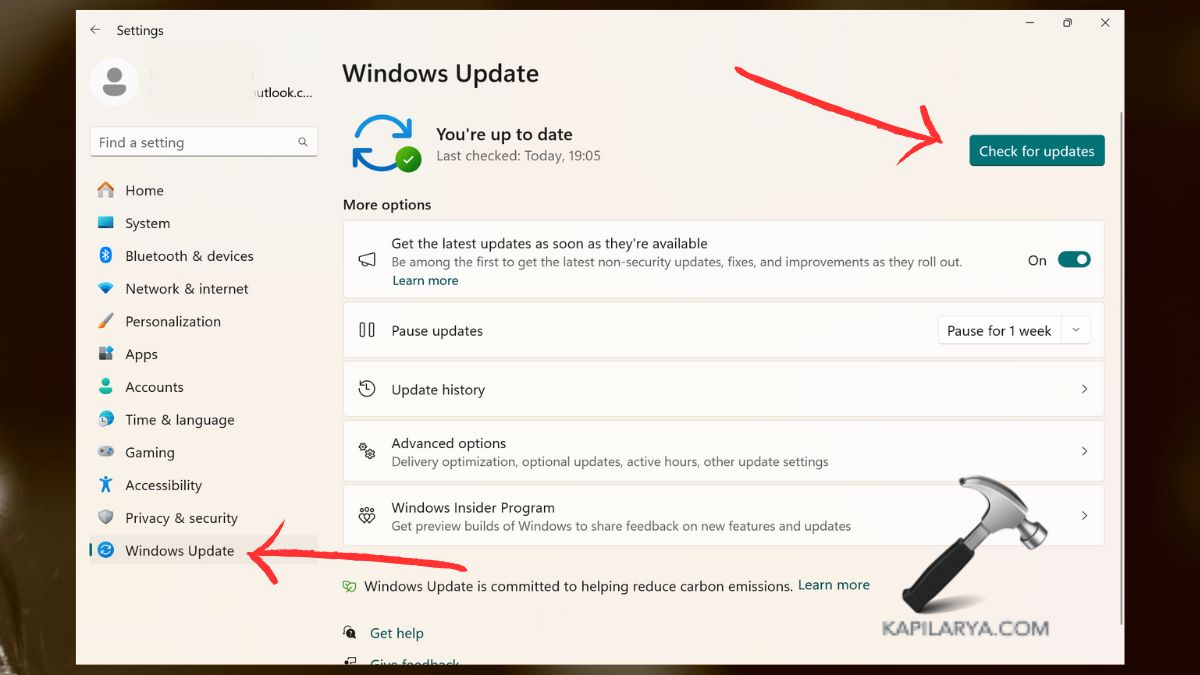
#2 Check and Install System Updates
Keeping your system up to date ensures you have the latest features and security patches.
1. Go to Settings > Windows Update.
2. Click “Check for updates” and install any available updates.

#3 Enable System Protection
System protection is useful in the establishment of restore points to protect your data against program faults.
1. Go to the Control Panel app from the search bar. Then tap on System.

2. In the Device Specification tab, select “System Protection”.

3. Choose your primary hard drive, click on “Configure”, and enable “Turn on System Protection”.

#4 Check and Install Missing Drivers
Check that all the components in your computer work properly, in case the driver is missing, download it.
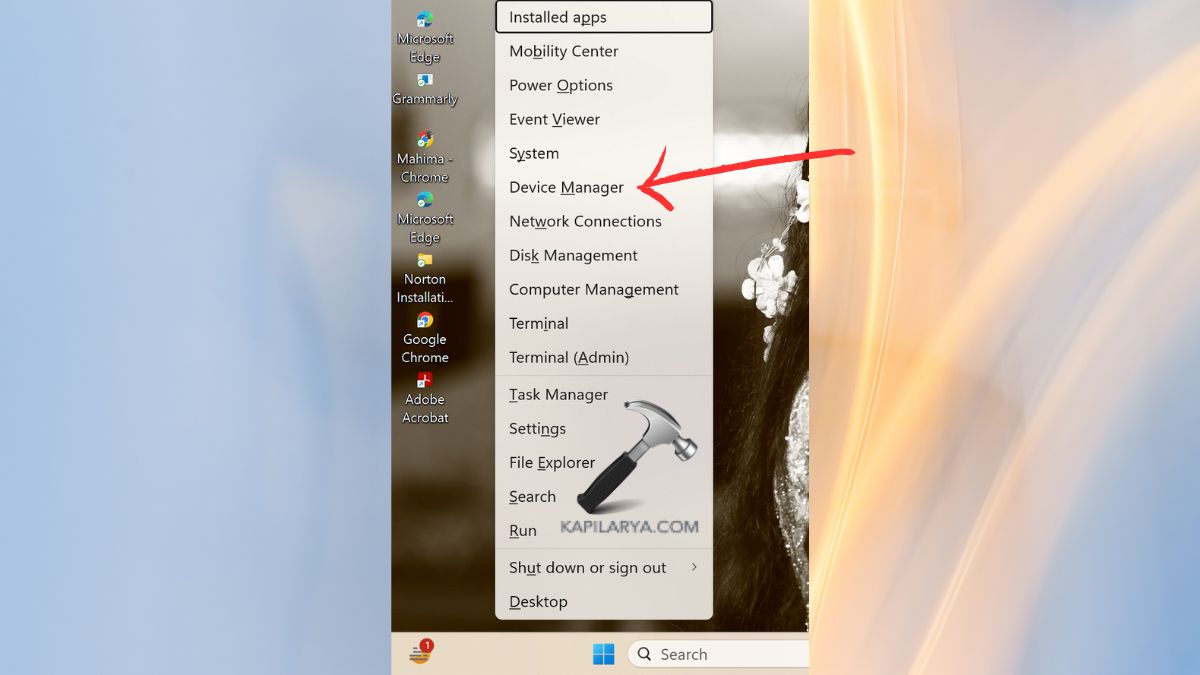
1. Type “Device Manager” in the Start menu search. Or just right-click to the Start icon.

2. Right-click on devices that have a yellow mark near them and then “Update driver” option.

#5 Install Essential Apps on Windows 11
There are install apps list of productivity, media, and security applications that will meet its necessity. Some of these apps that are recommended are-
a. Microsoft Office for productivity for business correspondence, document, and spreadsheet management.
b. For browsing internet, Google Chrome, Edge, or Mozilla Firefox.
You can download them directly from Microsoft Store pre-installed with Windows 11.
1. Open Microsoft Store app from search console or taskbar.

2. Browse the mentioned apps or search the apps you want to download from the search icon. Click on “Install”.

#6 Uninstall Bloatware from Windows 11
Bundled apps that come with a system have a tendency of slowing down a system. Remove unnecessary programs-
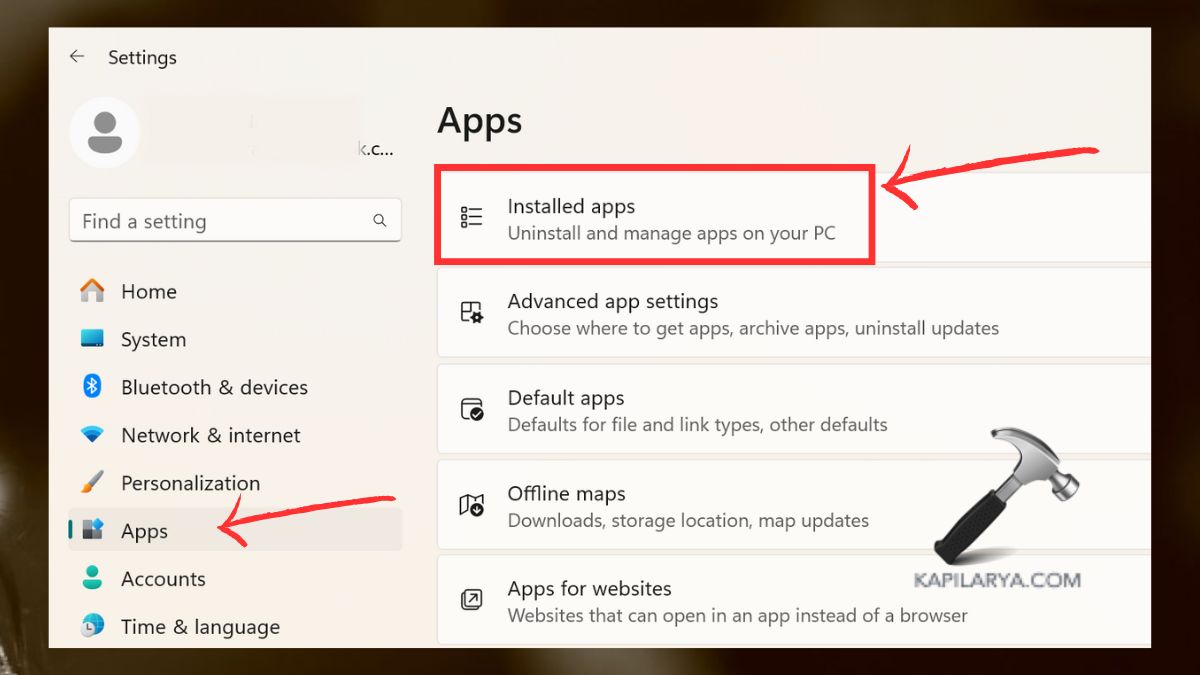
1. Go to the Settings menu, then select Apps > Installed apps.

2. “Uninstall” unused apps by tapping on the dots in the corner of the app’s name.

#7 Enable Automatic Time Synchronization
Some items that are critical for successful workflow should be checked to have the correct time settings.
1. Go to Settings app as we did in the previous solutions. From the left panel, tap Time & Language > Date & time.

2. Activate the options: Set time automatically and Set time zone automatically.

#8 Create a Full Backup
Full system backup helps you protect your data in the case of failing the system or new software versions. Learn how to set up and use Windows 11 Backup and File History features to back up your files, apps, and settings.
#9 Change Screen and Sleep Timeout Settings
You can easily prevent your screen from turning off too quickly by adjusting timeout settings.
1. Press Settings followed by System > Power & battery.

2. Set values for remaining time on the Screen and Time before Sleep mode.

#10 Choose a System Color Mode
Choose your system’s theme and switch it from Light to Dark mode and vice versa with a click.
1. Now, again go to Settings icon followed by “Personalization” and finally “Colors”.

2. Select light or dark under select your color.

#11 Customize the Taskbar
Some Taskbar options can help you manage your work smoothly and therefore improve workflow.
1. Choose Start > Settings > Personalization > Taskbar.

2. You can choose to either allow or restrict icons such as Search, Widgets, and even Chat.

#12 Change System Wallpaper Theme
And now you probably would like to see a picture of your favorite wallpaper on your desktop. Thus, in order to personalize the desktop choose another theme for the wallpapers.
1. First, click on Settings, and then go to Personalization > Background.

2. Select either a pre-installed theme or upload your custom image.

#13 Change Mouse Pointer and Cursor Color
Here you can make you cursor more visible and unique in appearance to your own taste.
1. First open Settings by pressing Windows + I, then go to Accessibility > Mouse pointer and touch.

2. Choose size of the pointer or change its color.

#14 Set Browser and Apps as Default
You can always customize the default apps for opening files and browsing.
1. Go to Settings app again in Windows 11. Go to Apps from left-side panel > Default apps.

2. Now, set the preferred browser (e.g., Chrome, Edge) and apps for different file types.

#15 Enable the End Task Option
The End task option can help you to quickly close unresponsive apps.
1. For that, open Settings > System > For developers.

2. Toggle on End Task for Task Manager option.

#16 Change File Explorer Default Settings
For better usability, you can optimize the File Explorer’s default settings.
1. Open the File Explorer > Options.
2. Here, in the General tab, open the dropdown for “Open File Explorer to” and set the default view to “This PC” instead of “Quick Access”.

#17 Disable Startup Apps
To improve the boot speed of your Windows 11 PC, you can limit startup apps.
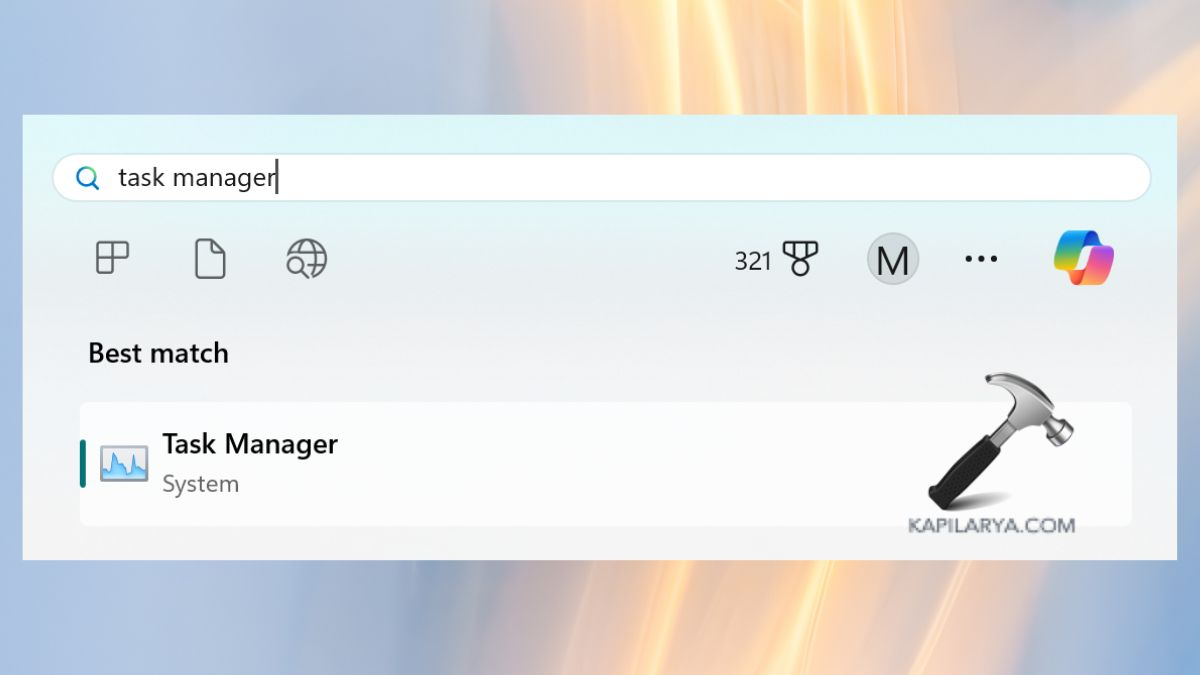
1. Open Task Manager by pressing Ctrl + Shift + Esc or just find it through search bar.

2. Go to Startup and disable unnecessary apps by right-clicking and selecting Disable.

#18 Disable Snap Layouts Top Edge Menu
You can disable Snap Layouts if you find this feature distracting.
1. First, open Settings > System > Multitasking.

2. Then, turn off the Snap windows option. See, it was that easy.

#19 Disable Widgets in the Lock Screen
Removing widgets from the lock screen can help you reduce clutter.
1. Go to Settings > Personalization > Lock screen.
2. Set Personalize your lock screen to Picture or Slideshow instead of widgets.

#20 Disable Clipboard History
Additionally, you may opt to avoid unnecessary clutter by turning off Suggested Actions.
1. If that’s so, open Settings app > System > Clipboard.

2. Disable “Clipboard History” under the Clipboard settings as shown in the image.

Though, if you experience any error while performing any of these methods on your Windows 11, leave a comment below so we can help you out.
That’s it!
![KapilArya.com is a Windows troubleshooting & how to tutorials blog from Kapil Arya [Microsoft MVP (Windows IT Pro)]. KapilArya.com](https://images.kapilarya.com/Logo1.svg)


![[Latest Windows 10 Update] What’s new in KB5055612? [Latest Windows 10 Update] What’s new in KB5055612?](https://www.kapilarya.com/assets/Windows10-Update.png)


Leave a Reply