Recently, we discussed about an issue where search indexing is automatically turned off in Windows 10, under following post:
Fix: ‘Search indexing was turned off’ error in Windows 10
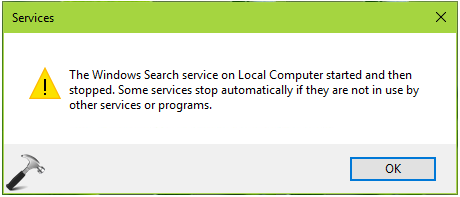
The above mentioned fix suggests you to manually start the Windows Search service, if it is not running. However, following the suggestion, one of my friend found that he couldn’t start the Windows Search service on his machine. Following is message he received instead:
Page Contents
The Windows Search service on local computer started and then stopped. Some services stop automatically if they are not in use by other services or programs.

So if you’re also getting this message, make sure you first tried the suggestion of running Search & Indexing troubleshooter. Also try rebuilding the search index, if you’ve not done this yet. In case if the Windows Search service still fails to start/initiate, here is how you can fix it:
FIX : The Windows Search Service On Local Computer Started And Then Stopped In Windows 10/8/7
Microsoft is already aware of this issue, since days of Windows Vista. The software giant recommends you to delete all files with .BLF and .REGTRANS-MS extension under C:\Windows\system32\config\TxR folder, to fix this issue. Also try deleting Windows Search folder under C:\ProgramData\Microsoft. Worth to mention here that these files are hidden files, so make sure you checked ‘Hidden items‘ on View tab, under File Explorer ribbon.
Try below mentioned registry manipulation, if you still have the issue:
Registry Disclaimer: The further steps will involve registry manipulation. Making mistakes while manipulating registry could affect your system adversely. So be careful while editing registry entries and create a System Restore point first.
1. Press  + R and put regedit in Run dialog box to open Registry Editor (if you’re not familiar with Registry Editor, then click here). Click OK.

2. In left pane of Registry Editor window, navigate to following registry key:
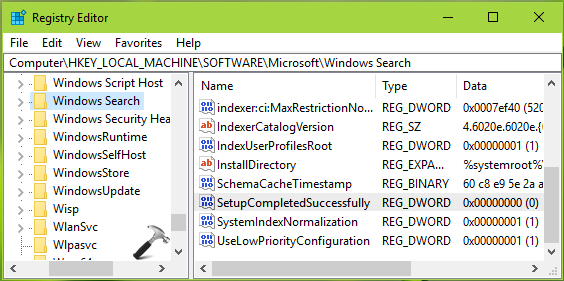
HKEY_LOCAL_MACHINE\SOFTWARE\Microsoft\Windows Search

3. On the right pane of Windows Search registry key, look for SetupCompletedSuccessfully named registry DWORD (REG_DWORD). Double click on it modify its Data.

4. Set the Value data to 1 and click OK. Then go to following registry location:
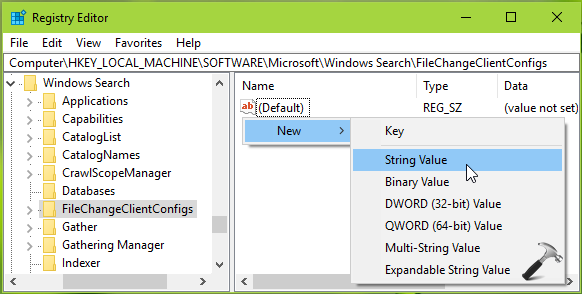
HKEY_LOCAL_MACHINE\SOFTWARE\Microsoft\Windows Search\FileChangeClientConfigs

5. On the right pane of FileChangeClientConfigs registry key, right click and select New > String Value. Name the newly created registry string (REG_SZ) as {A010C594-BAB6-4690-952C-28A0C0365307}. Double click to modify the string Data.

6. Finally, set the Value data to ScopeToMonitor and click OK. Close Registry Editor and reboot.
After restarting your machine, re-try to start the Windows Search service and it should work fine now.
That’s it!
![KapilArya.com is a Windows troubleshooting & how to tutorials blog from Kapil Arya [Microsoft MVP (Windows IT Pro)]. KapilArya.com](https://images.kapilarya.com/Logo1.svg)


5 Comments
Add your comment
None of the above worked for me :(.
Upon rebooting (after the Regedit step) and then starting the service, I get “Windows could not start the Windows Search service on Local Computer. Error 6801: Transaction support within the specified resource manager is not started or was shut down due to an error”.
Any ideas?
Filechangeclientconfigs in not present
^^ You can create that registry sub-key manually. Right click on Windows Search registry key and New key.
Hi, Now the windows search service has worked. Thank you.
^^ Glad to help Ravi 😎