

Windows 11 is getting a security upgrade with version 24H2. Starting with this version, both the Pro and Home versions will automatically encrypt your device during installation. On the plus side, it keeps your data safe from prying eyes if your device gets stolen. However, the downside is that if your computer crashes and you lose access to Windows, getting your data back could be difficult. If you don’t need this feature, here’s how you can disable BitLocker device encryption during Windows 11 installation.
Page Contents
How to Stop Automatic BitLocker Device Encryption during Installation on Windows 11
Method 1: Disable Device Encryption using Rufus
Rufus is a free, lightweight utility that can be used to format and make bootable USB drives. You can even create a bootable USB drive for Windows 11 with the option to disable automatic device encryption during installation.
1. Insert the USB drive with at least 8 GB of space.
2. Open your favorite browser and go to the Rufus official website (https://rufus.ie/en).
3. Under the Download section, click the version link to download the tool.

4. Once the Rufus app is downloaded, double-click the exe file to open the tool.
5. In the Rufus tool, click the “Show application settings” button (third button from the left) at the bottom right corner.

6. Click the “Check now” to check for updates in the Update policy and settings dialog. Then, click “Close“.

7. From the Boot Selection drop-down menu, choose “Disk or ISO image”. Then, click the drop-down button next to it and select the “DOWNLOAD” option. If you already have the Windows 11 ISO image.
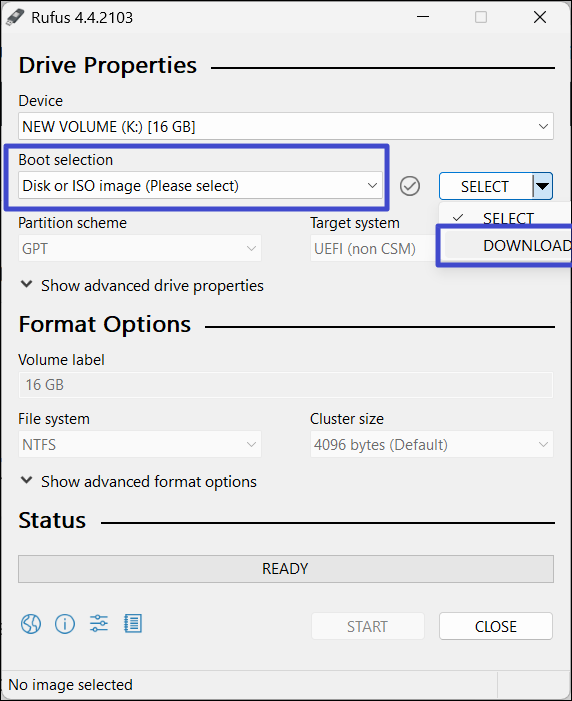
8. Then, click the “DOWNLOAD” button.

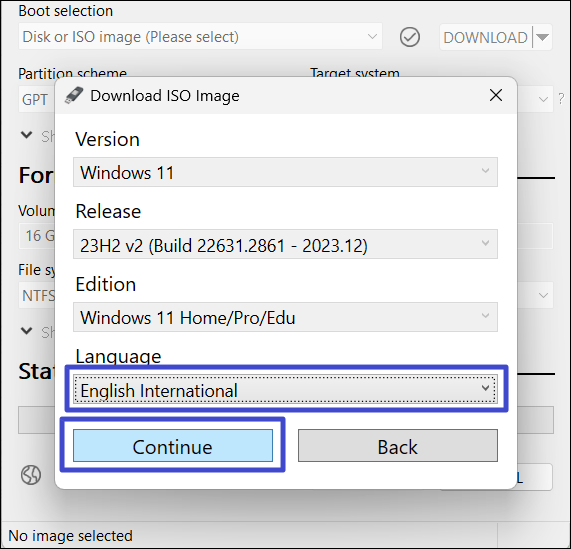
9. Select “Windows 11” and click “Continue” in the dialog box.

10. Next, select the release and click “Continue“.

11. From Edition, choose “Windows 11 Home/Pro/Edu“, and click “Continue“.

12. Then, select the language and click “Continue“.
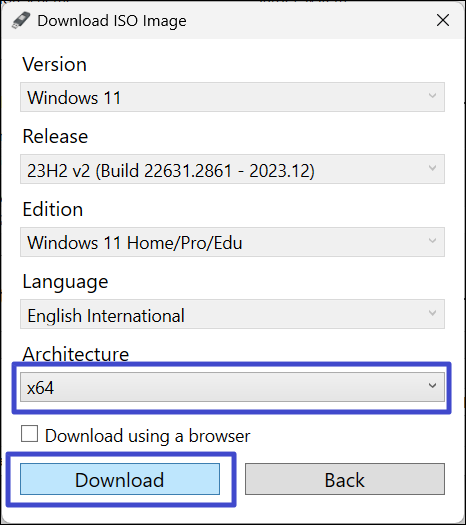
13. Finally, select the “x64” architecture option and click the “Download” button.
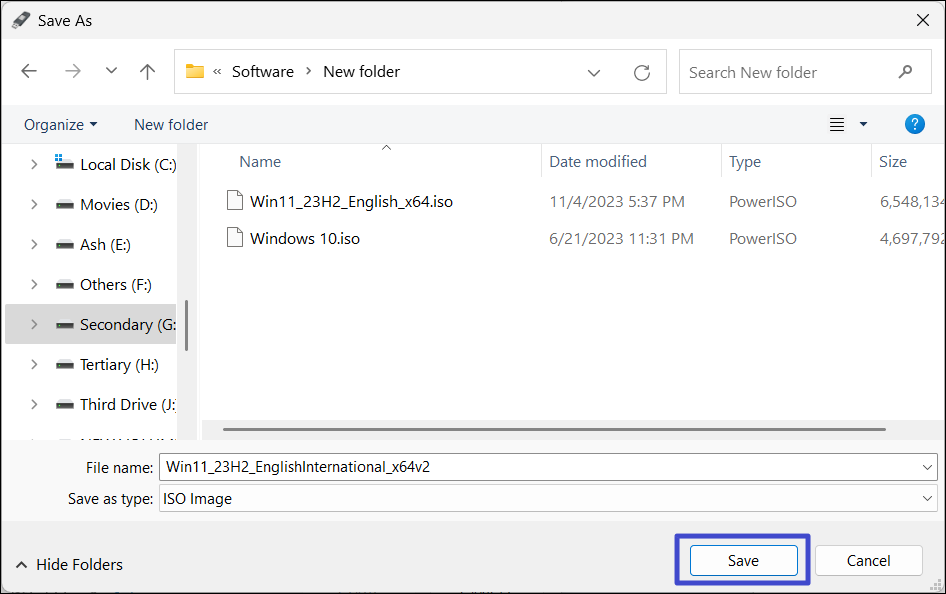
14. Then, select where you want to save the Windows 11 ISO file and click “Save“.
15. You can monitor the download progress in the main Rufus window. Depending on your Internet speed, it will take a while.

Creating a Bootable USB without Device Encryption
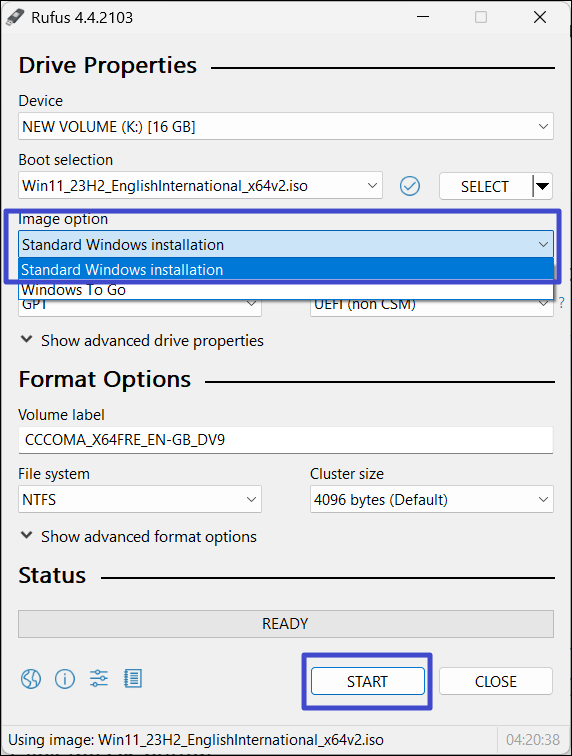
1. Once the download is complete, select “Standard Windows installation” from the Image option, and click “START“.
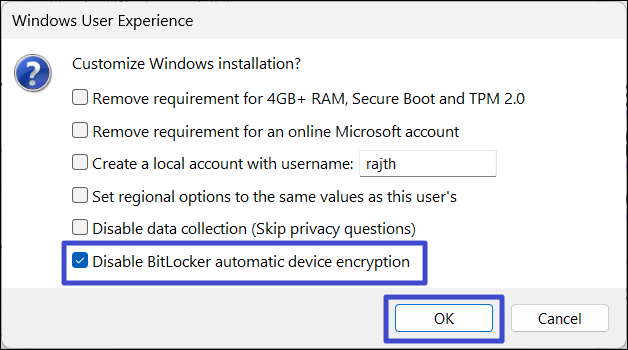
2. Under ‘Customize Windows Installation?’, enable the options as necessary.
3. Check the “Disable BitLocker automatic device encryption” option and click “OK“.
4. Then, click “OK” again in the warning dialog box to format and create the bootable device.

Once you’ve created the bootable USB drive, you can use it to clean install Windows 11 on a computer without BitLocker device encryption.
Method 2: Disable Device Encryption During Windows 11 Setup
If you don’t want to use the Rufus app to create your bootable USB, you can use Microsoft’s Media Creation tool to make your bootable USB. Then, disable BitLocker encryption during the OOBE setup of Windows 11.
1. First, create your Windows 11 installation media.
2. Boot your computer with the installation media and install the Windows.
3. Once the installation is over, your device will restart and move OOBE (Out of Box Experience) setup.
4. When you see the first screen of the OOBE setup (usually country or region selection), press the Shift + F10 keyboard shortcut to open the Command Prompt.

5. In the Command Prompt window, type “regedit” and hit Enter.
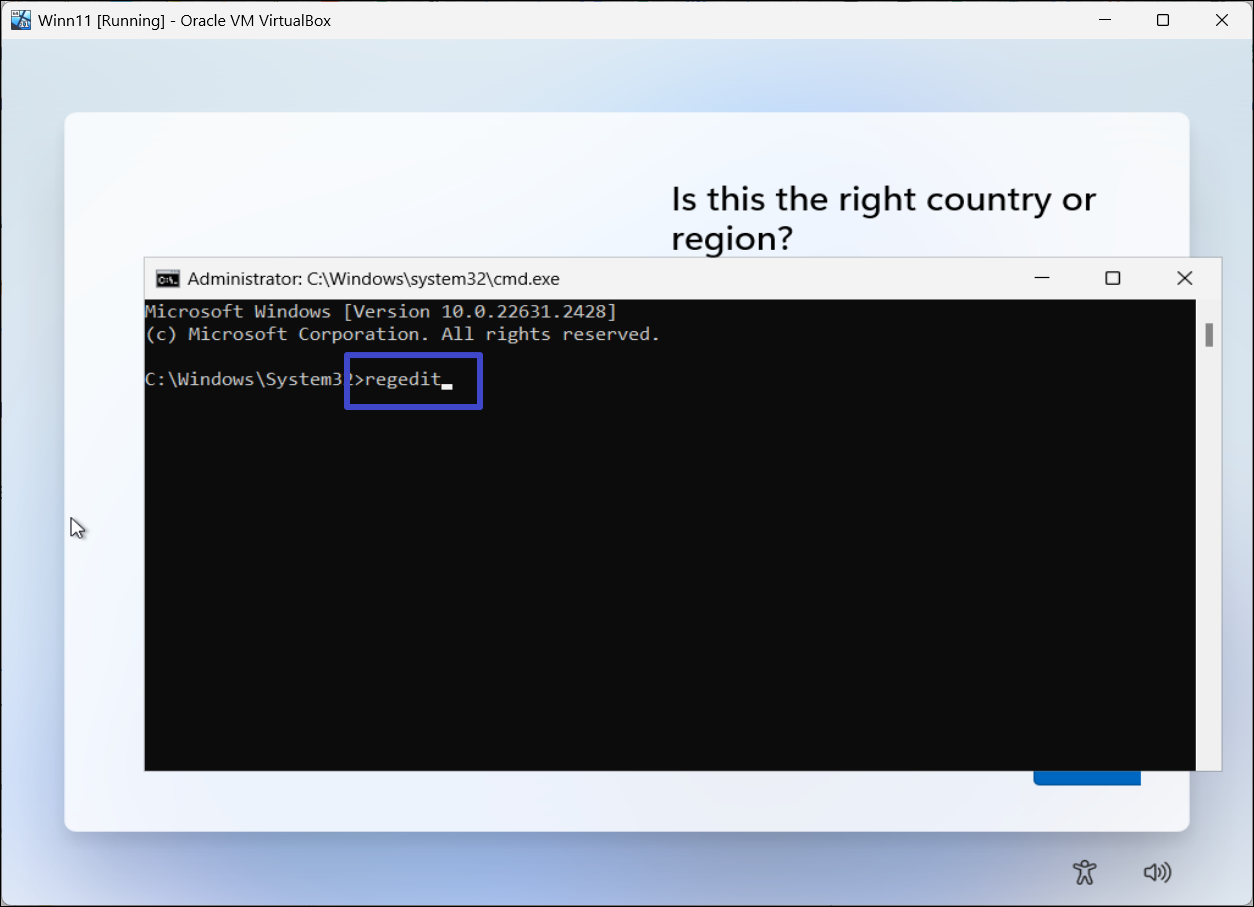
6. This will open the Registry Editor tool.
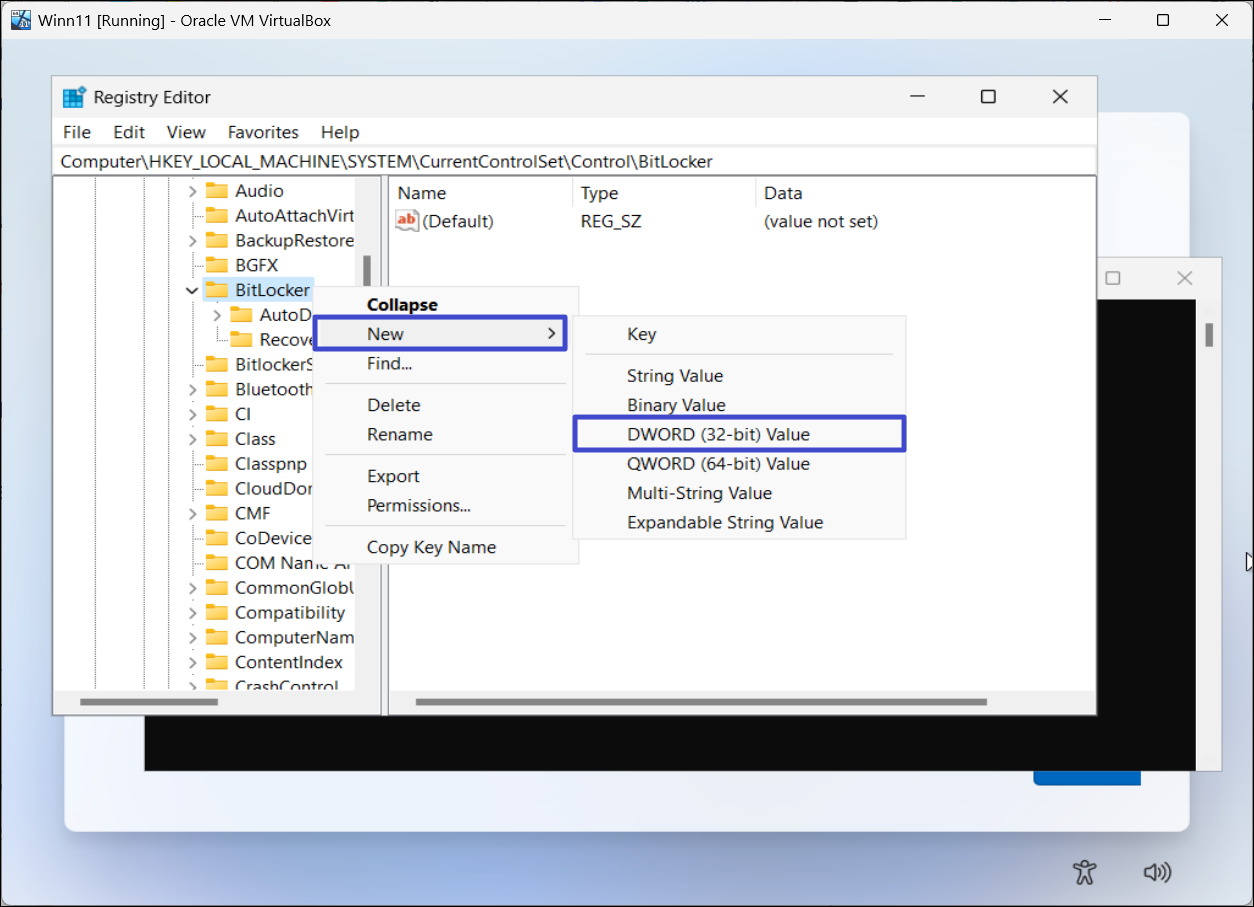
7. Here, navigate to the following location:
HKEY_LOCAL_MACHINE\SYSTEM\CurrentControlSet\Control\BitLocker
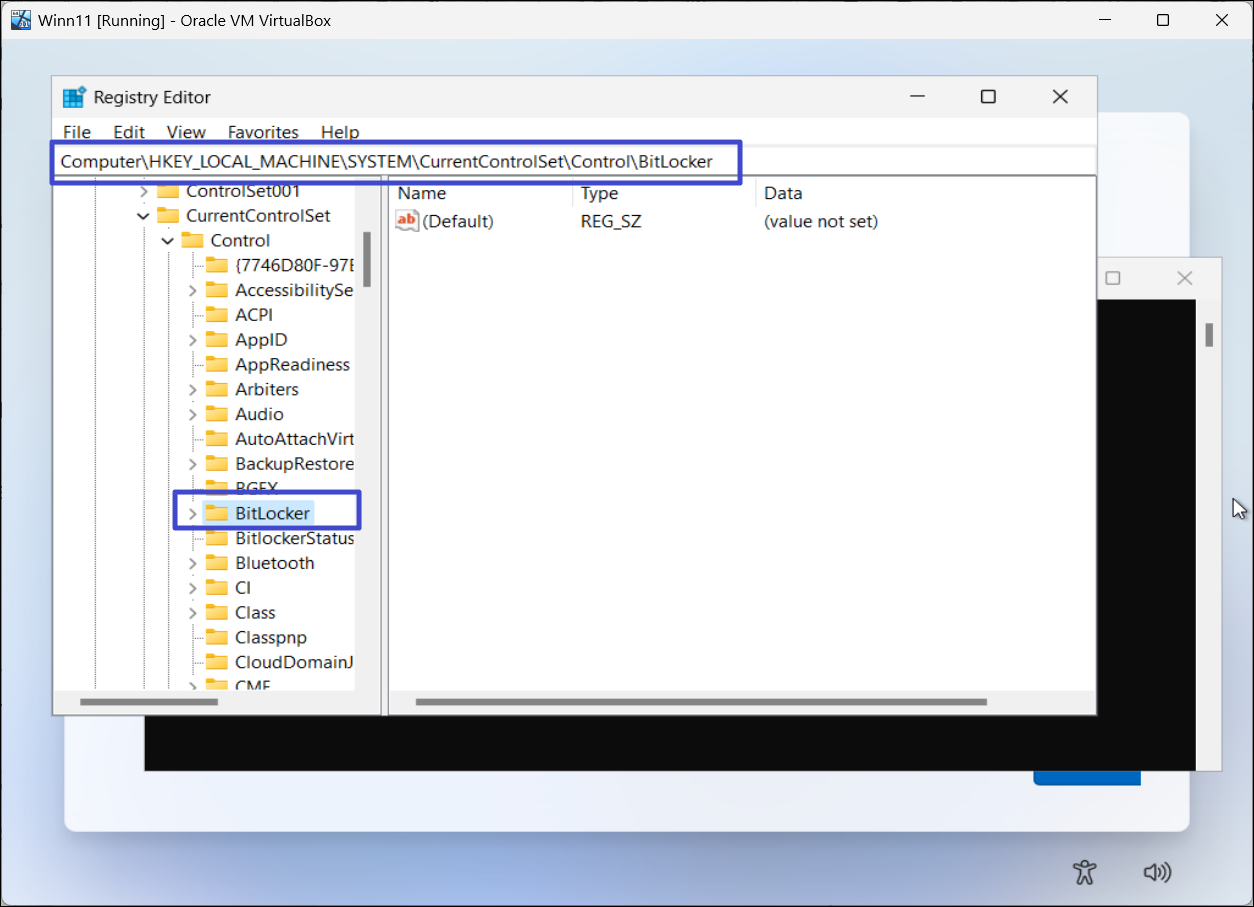
8. Right-click the “BitLocker” key and select “New > DWORD (32-bit) Value”.
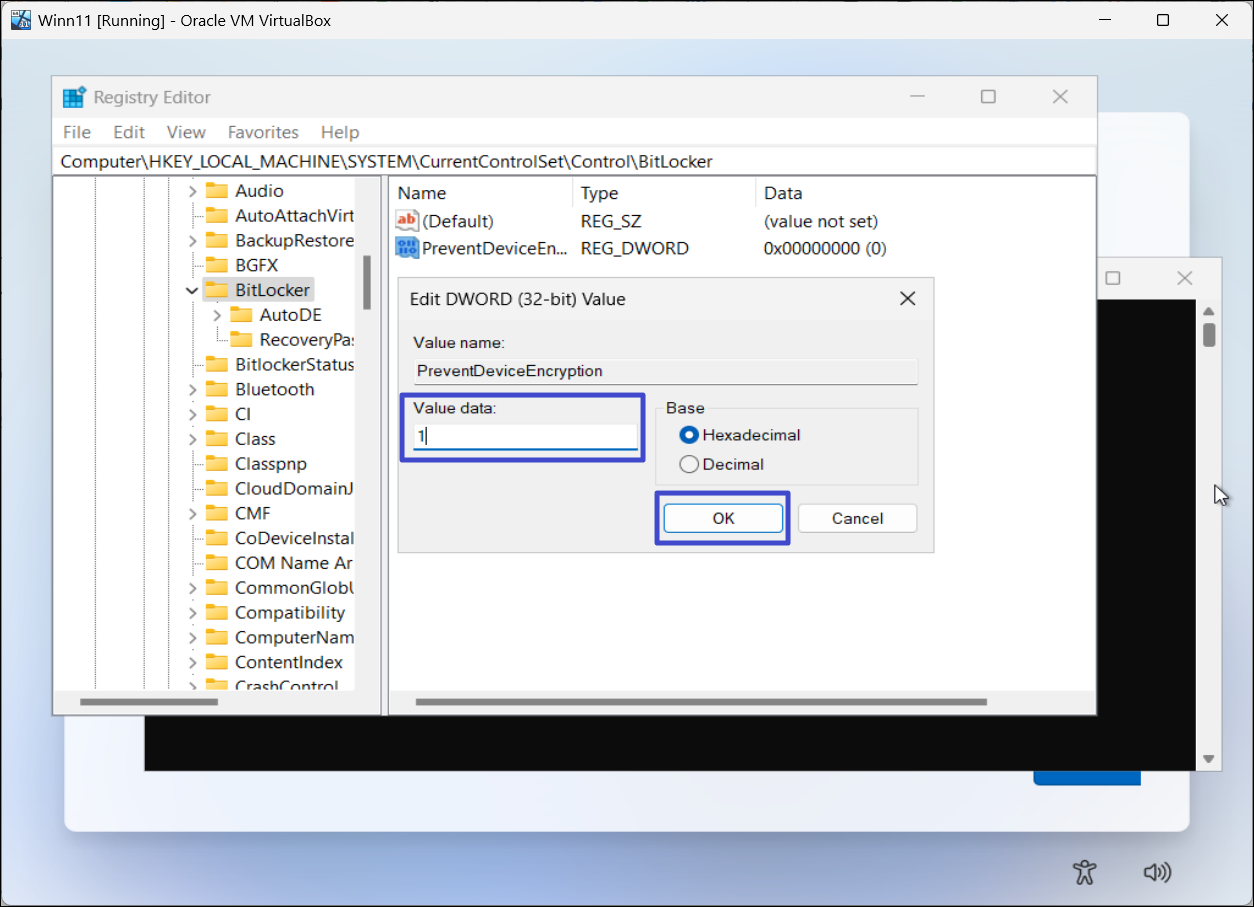
9. Rename the DWORD to “PreventDeviceEnryption“.

10. Now, right-click the newly created PreventDeviceEnryption value and set its value to “1″.
11. Close the Registry Editor and then close the Command Prompt.
12. Continue with the OOBE instructions to finish the setup.
Now, your Windows 11 will not be encrypted by BitLocker device encryption.
Disable BitLocker Device Encryption after Installation
1. Open Windows Settings.
2. Navigate to “Privacy and security” > “Device encryption“.
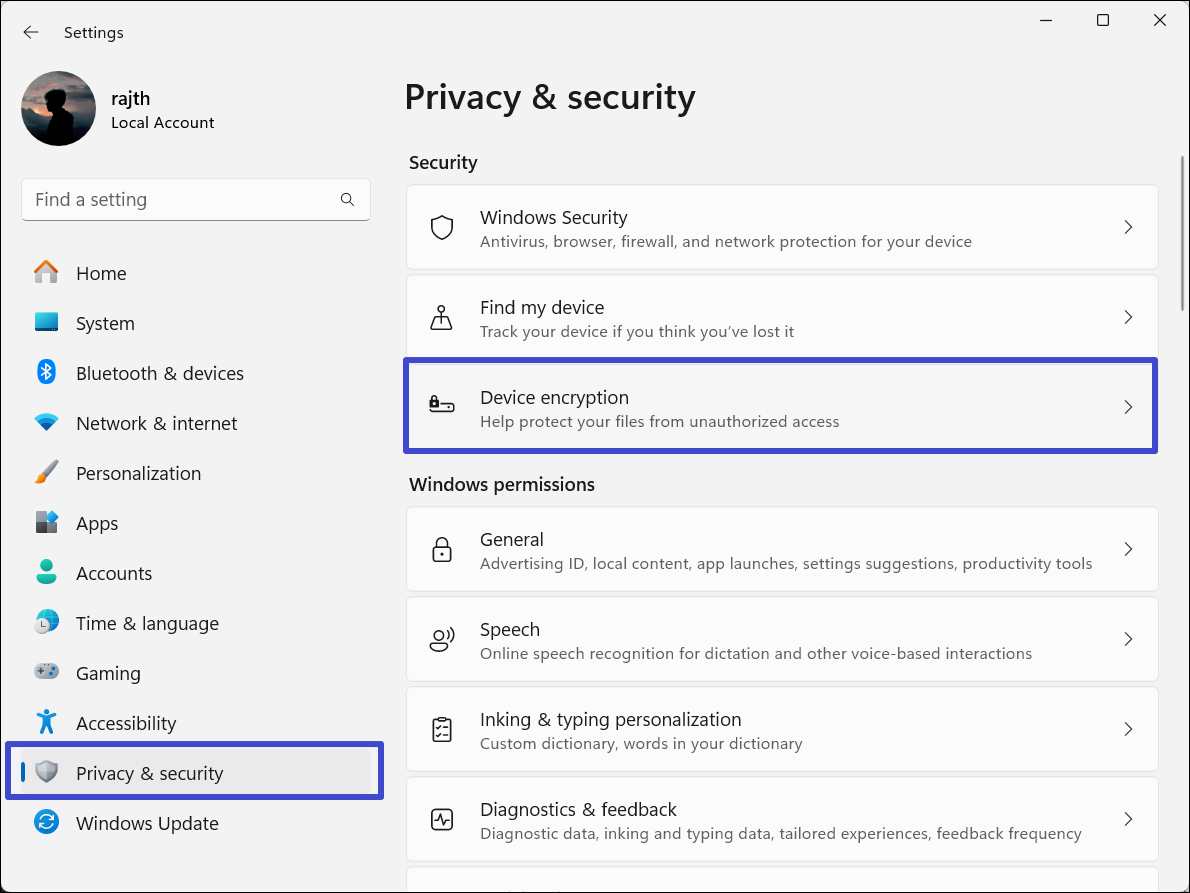
3. Then, disable the “Device encryption” toggle switch.

That’s it.


Leave a Reply