Start Menu is something which needs no introduction. Everyone of you’ve used it, right from the ages of Windows XP to these modern days of Windows 10. With the passage of time, Start Menu has seen many ups and down with various customization approaches. However, finally we have a Start Menu that is bit advanced and could even act as Start Screen.
Sometimes, if you’re using the Start Menu on a system with multiple users, fox example; a system used in computer class or a public place, you may want to force users with specified fixed layout of Start Menu. In a fixed layout, the tiles of Start Menu won’t be movable however their functionality will remain unchanged. That means, users can use the tiles but couldn’t customize the Start Menu by moving tiles from here to there.
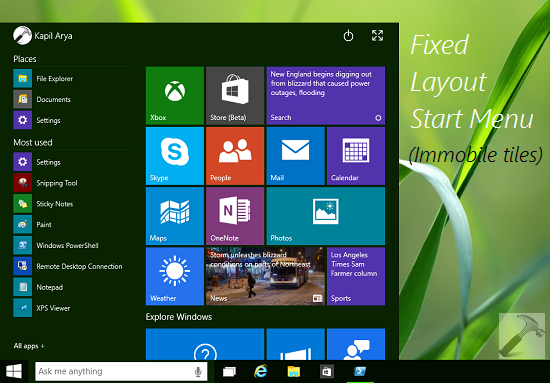
To make this possible, you can try out the steps mentioned below with administrative privileges. Please note that this trick is possible with Windows Enterprise and Pro editions.
How To Specify Fixed Layout Start Menu In Windows 10
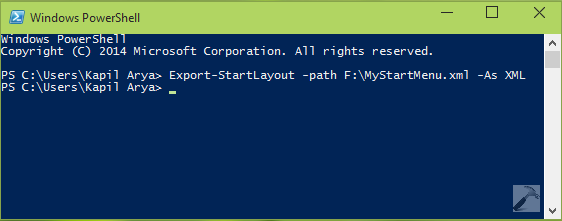
1. Press  + R and put powershell in Run dialog box to open Windows PowerShell. Click OK. In Windows PowerShell window, run the following cmdlet to export your Start Menu into an XML file.
Export-StartLayout -path <Fixed Start Menu Layout XML File Location> -As XML
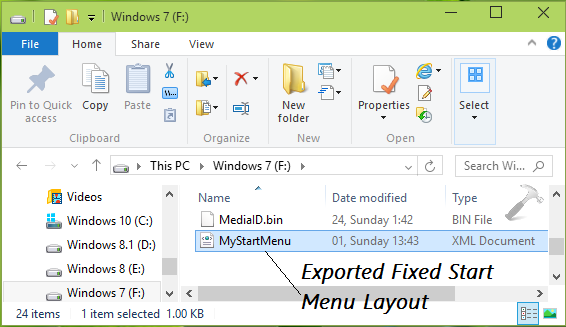
For example, to export the Start Menu layout to F: drive with MyStartMenu named file, I’ll run Export-StartLayout -path F:\MyStartMenu.xml -As XML cmdlet.
2. Next, verify the output file of previous step, you can right click and open it with Internet Explorer if you know XML.
3. Moving on, press  + R and put gpedit.msc in Run dialog box to open Local Group Policy Editor. Click OK. In the left pane of Local Group Policy Editor window, navigate here:
User Configuration -> Administrative Templates -> Start Menu and Taskbar
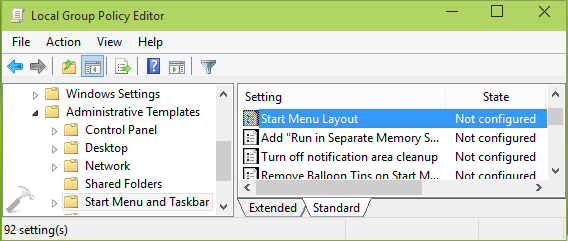
4. In the right pane of above shown window, find out the Start Menu Layout Setting. Double click on the same to get this:
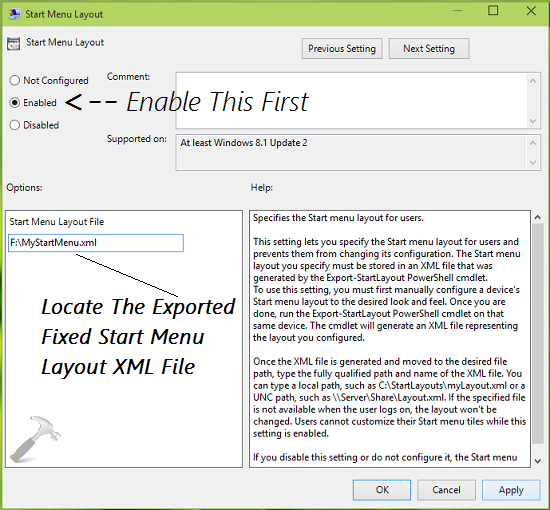
5. Now in the above shown window, click Enabled first. Then in the Start Menu Layout File input box under Options, put the location of exported fixed Start Menu layout file, verified in step 2. Click Apply followed by OK.
Close the Group Policy Editor now, click Start Button, and try moving tiles in Start Menu. You’ll find that tiles are not movable now as the fixed Start Menu layout has became effective.
That’s it!
![KapilArya.com is a Windows troubleshooting & how to tutorials blog from Kapil Arya [Microsoft MVP (Windows IT Pro)]. KapilArya.com](https://images.kapilarya.com/Logo1.svg)




11 Comments
Add your comment
Very nice trick thanks for sharing.
Really helpful thnx :-D
amazing article Kapil Works great on my 9841 build. Kudos to gud work…
This command doesn’t seem to work under 10122 build… I get an XML generated file, but it’s only 1K in size and has no config data in it:
Any updated information for this newer build?
–Aaron
^^ Please cross check the command and make sure you’ve used correct syntax. I haven’t yet checked it on build 10122, I’ll check and get back to you :)
I get a file that appears fine, and the group policy applies with all of the correct information in the registry but it doesn’t actually do anything. Windows 10 Enterprise, both x86 & x64.
I get the XML file, I applied the GPO, all seems well and the registry entries show up, all correct. However the start menu is unscathed, nothing is changed. Suggestions?
^^ On which build you’re?
A.) Sorry for the double post. B.) Mix of 10586 and 10240, x86 & x64, all Enterprise. Same result for both. Group policy applies, correct settings show up in the registry, no changes occur with the start menus.
The computer said ‘couldn’t find gpedit.msc please make sure you typed the name correctly, then try again’ what did I do wrong? I’m on windows 10 version 1803.
^^ You need atleast Windows 10 Pro, Enterprise or Education edition to open and use Group Policy snap-in.