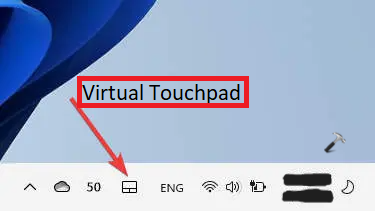
In Windows 11, users can use the on-screen virtual touchpad for controlling the mouse pointer with the touchscreen. One can drag the virtual touchpad to any location on the screen. So, how to show/hide virtual touchpad icon on Windows 11 taskbar?

In this post, learn how to show/hide virtual touchpad icon on Windows 11 taskbar using different methods. Now, let’s get started without further ado!
Page Contents
Show/hide Virtual Touchpad icon on Windows 11 taskbar
Method 1 – Using the Settings App
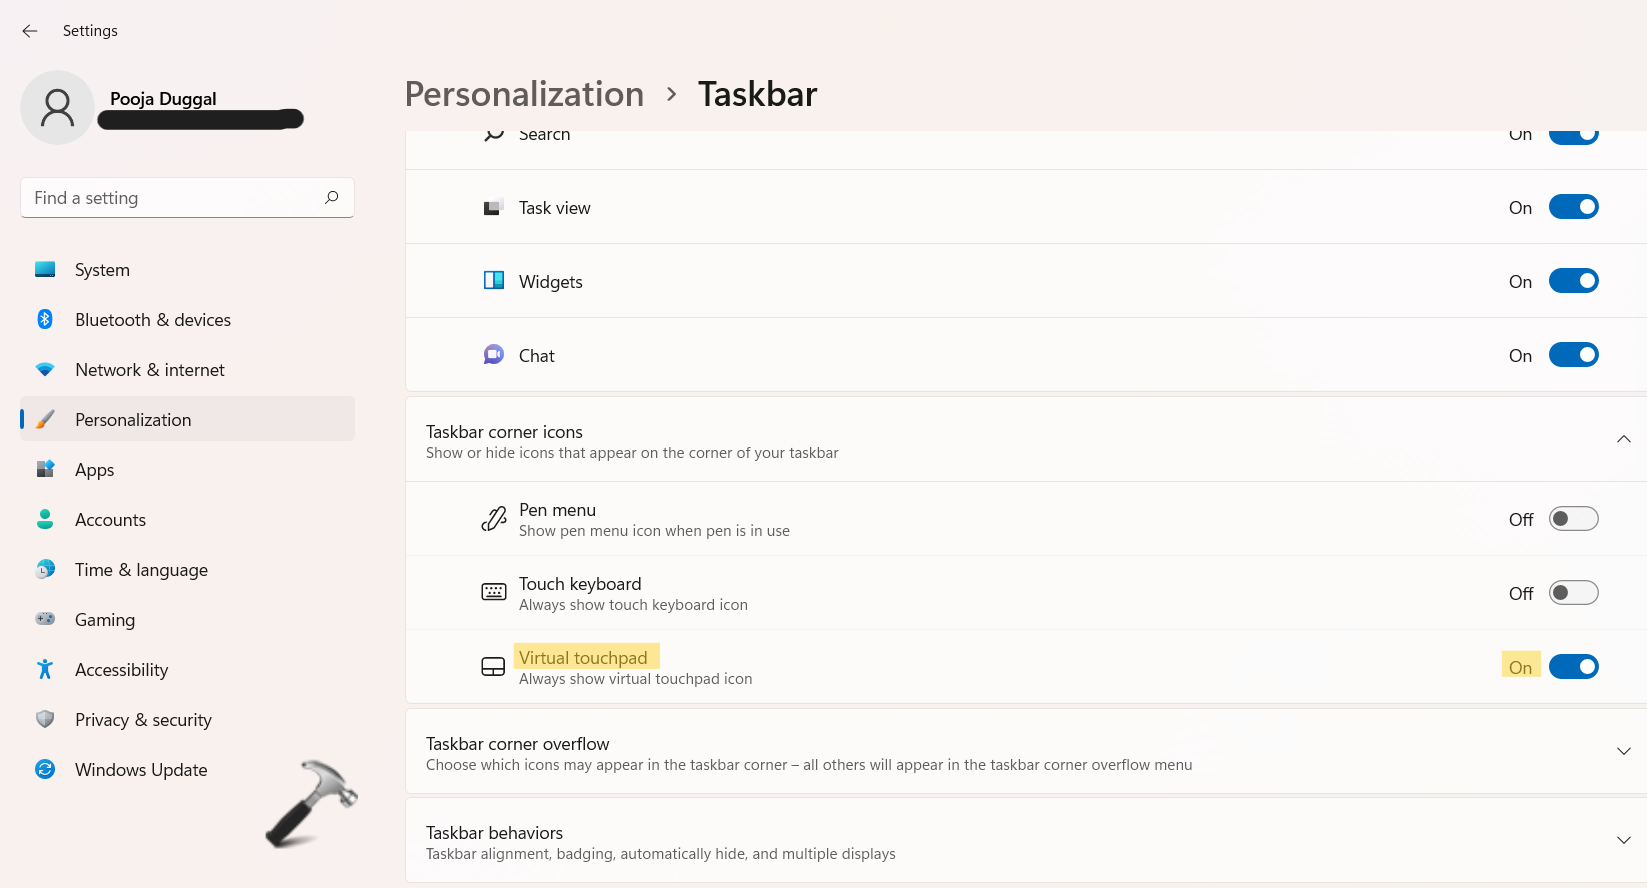
1. Open the Settings app by pressing the Windows + I tabs together on your keyboard and go to the Personalization tab. After that, click on Taskbar present on the right side.

2. After that, click on the Virtual touchpad option present under Taskbar corner icons. If you toggle the switch On, it will show the virtual touchpad. Or else, toggle the switch Off to hide the virtual touchpad.

3. Now, you can close the Settings app and check if the settings have been applied successfully.
Method 2 – Using Registry Editor
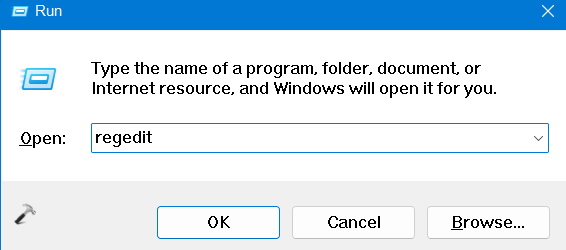
1. In the first place, you need to open the Run dialog box. For this, press the Windows + R keys simultaneously on your keyboard. Once opened, type regedit in the Run dialog box. Press Enter to open Registry Editor.

2. After that, navigate to the following location:
HKEY_CURRENT_USER\Software\Microsoft\Touchpad
3. Once there, double-click on the TouchpadDesiredVisibility REG_DWORD and change its value data to 1. This will show the virtual touchpad icon on the taskbar.

Or else, change the value data of TouchpadDesiredVisibility REG_DWORD to 0. This will hide the virtual touchpad icon on the taskbar.

4. Lastly, close Registry Editor and reboot your Windows system to apply the changes.
So, these are some of the effective methods to turn on or off the virtual touchpad icon on Windows 11 taskbar. It can be done easily through the Settings app. If this method does not work for you, then use the Registry Editor method to perform this task.
![KapilArya.com is a Windows troubleshooting & how to tutorials blog from Kapil Arya [Microsoft MVP (Windows IT Pro)]. KapilArya.com](https://images.kapilarya.com/Logo1.svg)


![[Latest Windows 10 Update] What’s new in KB5055612? [Latest Windows 10 Update] What’s new in KB5055612?](https://www.kapilarya.com/assets/Windows10-Update.png)


Leave a Reply