Settings app is one of the most highlighted features in Windows 10. Now since Microsoft has given more emphasis to Universal Apps, many settings has been moved to Settings app from Control Panel. Additionally, Settings app has introduced some new configurable options to setup Windows 10 with the way you like.
The Personalization section under Settings app lets you to select Desktop background, Lock Screen, Themes and Start settings where you can enable Start Screen. Imagine what would happen if the Personalization settings got disable for you. In such case, you’ve to go with current settings and you can’t customize any thing. We recently came around this weird problem on a Windows 10 running system.

We were pretty sure that Windows 10 was activated on that system with official product key we got from MSDN. Now the question is.. how do you solve this problem? Well, after doing some research, I was able to fix this issue using following steps:
Page Contents
FIX : Settings App Personalization Options Disabled In Windows 10
1. Press  + E to open File Explorer and navigate to this folder:
C:\ProgramData\Microsoft\Windows
*Sustitute C: with your system root drive. Here ProgramData folder is hidden by default.
2. In the Windows folder, scroll down to look for Start Menu Places folder and rename this folder to Start Menu Places.old.

You may get following error when you rename this folder:
An unexpected error is keeping you from renaming this folder. If you continue to receive this error, you can use the error code to search for help with this problem.
Error 0x80070005: Access is denied.

Simply click/tap Cancel in above shown window and take ownership of the folder using this method. Then re-try to rename and it would work.
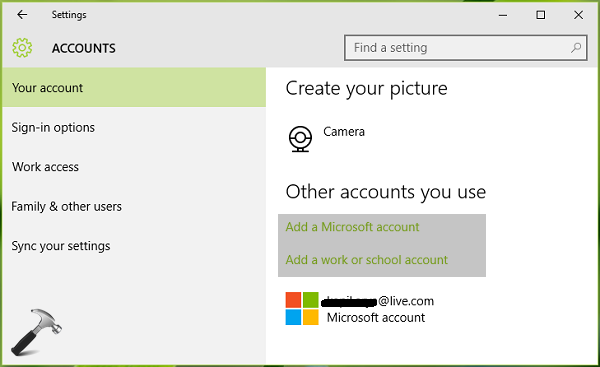
3. Moving on, open Settings app and go to Accounts > Your account. In the right pane of this screen, click/tap on Add a local/Microsoft account link and create a temporary user account.

4. Log on to the new user account we created in previous step. Go to C:\ProgramData\Microsoft\Windows\Start Menu Places Original.old and copy all the shortcuts inside it to C:\ProgramData\Microsoft\Windows\Start Menu Places Original.

5. Now sign out from this new account and log in back to your original user account. Again, go to C:\ProgramData\Microsoft\Windows\Start Menu Places Original.old and copy all the shortcuts inside it, paste them to to C:\ProgramData\Microsoft\Windows\Start Menu Places Original. It’s obvious that this operation will be overwriting one, since all shortcuts exists there already (as of step 4). But, do overwrite and go ahead.
6. Finally, check you Settings app. You’ll find that Personalization options are now enabled:

Hope this helps! Let us know if you’ve any confusion at any step, so that we can help you.
![KapilArya.com is a Windows troubleshooting & how to tutorials blog from Kapil Arya [Microsoft MVP (Windows IT Pro)]. KapilArya.com](https://images.kapilarya.com/Logo1.svg)


![[Latest Windows 10 Update] What’s new in KB5055612? [Latest Windows 10 Update] What’s new in KB5055612?](https://www.kapilarya.com/assets/Windows10-Update.png)


Leave a Reply