Whether you are on local account or Microsoft account, you can turn on auto login using this guide. We also discussed earlier that PIN is more secured sign in option as compare to traditional password. And due to this reason, Microsoft introduced passwordless feature in Windows 10 Version 2004. In this article, we will learn how you can set up Passwordless authentication in Windows 10.
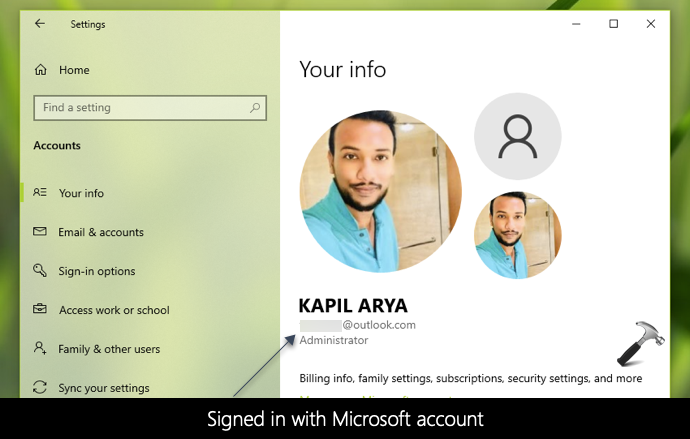
To set up a password authentication, there are two requirements basically which you must fulfil. The first requirement is that you should be signed with Microsoft account. If you are on local account, you can we use this guide to switch to Microsoft account. Password authentication is one of the reason why Microsoft introduced only Microsoft account set up while installing Windows 10 version 2004 or later.
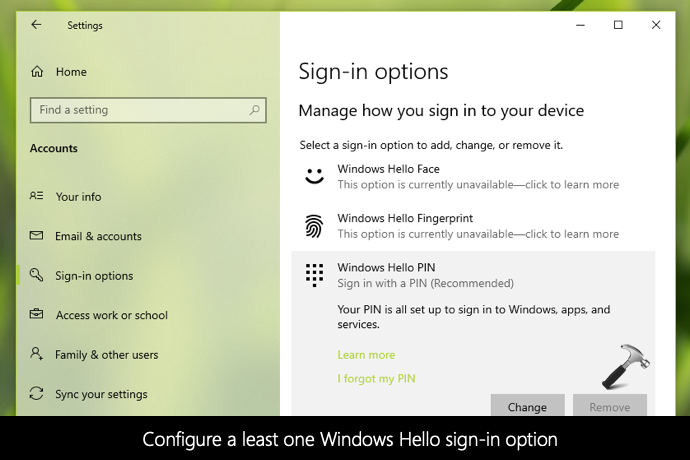
And the second requirement is that, you must have a Windows Hello sign-in option configured. It’s worth to mention here that Windows Hello sign-in options includes PIN, face and fingerprint. If you have any one of the Windows Hello sign-in option configured, you are good to go.
Here is how you can set up Passwordless authentication in Windows 10.
Set up Passwordless authentication in Windows 10
1. Go to Settings app > Accounts > Your info, make sure you’re signed in or switched to Microsoft account.

2. Next, go to Sign-in options section and set up any one of Windows Hello sign-in option. In this example, we setup Windows Hello PIN.

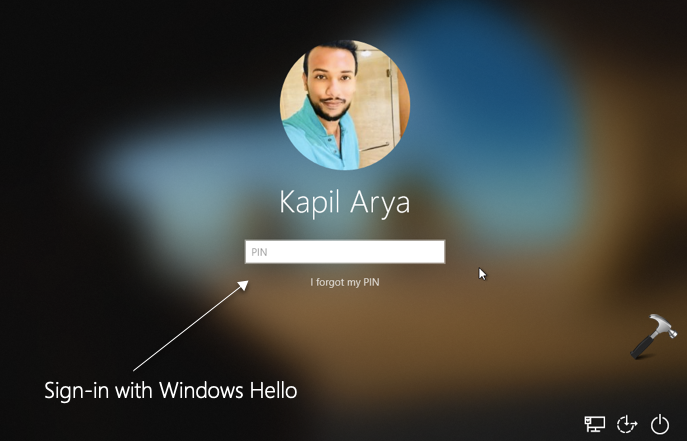
3. Reboot the system and sign-in with the Windows Hello option you configured in previous step.

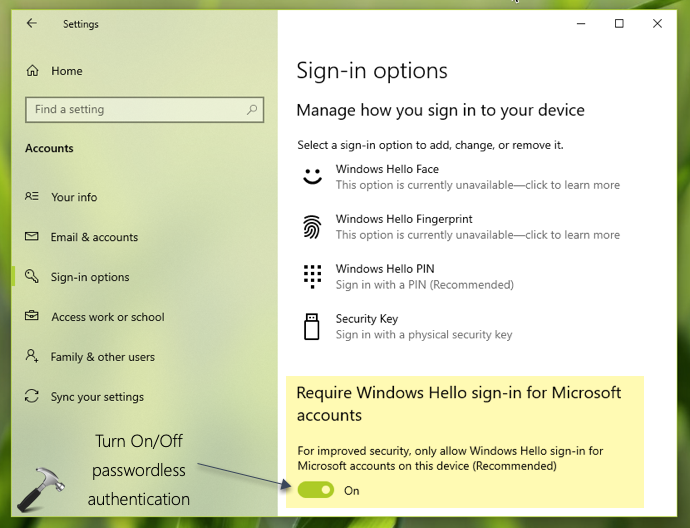
4. After signing in, go to Settings app > Accounts > Sign-in options, you’ll find that password sign-in option is no longer available. Additionally, a new option Require Windows hello sign-in for Microsoft accounts is introduced. You can turn On or Off this option to enable or disable Passwordless authentication, respectively.

Check this video to illustrate above steps:
That’s it!
Related: Enable/Disable Sign-in Options In Windows 10.
Also available: Enable Passwordless login for Windows 11.
![KapilArya.com is a Windows troubleshooting & how to tutorials blog from Kapil Arya [Microsoft MVP (Windows IT Pro)]. KapilArya.com](https://images.kapilarya.com/Logo1.svg)


Leave a Reply