On a Windows 11 PC, it is quite important to choose a region. This is because some data and applications employ the regional format settings for adjusting their date and time. While setting up Windows display language, the regional format settings function on the location and language linked to the display language. However, in some cases, users may like to set the regional format different from the display language. Learn here how to set or change regional format in Windows 11.
Now, let us have a look at different methods to change the regional format on a Windows 11 PC below!
Page Contents
Set or change regional format in Windows 11
Method 1: Set or Change Regional Format through Settings
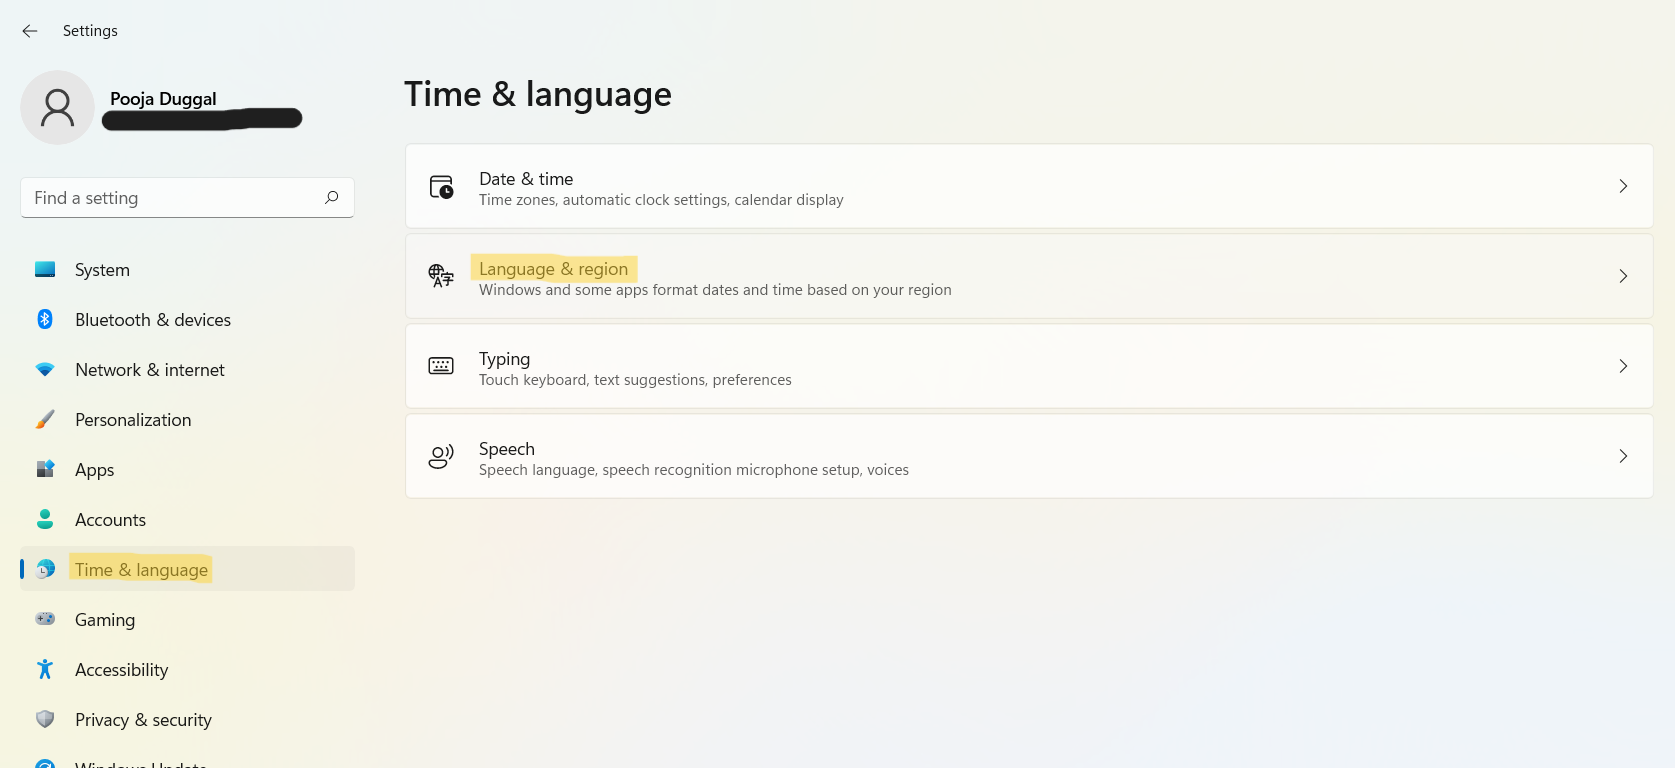
1. In the first place, open the Settings window by pressing the Windows + I tabs together on your keyboard. After that, go to the Time & language tab and then, choose the Language & region option.

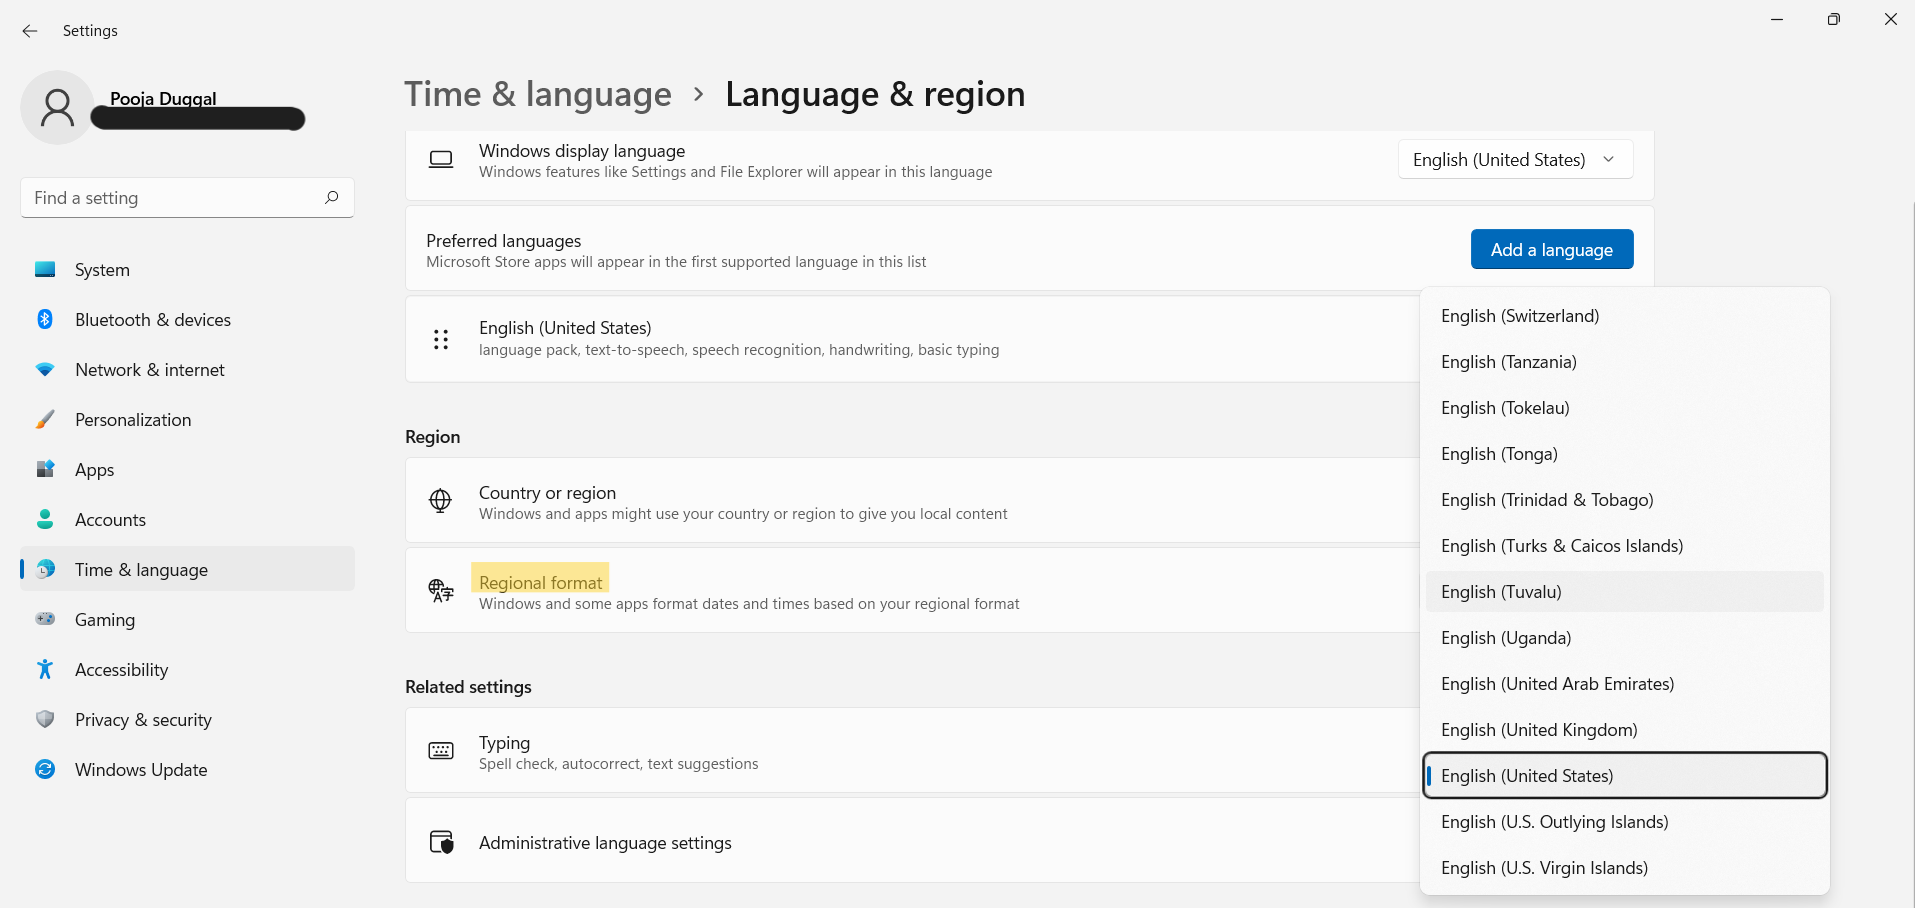
2. Under the Region section, click on the dropdown menu present against Regional format.

3. Now, choose the appropriate regional format from the list. Once done, close Settings.
Method 2: Set or Change Regional Format through Control Panel
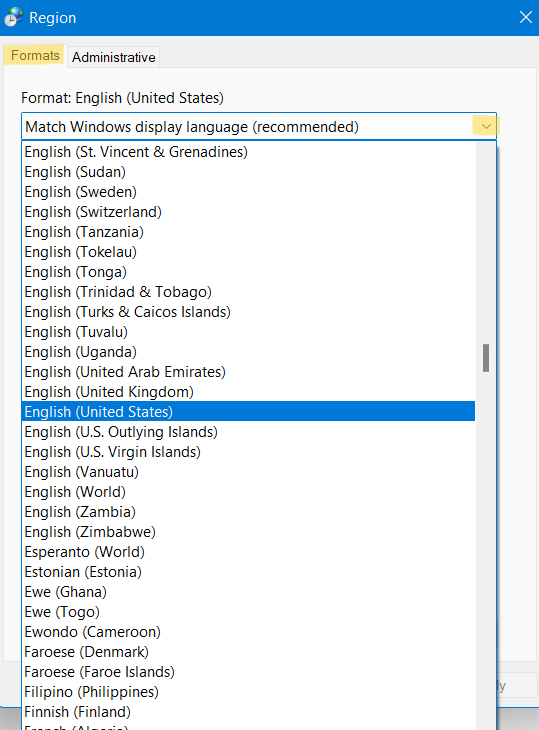
1. Open Run by pressing the Windows + R tabs together on your keyboard. Once opened, type intl.cpl in the Run dialog box and hit Enter for opening Region settings.

2. Now, go to the Formats tab and click on the dropdown menu present under the Format tab.

3. After that, you can choose the appropriate regional format that you like from the given list.
4. Once done, click on the Apply option and then, press OK for applying the changes.

5. Now, close the Control Panel tab if you want.
So, these are two ways to set or change regional format. Users can change the regional format from either Settings or Control Panel. It is easy to change these settings from any of these methods.
![KapilArya.com is a Windows troubleshooting & how to tutorials blog from Kapil Arya [Microsoft MVP (Windows IT Pro)]. KapilArya.com](https://images.kapilarya.com/Logo1.svg)


Leave a Reply