In Windows 10, if your system isn’t working correctly, you’d the option to reinstall without affecting your files. Such option was available in earlier versions of Windows 10. Then Microsoft merged Refresh (option evolved in Windows 8) to Reset option. Hence, you can use Reset to reinstall Windows 10 by keeping or erasing your files.
As per Microsoft, the Reset process used basically used runtime system files located in the Windows Component Store (C:\Windows\WinSxS folder). The files were located locally on disk and were utilized only when recovery operation is performed. If the Windows installation is in really a bad or corrupted situation, the Reset process might failed too, with There was a problem resetting your PC message.
To deal such problems, Microsoft has introduced reset using the cloud in newer Windows 10 Version 2004. Considering about the development branch, the feature was first introduced with build 18970 of 20H1. The cloud download option during Reset can be utilized to reinstall same build, edition, and version of your existing Windows 10 installation. It is quick and fast, if your Internet connection is good. It completely eliminates the requirement of bootable USB for reinstallation.
Here is how you can reset Windows 10 using the cloud option:
Reinstall Or Reset Windows 10 Using The Cloud
1. Right click Start Button or press  + X keys and select Settings.
2. In the Settings app, navigate to Update & Security > Recovery.
3. Under Recovery, click on Get started button for Reset this PC.

4. Next, choose your preferred option whether to keep or remove your files.

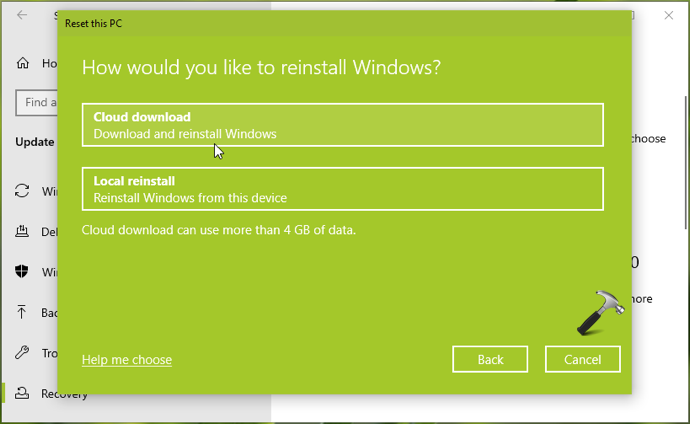
5. Then in next screen, select Cloud download. This will start downloading Windows, followed by its reinstallation. You need to further follow on-screen instructions to continue.

One more benefit of reset using cloud option is that if your system doesn’t boots, you can try accessing Advanced Recovery Options and choose to Reset from cloud.
That’s it!
Related: Could not find the recovery environment in Windows 10.
![KapilArya.com is a Windows troubleshooting & how to tutorials blog from Kapil Arya [Microsoft MVP (Windows IT Pro)]. KapilArya.com](https://images.kapilarya.com/Logo1.svg)


Leave a Reply