If your Windows 8 or 8.1 is shared by different users then there are some settings which you should configure to avoid contradiction. Most of users know that they can easily uninstall the apps from Start Screen, for doing so, they have right click on the app which they like to remove and simply a click Uninstall option. Thus if your system is shared by your family, it might happen that you install an app which you like, and some other member who used the system in your absence uninstalled it; obviously from Start Screen. Then how to avoid this scenario?
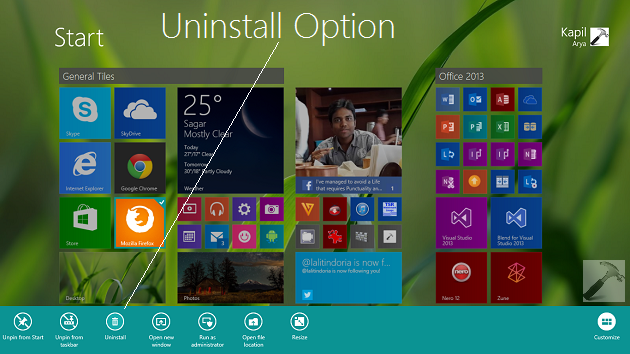
Well, if by any how; you remove the Uninstall option for the right click over apps from the Start Screen, others won’t be able to remove your installed apps. In this article, I’ll show you the way to do so. The necessary condition to follow this trick is that you must be the administrator of your system. If you fulfill this condition, follow these steps:
How To Prevent Users From Uninstalling Apps From Start Screen In Windows 8/8.1
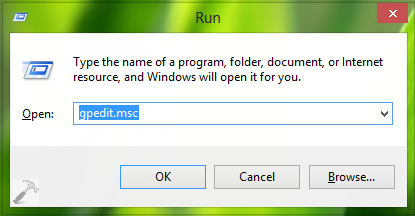
1. Press  + R and put gpedit.msc in Run dialog box to open Local Group Policy Editor. Click OK.
2. In the left pane, navigate here:
User Configuration -> Administrative Templates -> Start Menu and Taskbar
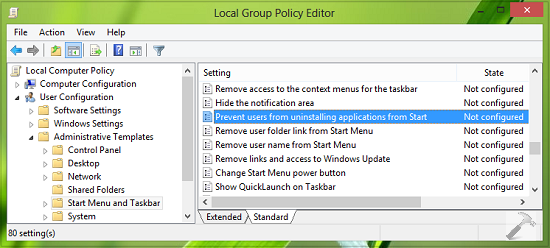
3. In the right pane of above shown window, you’ll find setting named Prevent users from uninstalling applications from Start which must be showing Not configured status by default. Double click it to get this:
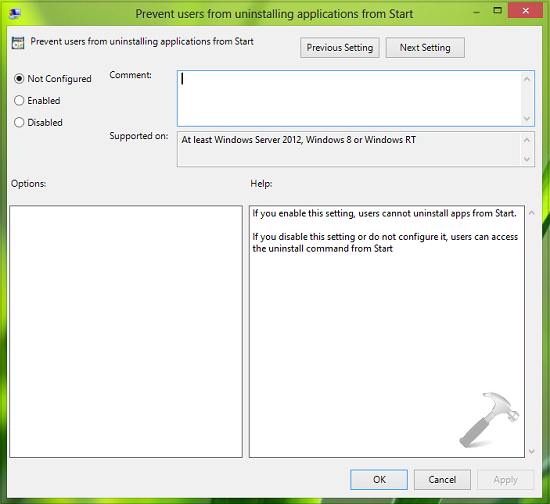
4. In the above shown window, click Enabled, then Apply followed by OK. You may close the Local Group Policy Editor now. You can now go to Start Screen and right click any app to verify the changes we’ve made so far. You’ll find that Uninstall option has been erased now.
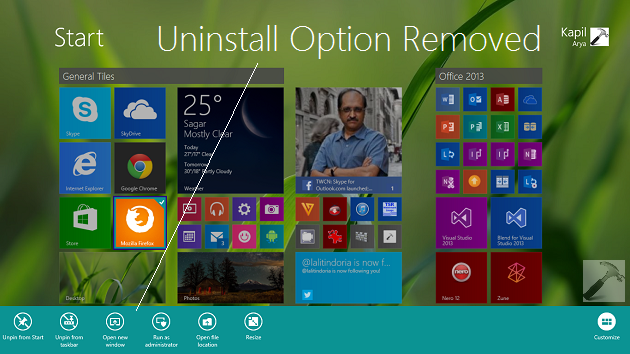
Additionally in Windows 8.1, if you navigate to apps management section in PC Settings (PC Settings -> Search and apps -> Apps sizes), you’ll have the message at the top saying Some settings are managed by your system administrator. Thus, users can’t uninstall the apps from here as well as the option is greyed out:
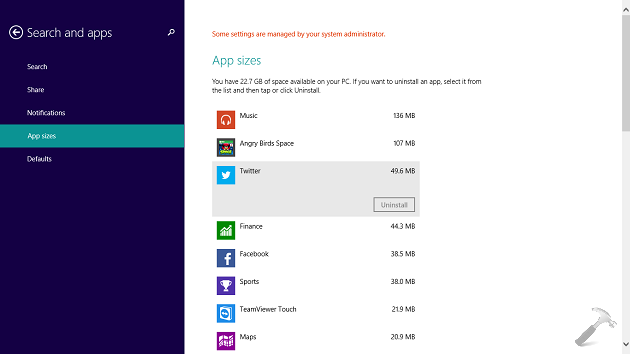
If you again want to allow users to uninstall apps, then you can select Disabled or Not Configured option in step 4.
That’s it!
![KapilArya.com is a Windows troubleshooting & how to tutorials blog from Kapil Arya [Microsoft MVP (Windows IT Pro)]. KapilArya.com](https://images.kapilarya.com/Logo1.svg)


Leave a Reply