When you make a clean install of Windows 10, reinstall or start your pre-installed Windows 10 machine for the very first time, you go through a series of screens. These screens are designed to complete your personalized set up for the operating system. Microsoft calls it Out of Box Experience (OOBE). Sometimes, it is also called Windows 10 first-run experience. In this article, we’ll learn about Out of Box Experience in Windows 10 in detail.
When you download Windows 10 from official Microsoft site, the Out of Box Experience you receive is default. However, various OEMs and developers can customize the Out of Box Experience to match it for their organization. So on some of the devices, you might receive OOBE screens which may not be available on other devices. According to Microsoft, following is the list of OOBE screens users may come across.
- Language selection
- Cortana welcome
- Region selection
- Keyboard selection
- Connect to a network
- Automatic download of critical ZDP and driver updates (only if you’re connected to network)
- Get the latest from Windows (In Windows 10 V1803 or later)
- End User License Agreement (EULA)
- Sign in to your Microsoft account, or create local account (if there no network)
- If local account was created and you added password, screen to setup security questions
- Windows Hello setup
- Link your phone and PC (only appears if your signed into Microsoft account)
- Save files to OneDrive
- Set up Office (only appears if you’re signed into Microsoft account)
- Payment information (In Windows 10 V1803 or later, only if you opted free trail of Office)
- Make Cortana my personal assistant
- Privacy settings
- OEM Registration pages (only appears if your bought OEM licensed machine)
Now let us take a practical walk-through of above mentioned screens. Only important screens are mentioned to save your time! Note that you can later change the settings you’ve opted in OOBE screens in your Windows 10, except legal terms consent.
Out of Box Experience in Windows 10
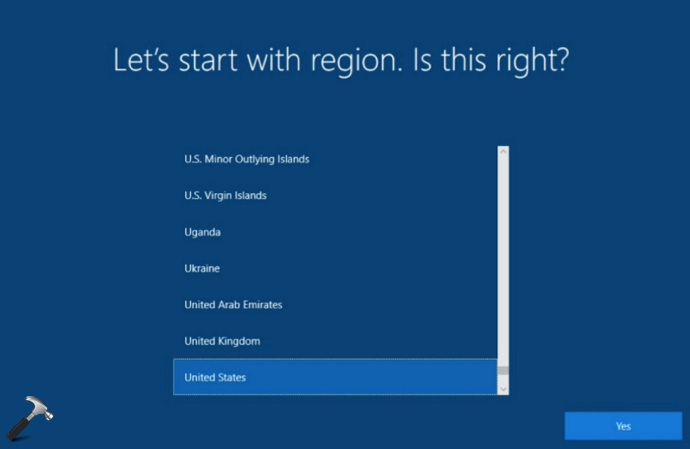
So when you start the machine for the very first time, the first screen you see is region selection screen. Here you can select your region correctly and click Yes to go to next screen.
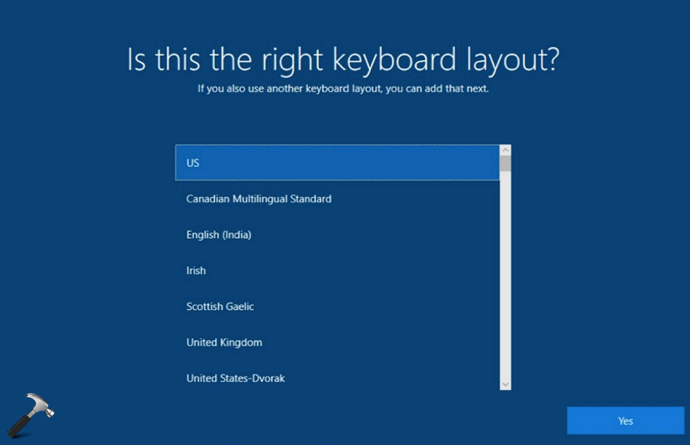
Next is keyboard layout selection screen. Here you can select a keyboard layout for the system and hit Yes to move on.
Then you will be asked whether you want to add second keyboard layout. If you want to add another keyboard layout, click Add layout else click Skip.

Then you should be taken to network selection. Depending upon the network you selected, you will be offered Windows Updates. If you are connected to corporate network, you will be asked whether you want to set up the system for your personal account or with your work account. If you are on the private network and this is your personal system, you will be asked to sign in to Microsoft account. If you like, you can click Continue with limited setup link to create a local account instead. This screen appears only if you’re not connected to any network.
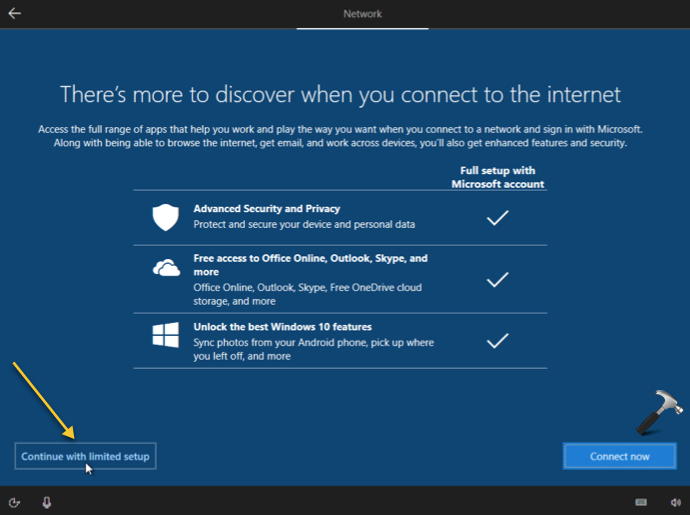
Then screen to sign in or set up your account.
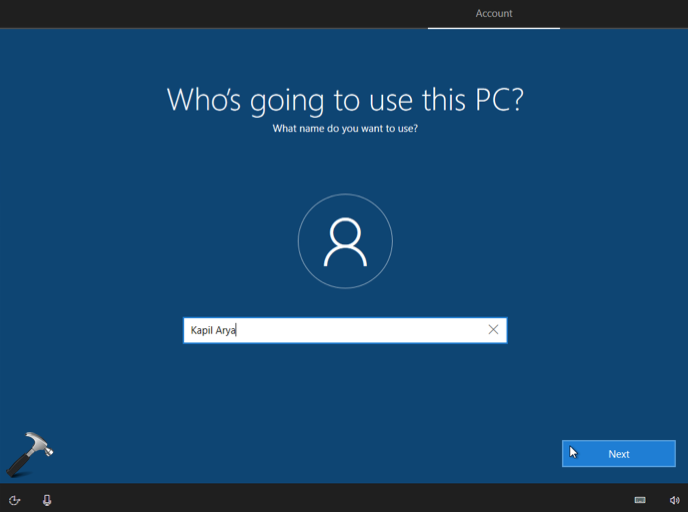
After signing in or creating your account, you will be asked whether you want to activate activity history for the Timeline feature. This screen appears if you have signed in with your Microsoft account.
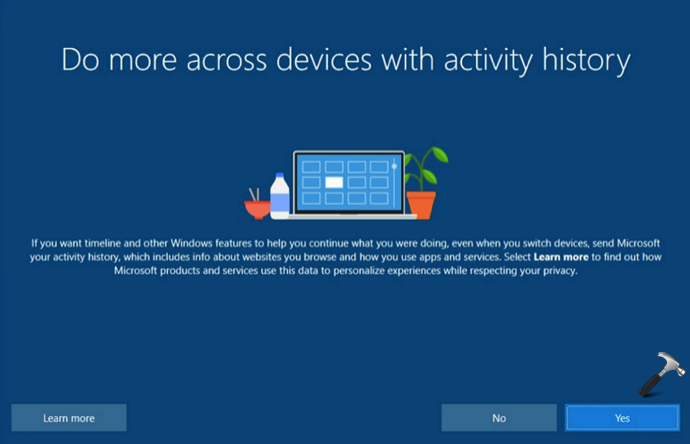
Next, you will be asked whether you want to enable Cortana has your digital assistant.
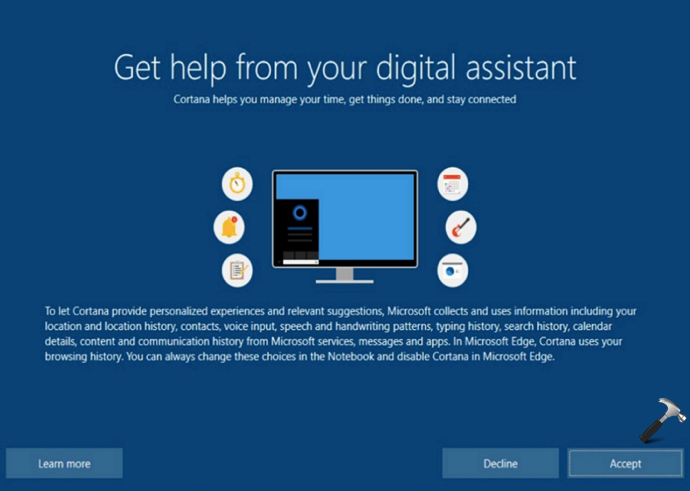
And this is usually the final screen for OOBE and it’s the privacy settings screen. You can select the privacy permissions you want to give to and click Accept.
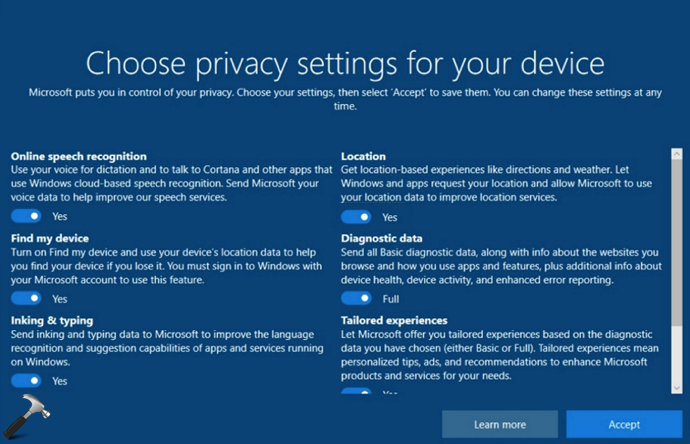
Once you complete the above privacy settings, you will be seeing first time sign-in animation for your account.
When the final setup of your system is completed (as per animation), you will be taken to Desktop. You can now enjoy your personalized Windows 10.
That’s it!
![KapilArya.com is a Windows troubleshooting & how to tutorials blog from Kapil Arya [Microsoft MVP (Windows IT Pro)]. KapilArya.com](https://images.kapilarya.com/Logo1.svg)




Leave a Reply