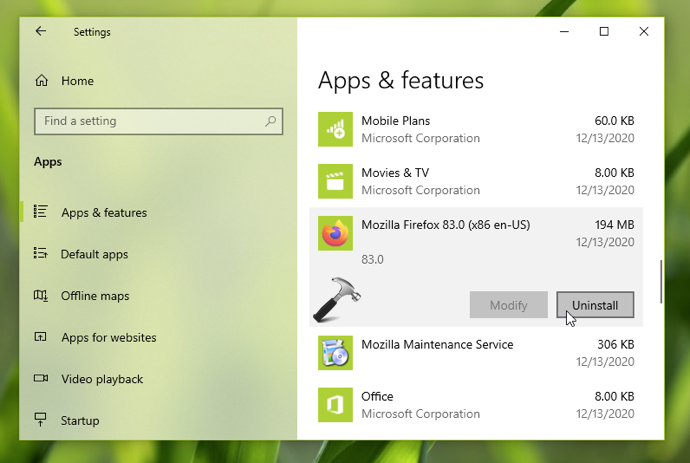
If you are looking forward to remove a program or app from your Windows 10 to free up the disk space, this guide is for you. There might be anonymous reasons for why you want to uninstall a program. In this article, we will see how to uninstall a program or app in Windows 10.
While installing some programs, you might need administrator permissions, if you’re on a standard user account. If you remove a Desktop app from the system, usually it will be removed for all the user accounts present on the system. However, when you uninstall a universal app, it may not be removed for all users, unless you use PowerShell cmdlet to specify that.
You can try either of the methods mentioned below to remove an app or program.
Page Contents
How to uninstall a program or app in Windows 10
Method 1 – Using Settings app
Follow these steps to uninstall app/program using Settings app.
- Right click Start Button or press
 + X keys and select Settings.
 - In the Settings app, go to Apps > Apps & features.
- In right pane of Apps & features, highlight the program/app you want to remove and click Uninstall.

In the few moments, the app or program will be uninstalled from your system. You can then close Settings app and return to the Desktop, if you like.
Method 2 – Using Command Prompt
1. Right click on Start Button and select Command Prompt (Admin)
2. In administrative Command Prompt window, type wmic command and press Enter key.

3. This will populate the list of programs installed on your system. Next, execute following command after substuting name of program you want to remove:
product where name="<PROGRAM NAME>" call uninstall
4. Finally, when asked, type Y and press Enter to confirm uninstall operation. The program/app will now be uninstall and you must receive Method execution successful message in return, as a confirmation. You can now close Command Prompt.
That’s it!
![KapilArya.com is a Windows troubleshooting & how to tutorials blog from Kapil Arya [Microsoft MVP (Windows IT Pro)]. KapilArya.com](https://images.kapilarya.com/Logo1.svg)


 + X keys and select Settings.


Leave a Reply