In Windows 10, thumbnail previews are enabled by default. These previews helps you to identify images/videos you’re looking for, in large folders without opening them. Thumbnails on folders will help you to remind, what content you’ve put inside the folder earlier. So in this way, thumbnail previews are totally for user convenience.
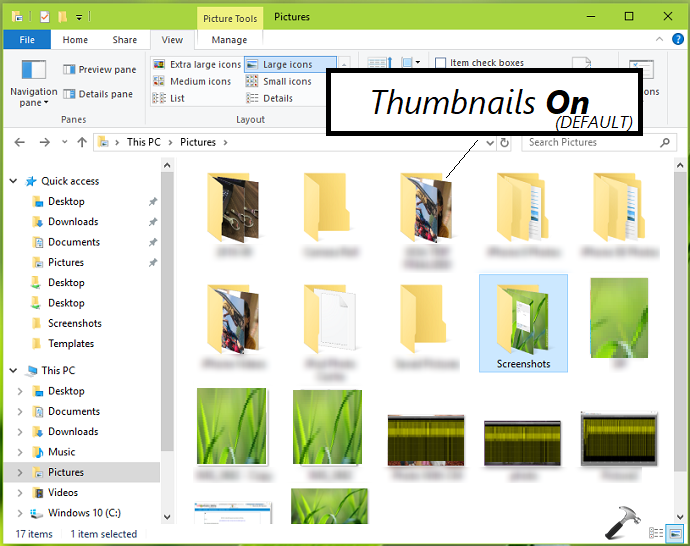
You can show or hide thumbnails as per your requirement. In this article, we’ll provide two simplified methods to enable/disable thumbnail previews in your Windows 10. You can try either of these methods as per your convenience.
Page Contents
How To Show/Hide Thumbnails In Windows 10
Method 1 – Via Folder Options
1. Press  + E to open File Explorer.
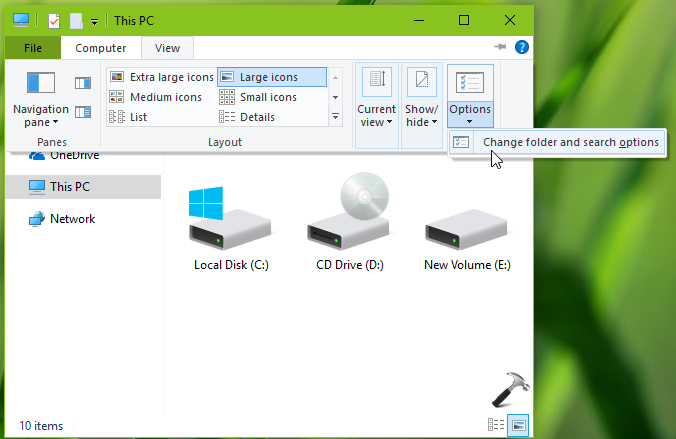
2. Under File Explorer ribbon, click View > Options > Change folder and search options.
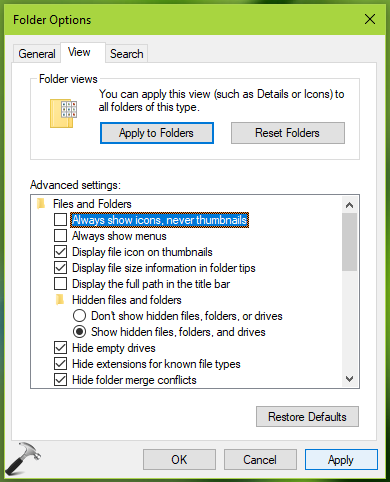
3. In Folder Options window, switch to View tab. Under Advanced settings, check Always show icons, never thumbnails option to hide thumbnails. While you can uncheck same option to display thumbnails. Click Apply followed by OK.
Your select setting will be applied with immediate effect.
Method 2 – Via System Properties
1. Press  + R and type
 SYSDM.CPL in Run. Click OK or press Enter key.

2. In System Properties window, on Advanced tab, click Settings button under Performance heading.

3. Next, in Performance Options window, on Visual Effects tab, select Custom. Then uncheck Show thumbnails instead of icons to hide thumbnails in Windows 10. Or check same option to let thumbnails shown, which is default setting as well. Click Apply, OK.
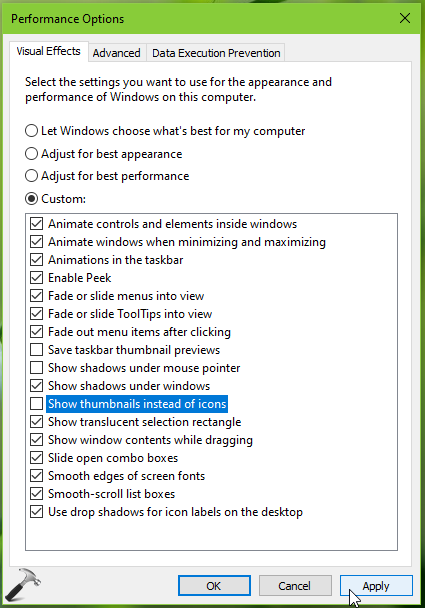
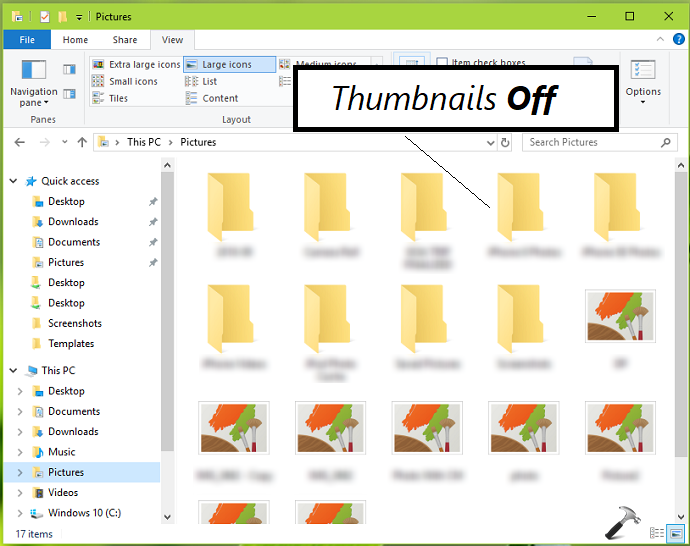
We unchecked the above option and saved settings. To confirm results, we can see thumbnails are no longer displayed now:
That’s it!
![KapilArya.com is a Windows troubleshooting & how to tutorials blog from Kapil Arya [Microsoft MVP (Windows IT Pro)]. KapilArya.com](https://images.kapilarya.com/Logo1.svg)




![[Latest Windows 10 Update] What’s new in KB5055612? [Latest Windows 10 Update] What’s new in KB5055612?](https://www.kapilarya.com/assets/Windows10-Update.png)


Leave a Reply