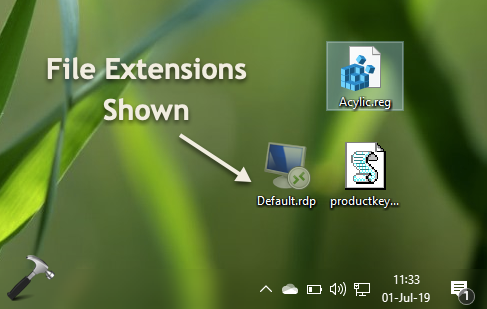
In Windows, file extensions helps in recognition of file types. For example, if file extension is .jpg then we can easily judge that it is an image file.
By default, file extensions are hidden in Windows 10 operating system. However, users can show/hide file extensions as per their need. In this article, we’ll show you how to make file extensions hidden or visible.
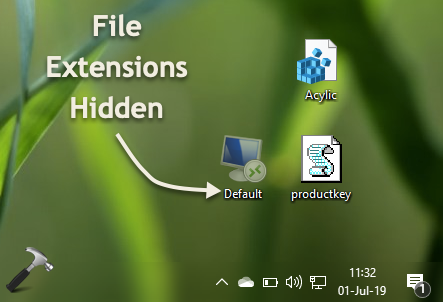
You can configure settings for file extensions via Folder Options or using registry manipulation. Both ways are mentioned below.
Page Contents
How To Show/Hide File Extensions In Windows 10/8/7
Method 1 – Via Folder Options
1. Press  + E to open File Explorer.
2. Under File Explorer ribbon, click View > Options > Change folder and search options.

3. In Folder Options window, switch to View tab. Under Advanced settings, check Hide extensions for known file types option to hide file extensions. While you can uncheck same option to show file extensions. Click Apply followed by OK.
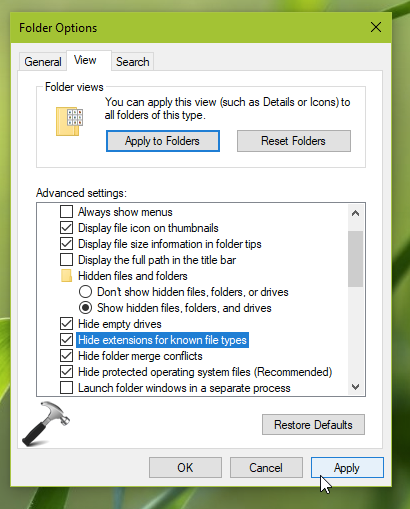
The setting should be applied with immediate effect.
If you like, you can configure this setting using registry as mentioned in Method 2 below.
Method 2 – Via Registry
Registry Disclaimer: The further steps will involve registry manipulation. Making mistakes while manipulating registry could affect your system adversely. So be careful while editing registry entries and create a System Restore point first.
1. Press  + R and put
 regedit in Run dialog box to open Registry Editor (if you’re not familiar with Registry Editor, then click here). Click OK.

2. In left pane of Registry Editor window, navigate to following registry key:
HKEY_CURRENT_USER\SOFTWARE\Microsoft\Windows\CurrentVersion\Explorer\Advanced
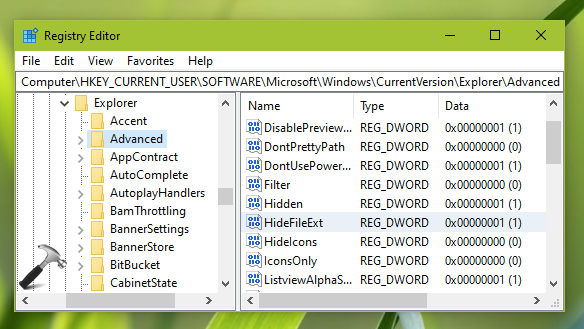
3. Now in the right pane of Advanced registry key, look for registry DWORD (REG_DWORD) named as HideFileExt which might be set to 1 which means file extensions are hidden. Double click on this registry DWORD to modify its Value data:
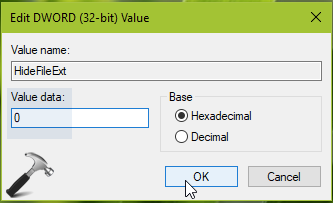
4. Set the Value data to 0 to show file extensions. Click OK and close Registry Editor and reboot to make changes effective.
That’s it!
![KapilArya.com is a Windows troubleshooting & how to tutorials blog from Kapil Arya [Microsoft MVP (Windows IT Pro)]. KapilArya.com](https://images.kapilarya.com/Logo1.svg)


![[Latest Windows 10 Update] What’s new in KB5055612? [Latest Windows 10 Update] What’s new in KB5055612?](https://www.kapilarya.com/assets/Windows10-Update.png)


Leave a Reply