By default, Windows 11 hides the significant folders or files that are usually not used by common Windows users. Typically, the hidden files cannot be viewed. In order to see these files, users need to modify Windows 11 settings. So, how to show hidden files in Windows 11?
In this post, we will talk about some of the effective yet easy ways to unhide the hidden files or folders. Now, to unhide the hidden files, go through the following methods:
Page Contents
How to Show Hidden Files in Windows 11
Method 1: View Hidden Files in Windows 11 Through File Explorer Options
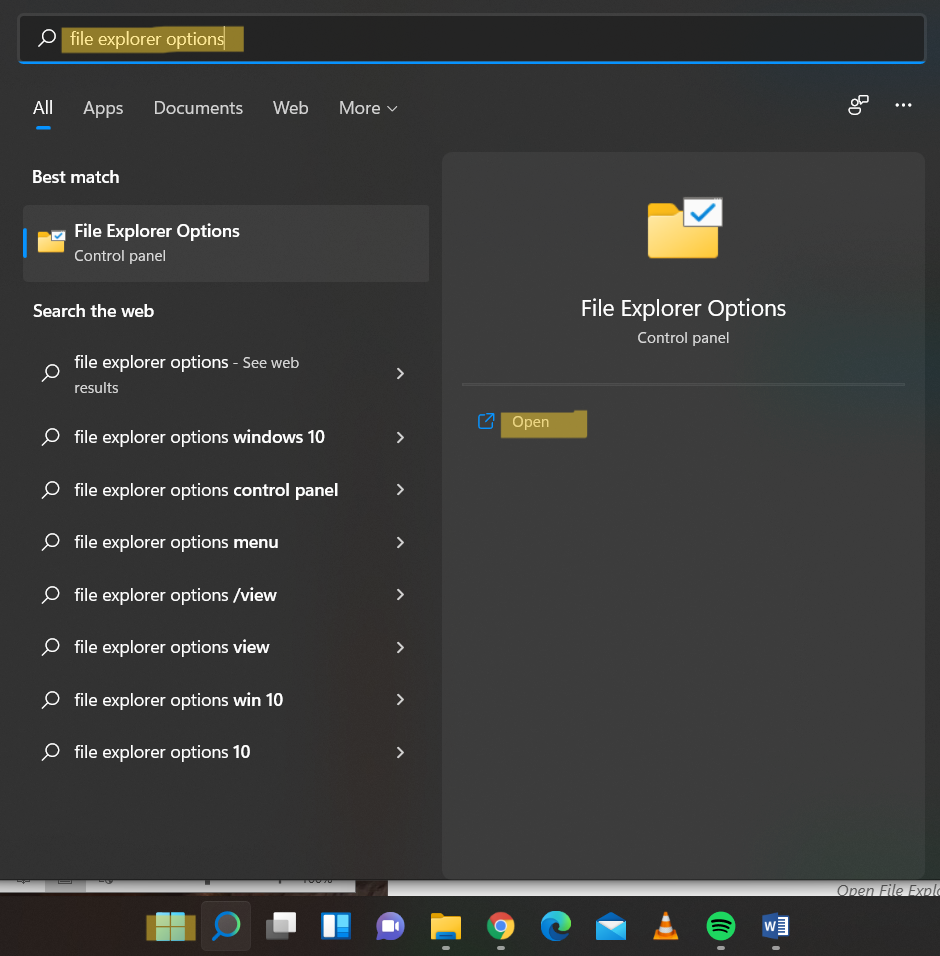
1. Click on Windows and type File Explorer Options. Next, click on Open to open it.

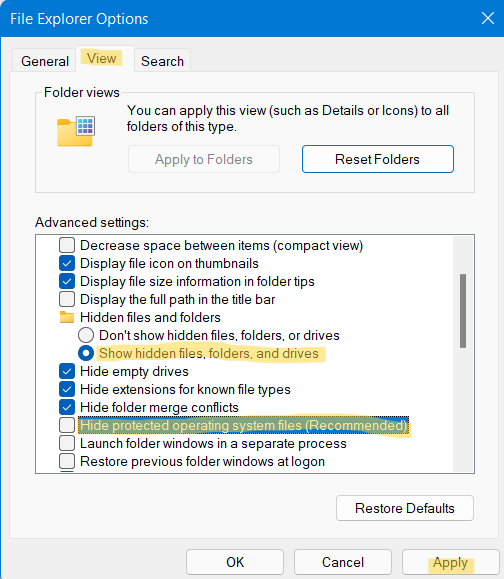
2. Go to View and then, select Show hidden files, folders, and drives. In addition to it, uncheck the box next to Hide protected operating system files to view the system files.

3. Once done, apply the changes and see the hidden files on your system now.
Method 2: See Hidden Files in Windows 11 Through File Explorer
1. In the first place, open File Explorer by right-clicking on Windows.

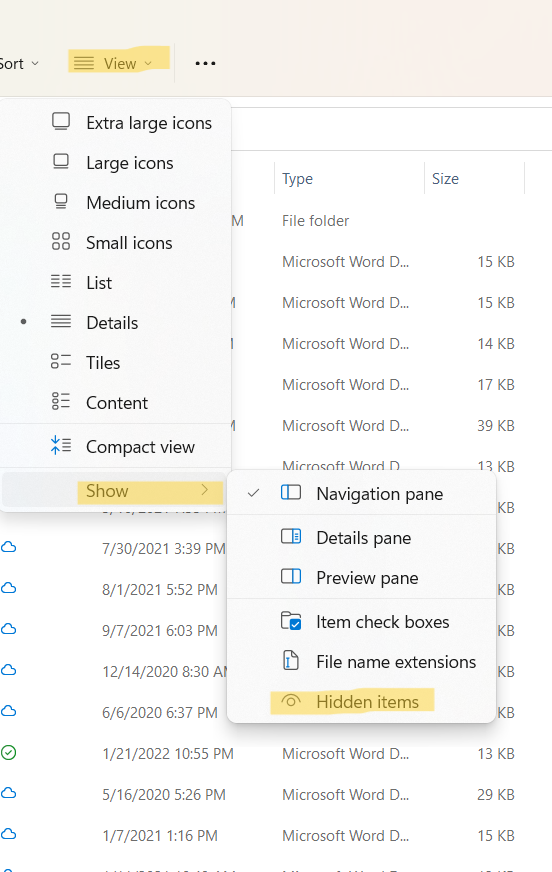
2. Next, click on the View option present at the top.

3. After that, expand the Show tab and then, choose Hidden items.

Method 3: Show Hidden Files in Windows 11 Through the Options Tab
1. Open File Explorer on your Windows 11 system.
2. Now, click on the three dots (ellipses) button present at the top. In the next window, choose Options.


3. Next, you will come across the Folder Options window. From there, go to the View tab.
4. Under Advanced settings, select Show hidden files, folders, and drives.

5. Once done, select OK and check your hidden files and folders.
So, these are some of the effective methods to view hidden files and folders in Windows 11. Once you followed any of these methods, your hidden files will become visible on your desktop. To view these unhidden files, open File Explorer and look for the icons with a faded or slightly translucent appearance.
![KapilArya.com is a Windows troubleshooting & how to tutorials blog from Kapil Arya [Microsoft MVP (Windows IT Pro)]. KapilArya.com](https://images.kapilarya.com/Logo1.svg)


Leave a Reply