A Virtual Private Network (VPN) connection provides more secure connectivity to your company’s network and the Internet. You can use the VPN connection in work or personal premises. Eventually, it is there to provide secure channel for your machine, so that can communicate safely.
If you’re already subscribed to a VPN service, or you’ve already configured VPN server, you need to setup VPN connection so that you can connect to the service. In this article, we’ll show you the steps to create VPN connection profile.
Page Contents
How To Setup VPN Connection In Windows 10/8/7
To establish a VPN connection in Windows 10, you can either use Settings app or Control Panel and both ways are mentioned here.
Method 1 – Using Settings App In Windows 10
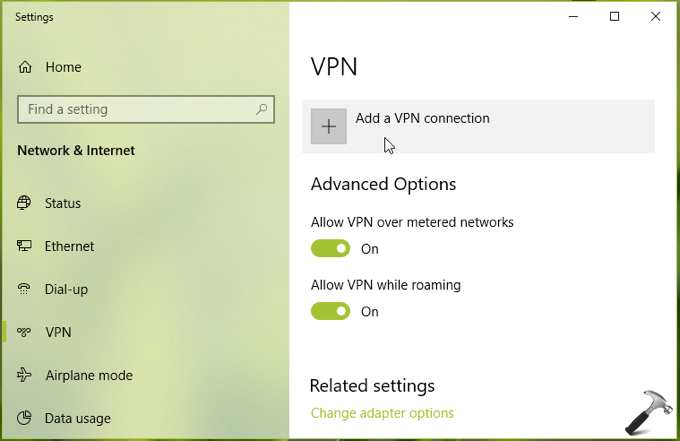
1. Open Settings app and go to Network & Internet > VPN.
2. In right pane of VPN, click on Add a VPN connection.
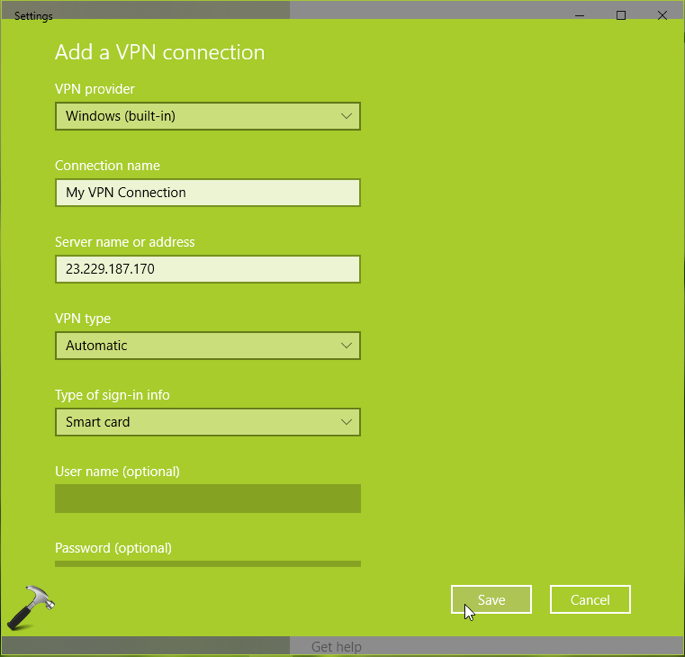
3. Provide the required details in next screen for your VPN connection and click Save.
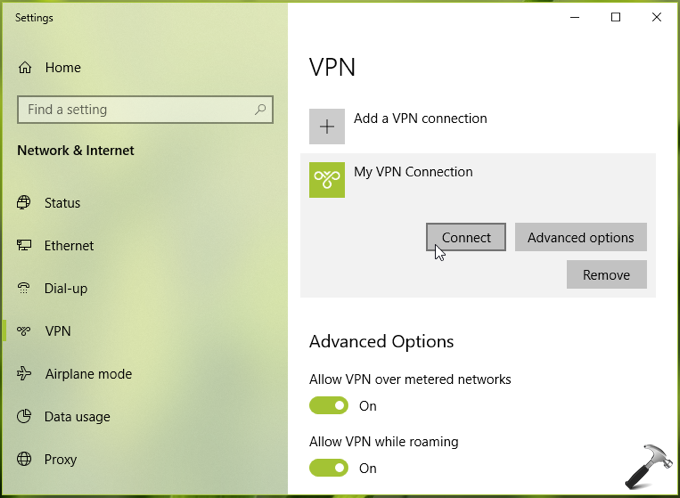
4. Now you’ve setup your VPN connection, so highlight it and then click Connect. Once your details are verified correctly, you should be instantaneously connected.
If you’re using older Windows OS, such as Windows 8.1/8/7, you can also setup VPN via Control Panel as mentioned in Method 2 below.
Method 2 – Using Control Panel In Windows 10/8/7
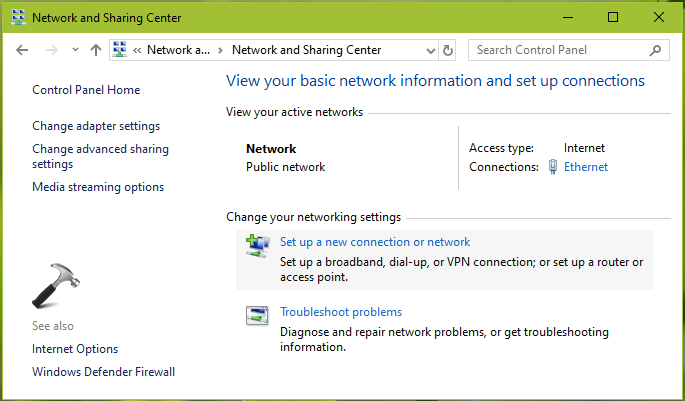
1. Open Control Panel and click Network and Sharing Center.
2. In Network and Sharing Center window, click on Set up a new connection or network.
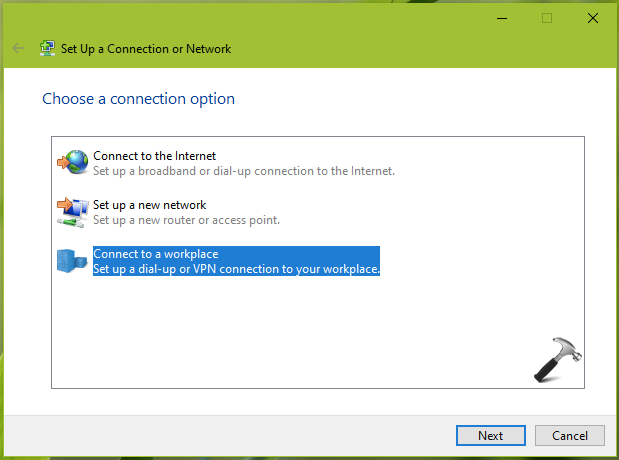
3. Moving on, then select Connect to a workplace option and click Next.
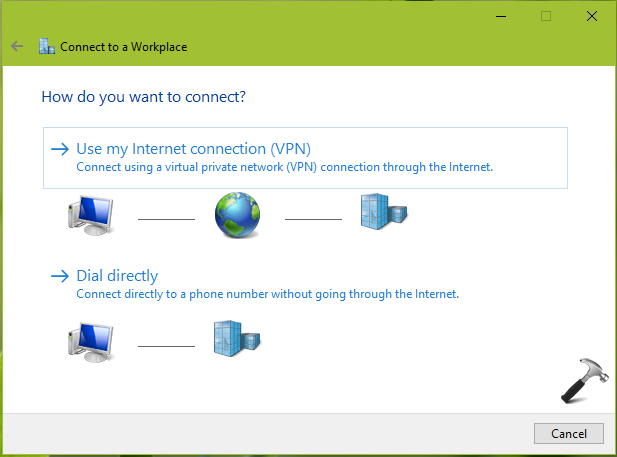
4. Then in next screen, select Use my Internet connection (VPN) option.
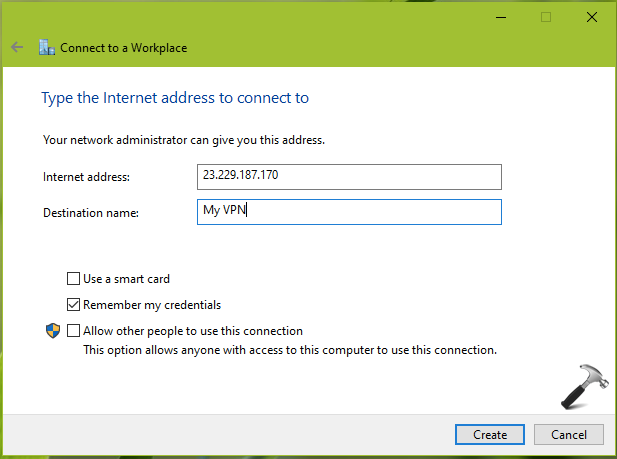
5. Now provide details for your VPN connection and hit Create.
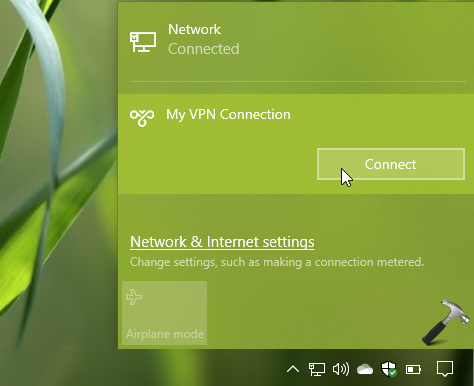
6. This should setup your VPN connection. You can now click on network icon present on taskbar and click Connect against VPN connection you just setup. You may be prompted for credentials, so keep them ready. If your details are verified correctly, you’ll be connected.
That’s it!
![KapilArya.com is a Windows troubleshooting & how to tutorials blog from Kapil Arya [Microsoft MVP (Windows IT Pro)]. KapilArya.com](https://images.kapilarya.com/Logo1.svg)





Leave a Reply