For correct functioning of some features, your Windows 10 device needs your exact location. For example, in Weather app, if your device location is exact, you’ll get weather conditions for your local hub. Some users prefer to show local weather conditions on lock screen. But if location is incorrect, users won’t be actually happy with this facility. To make this possible, it would be great, if your device is set to a default location.
If there is no location set on your Windows 10 device, it usually tries to automatically detect your location using global positioning service (GPS). In some cases, the automatic location detected by device is not exactly the location you’re on. In such cases, you’ll miss the localized content on your Windows 10 machine. Some users may get incorrect time on their system, due to incorrect location. To solve this problem, you must set a default location for your system.
So assuming you’ve already enabled location services, here is how you can set your default location on Windows 10.
How To Set A Default Location In Windows 10
1. Right click Start Button or press  + X keys and select Settings.
2. In the Settings app, navigate to Privacy > Location.
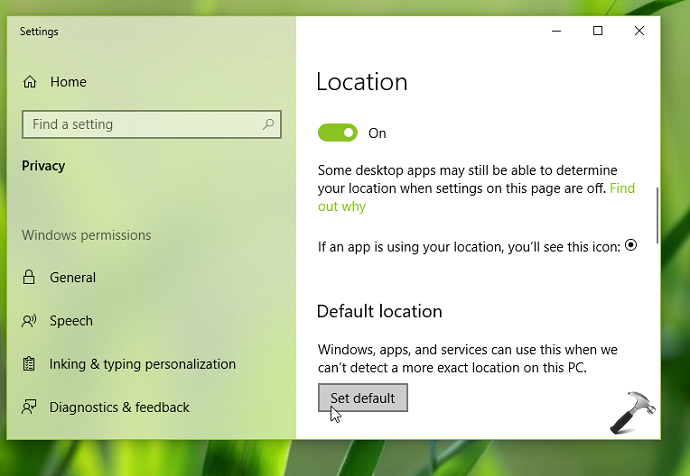
3. Now in right pane of Location, under Default location, click on Set default button.
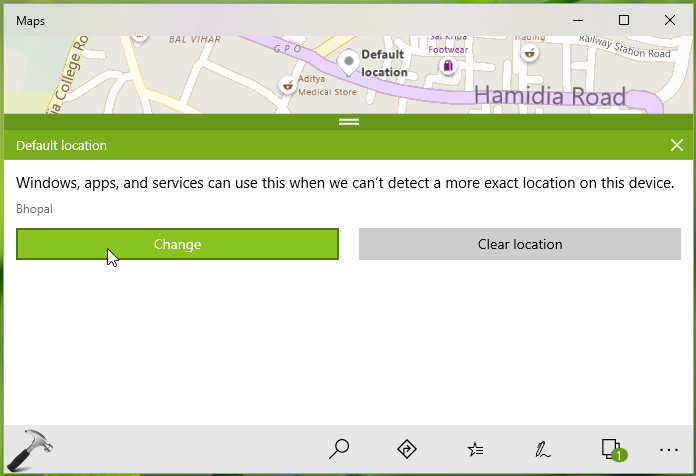
4. This will open Maps app and default location section there. Click on Change button. In case if you want to erase automatically detect location, click on Clear location.
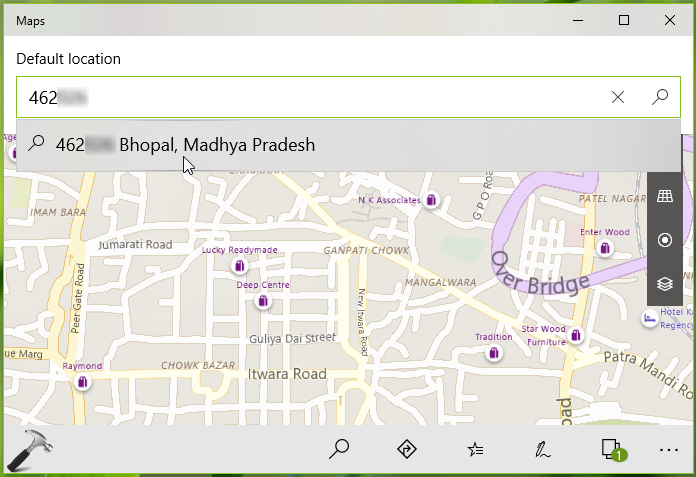
5. Next, under Default location, type your location and search for. For exact location, I recommend you to search through your postal code. From search results, pick your location.
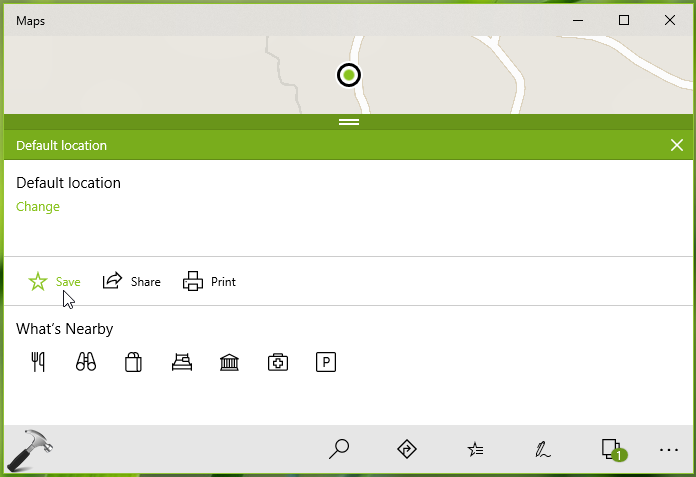
6. Finally, click on Save in order to set your default location. Close Maps and Settings app, and return to Desktop, if you like.
So this is how you can change default location for your Windows 10 device.
That’s it!
![KapilArya.com is a Windows troubleshooting & how to tutorials blog from Kapil Arya [Microsoft MVP (Windows IT Pro)]. KapilArya.com](https://images.kapilarya.com/Logo1.svg)




![[Latest Windows 10 Update] What’s new in KB5055612? [Latest Windows 10 Update] What’s new in KB5055612?](https://www.kapilarya.com/assets/Windows10-Update.png)


Leave a Reply