To keep your system up-to-date, you’re recommended to install latest Windows Updates available to you. In Windows 10, updates are downloaded automatically, unless you’ve blocked them via Group Policy. Windows Update keeps working in background and automatically install the updates when your system remains idle. You can change settings for this in Settings app > Update & security > Windows Update > Update settings.
However, ‘Update settings‘ doesn’t gives you the option to configure Windows Update scheduled installation time. It only gives you the option configure scheduled restart time after Windows installs the update. So to configure Windows Update scheduled installation time, you need to change settings via Group Policy.
Here is the step-by-step process to configure Windows Update scheduled installation time in Windows 10. Since this is Group Policy based method, it is supposed to be work on earlier Windows editions such as Windows 8 & 7.
How To Schedule Windows Updates Installation In Windows 10
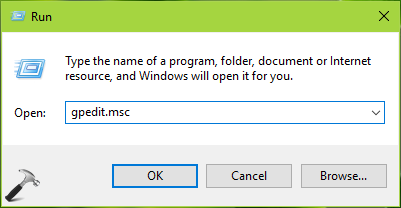
1. Press  + R and put gpedit.msc in Run dialog box to open Local Group Policy Editor. Click OK.

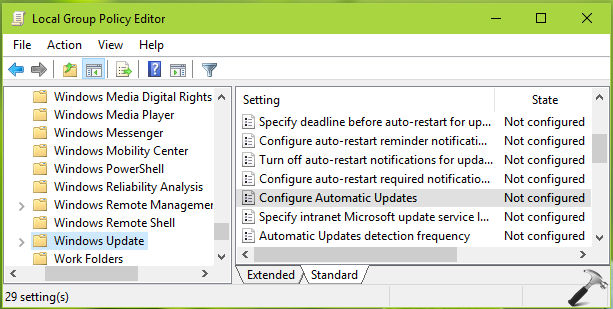
2. Next, in the GPO snap-in window, navigate here:
Computer Configuration > Administrative Templates > Windows Components > Windows Update

3. In the right pane, look for Configure Automatic Updates policy setting and double click on it to modify its status:

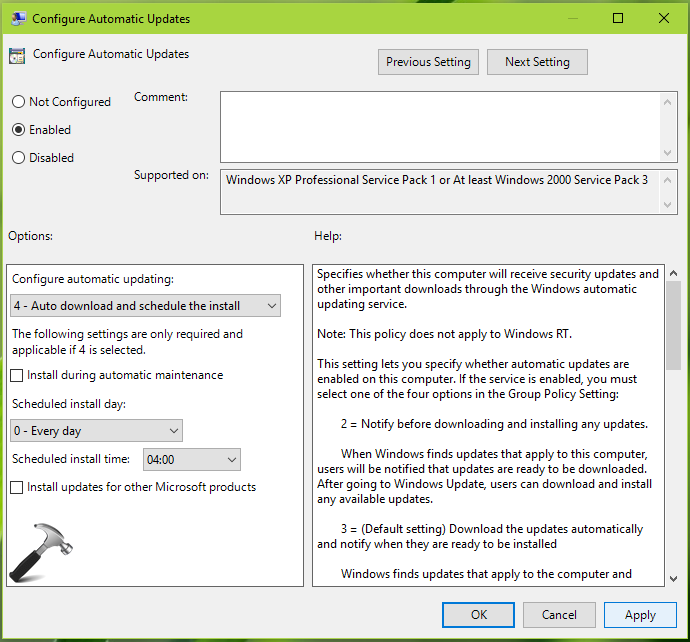
4. On the policy configuration window shown above, click Enabled. Then from Options, against Configure automatic updating, choose 4 – Auto download and schedule the install. Then you can choose the scheduled installation day and preferred installation time. Once you’re done with your choice, click Apply followed by OK. Close Local Group Policy Editor and reboot the machine to make changes effective.
In this way, you’ve scheduled Windows Update installation time in Windows 10.
That’s it!
![KapilArya.com is a Windows troubleshooting & how to tutorials blog from Kapil Arya [Microsoft MVP (Windows IT Pro)]. KapilArya.com](https://images.kapilarya.com/Logo1.svg)


![[Latest Windows 10 Update] What’s new in KB5055612? [Latest Windows 10 Update] What’s new in KB5055612?](https://www.kapilarya.com/assets/Windows10-Update.png)


2 Comments
Add your comment
Many thanks it worked a treat, saved me a big headache.
^^ Glad it helped 😎