We all know that drivers are quite important to Windows so that its features could work properly. Hence it is often recommended to users that they keep the system drivers up-to-date. For crucial system drivers, Windows automatically install the driver updates via Windows Updates, you can turn off this functionality here. In case if you’re looking for how-to manually update device drivers, check this guide.
However sometimes it may happen that a newer version of driver installed on the machine failed to work, while the earlier version of same driver worked flawlessly. In such a case you may feel the need to restore or roll back the driver to previous edition, which worked much better.
This guide will help you to illustrate how to make this possible, in few simple steps. Restoring the driver in Windows is same as restoring the system to earlier date using System Restore point.
Page Contents
How To Restore/Roll Back Driver To Previous Version In Windows 10/8.1/8/7
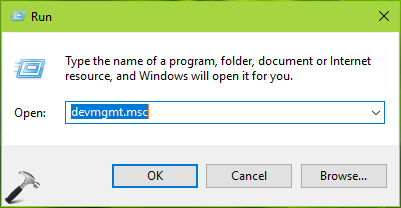
1. Press  + R and type devmgmt.msc in the Run, hit Enter key to open Device Manager snap-in.
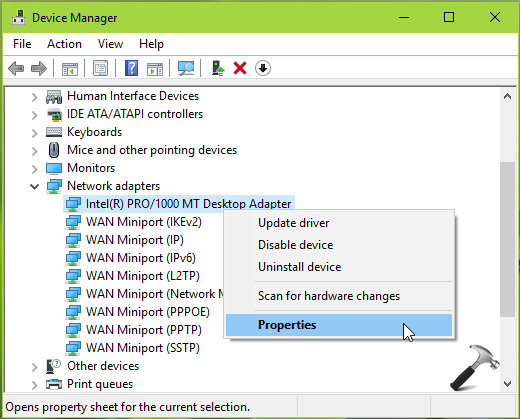
2. In the Device Manager window, right click on the driver you want to restore/roll back and select Properties.
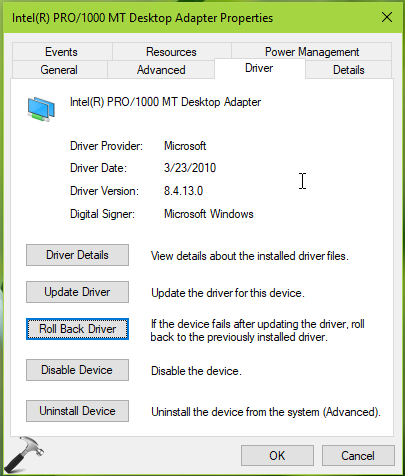
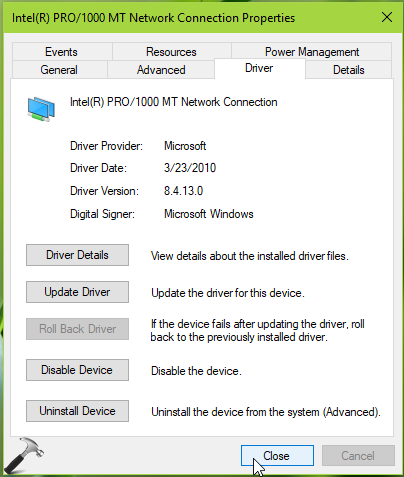
3. On the driver property sheet, switch to Driver tab. Click on the Roll Back Driver tab to restore the driver.
FYI: If you find the Roll Back Driver button greyed out, it means the driver exists in its initial version and is not eligible for restore operation.
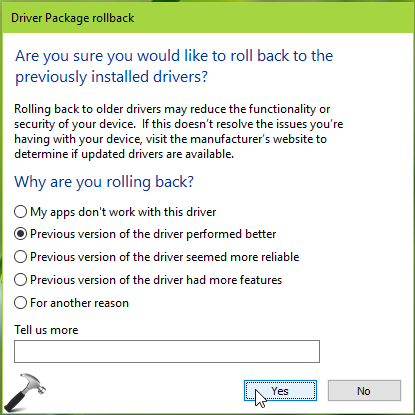
4. On the Driver Package rollback prompt, choose any option regarding why you’re performing roll back operation. Then hit Yes button and this should finally restore the driver to previous version.
Since the driver is now restored to initial version, the Roll Back Driver button will be automatically disabled.
So this is how you restore drivers to previous versions in Windows 10.
Check following video for live demo:
Hope you find the guide useful!
![KapilArya.com is a Windows troubleshooting & how to tutorials blog from Kapil Arya [Microsoft MVP (Windows IT Pro)]. KapilArya.com](https://images.kapilarya.com/Logo1.svg)


Leave a Reply