In Windows, each item has an owner and some permissions are assigned to that owner, so he/she can manage the item. Those permissions can be read, write, modify permissions. You can only change/access/modify an item if you’ve required permissions to do so. Usually, if you don’t have permissions for an item, you’re supposed to take ownership of that item and configure your favourable permissions.
While talking about taking ownership, there is a term called TrustedInstaller comes in between. What is this TrustedInstaller? Well, it is a special account that holds ownership for many of system files/folders, registry keys and individual objects. For example, WindowsApps folder in programs root directory of Windows 10, which contains many UWP app packages for different apps you, have TrustedInstaller as default owner. To modify any file in the specific app package, you might need to take ownership of WindowsApps folder. But while you restore ownership, you might not be able to find TrustedInstaller account. Because it a special built-in account, and not a standard user account. In this article, we’ll see how you can restore ownership to TrustedInstaller.
How To Restore Ownership To TrustedInstaller In Windows
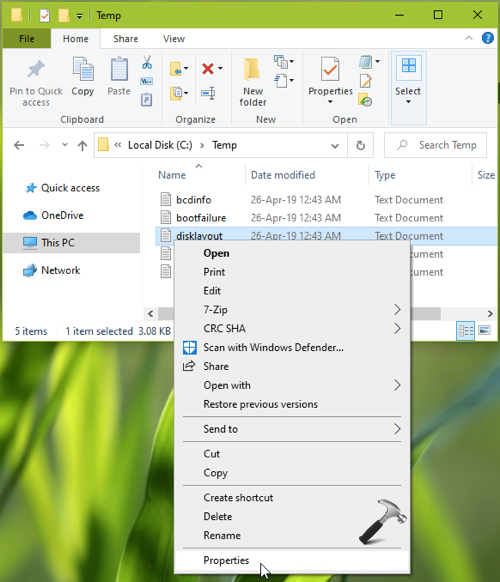
1. Right click on the file or folder for which you want to restore TrustedInstaller as owner and select Properties.
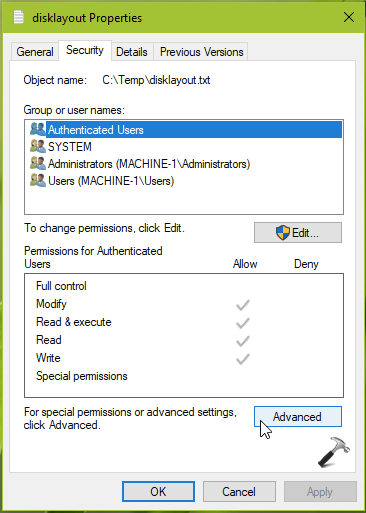
2. In the property sheet, switch to Security tab and click on Advanced button.
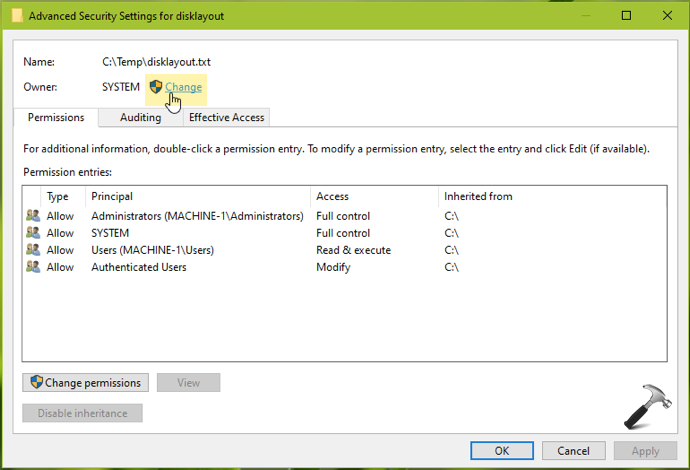
3. Moving on, in Advanced Security Settings window, click on Change link next to existing owner name.
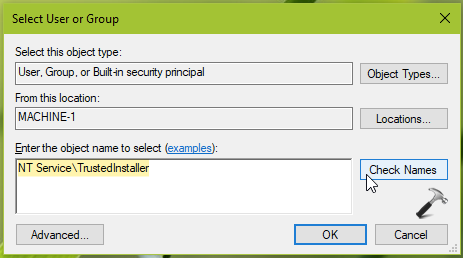
4. Now in Select User or Group, type NT Service\TrustedInstaller and click on Check Names button. The NT Service\TrustedInstaller should automatically convert to TrustedInstaller. Click OK.
5. So in the back window, we now have owner changed to TrustedInstaller. Now simply click Apply, OK, OK to save and apply these settings on the item.
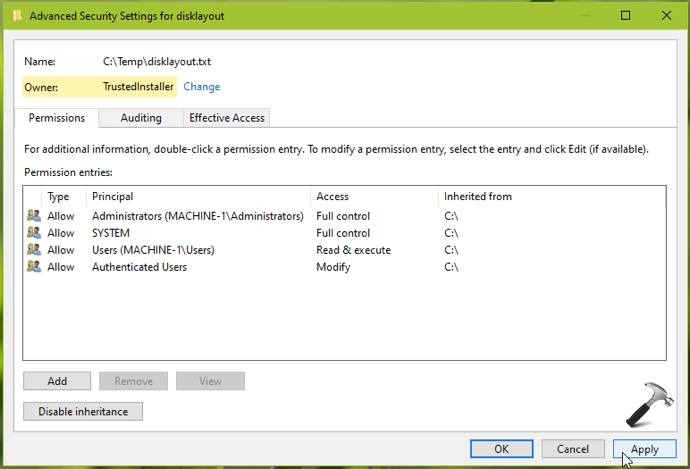
In this way, you can restore ownership for any item in Windows to TrustedInstaller.
That’s it!
![KapilArya.com is a Windows troubleshooting & how to tutorials blog from Kapil Arya [Microsoft MVP (Windows IT Pro)]. KapilArya.com](https://images.kapilarya.com/Logo1.svg)


![[Latest Windows 10 Update] What’s new in KB5055612? [Latest Windows 10 Update] What’s new in KB5055612?](https://www.kapilarya.com/assets/Windows10-Update.png)


Leave a Reply