If you are using network on your Windows system, it is never possible without the network adapter. A network adapter is basically the component of your machine’s internal hardware that is used for communicating over a network with another computer, server or the Internet. A network adapter could be wired or wireless. In this article, we’ll see how to reset network adapter in Windows 10.
So if you are facing some trouble with your network adapter, resetting it might help to fix the problem. You can try either of the methods mentioned below reset your network adapter.
Page Contents
How to reset network adapter in Windows 10
Method 1 – Using Device Manager
1. Right click Start Button or press  + X keys & select Device Manager.
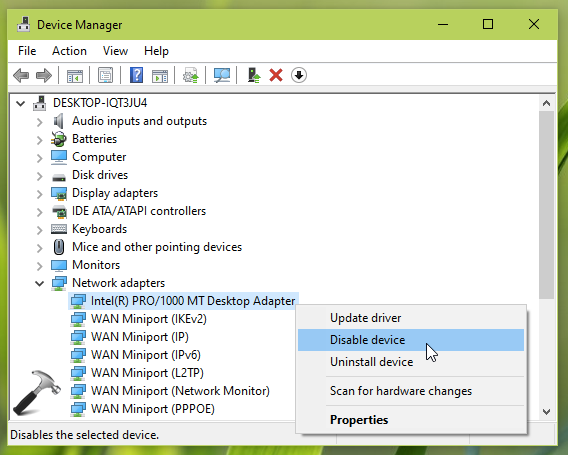
2. In the Device Manager window, expand Network adapters. Right click on the network adapter you want to reset and select Disable device.

3. After that, you will receive a confirmation from you confirm disabling that device. Click Yes to proceed.

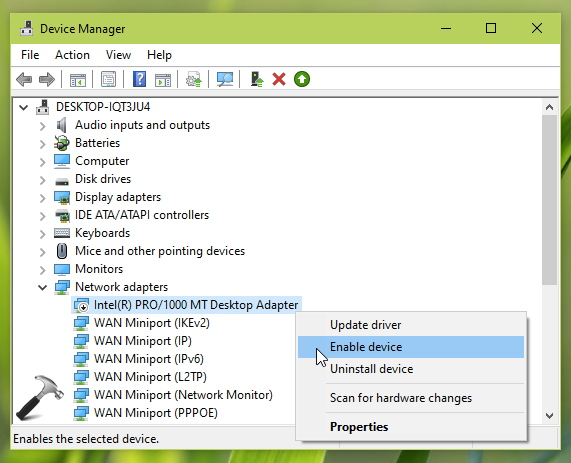
4. Once the device is disabled, the view of Device Manager will be refreshed. Now again, right click on the same network adapter and select Enable device this time.

That’s it, your network adapter is now reset. You will need to apply these same steps to each network adapter you want to reset.
If you want to reset all the network adapters at a time, you can refer to Method 2 mentioned next.
Method 2 – Using Settings app
1. Right click Start Button or press  + X keys & select Settings.
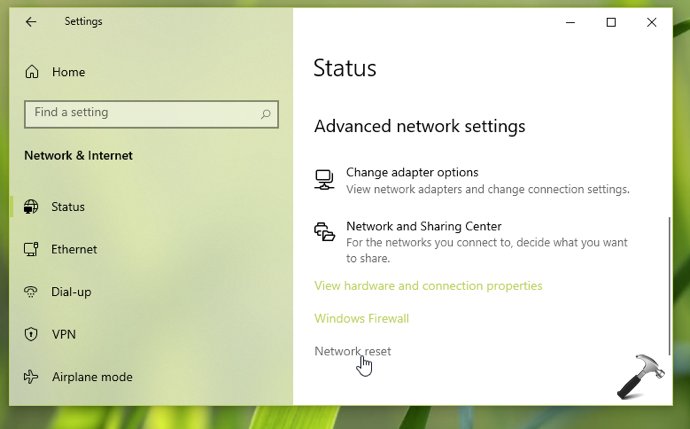
2. In Settings app, navigate to Network & Internet > Status.
3. In the right pane of Status, scroll down and locate, click the Network reset link.

4. In the next Network reset screen, you can click on Reset now button and this will initiate resetting all the network adapters along with network settings on your system.

Once this is done, you will need to restart your system. And in this way, all of your network adapters are now reset.
That’s it!
![KapilArya.com is a Windows troubleshooting & how to tutorials blog from Kapil Arya [Microsoft MVP (Windows IT Pro)]. KapilArya.com](https://images.kapilarya.com/Logo1.svg)


![[Latest Windows 10 Update] What’s new in KB5055612? [Latest Windows 10 Update] What’s new in KB5055612?](https://www.kapilarya.com/assets/Windows10-Update.png)


Leave a Reply