Would you also like to know about the fastest way to remove exclusions from Windows Defender? Well, this article is just perfect for you then!
For instance, if you have configured exclusion settings in Windows Defender or Microsoft Defender which enables certain files, folders, or processes to skip the scanning process, there may be times when you might want to revert this action. In the long run, exclusions may prove to be either unnecessary or dangerous, as each one may offer an opportunity for viruses to slip through. In this guide, you will learn how to easily remove the exclusions from Windows Defender on the Windows 11.
Page Contents
How to Remove Exclusions from Windows Defender
Method 1: Remove Exclusions from Windows Defender in Windows Security
The easiest method in which to remove these exclusions is through the Windows Security app which allows users to see and delete previously set exclusions.
1. Using the Windows key, press the Windows Logo + S, type “Windows Security” in the search and open the application. On the left side of the opened window, click on “Virus & Threat Protection”.
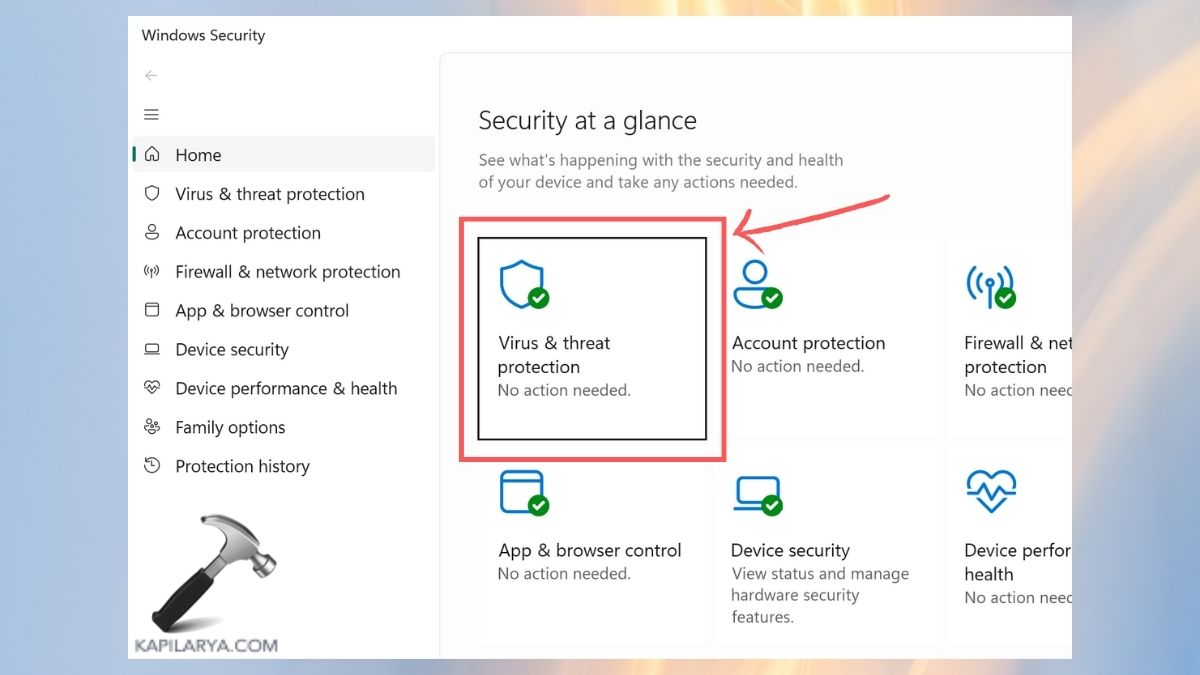
2. You are to go down and click on “Manage settings” under the Virus & Threat Protection settings.
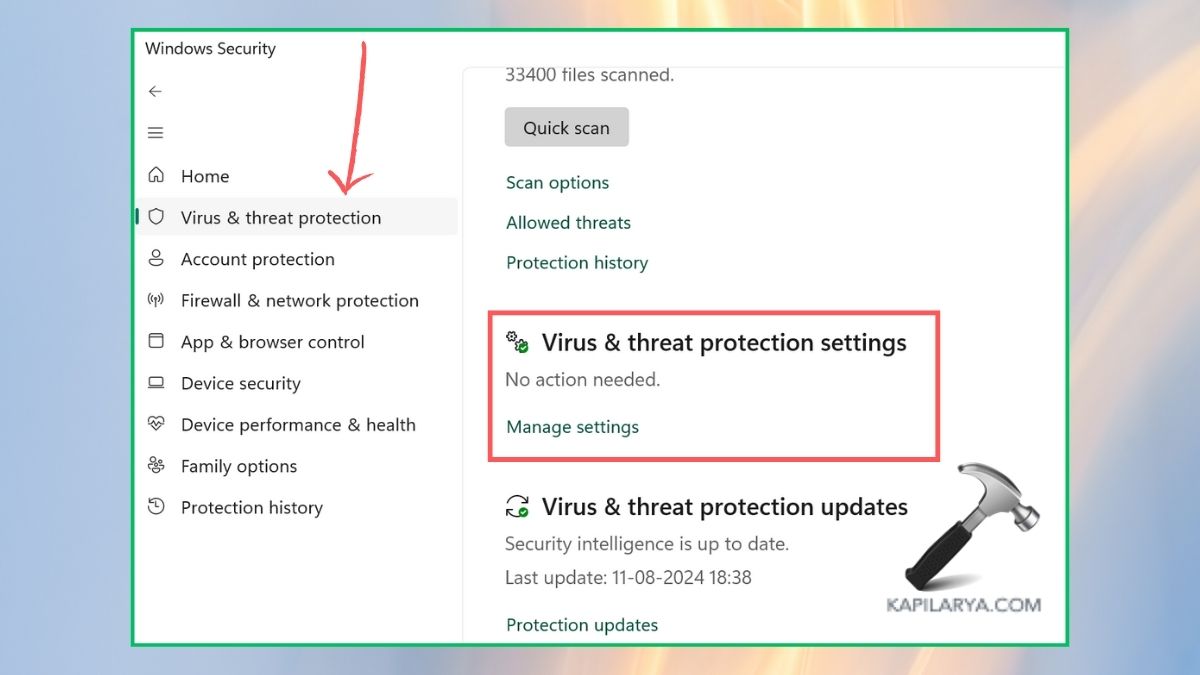
3. Scroll down more and click on “Add or remove exclusions”.
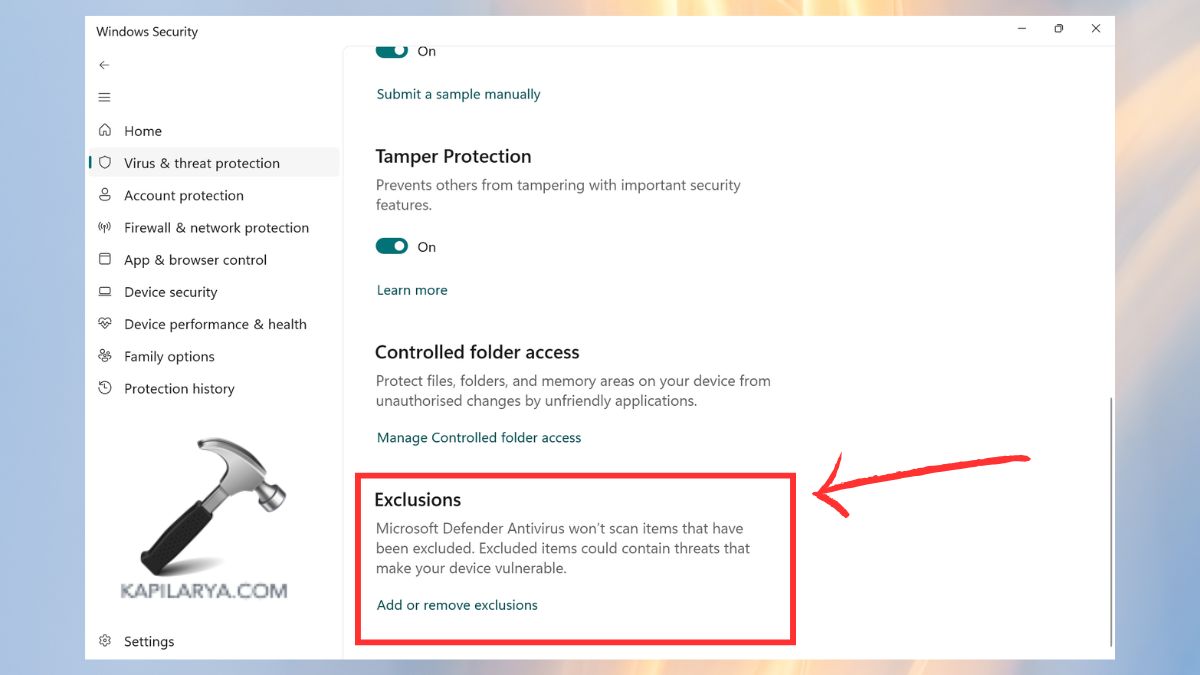
4. Here you will find all the exclusions of the current project. To remove any exclusion, simply click on it and hit the “Remove” button located at the bottom part of the web page.

Method 2: Remove File Exclusion Using PowerShell
If you feel easy to work with PowerShell, it can be used to easily and effectively remove file exclusions from Windows Defender. PowerShell also means that the exclusions for particular files can be deleted via command prompt commands.
1. Open the Start menu and use the Windows key, type Windows PowerShell, and right-click to choose the “Terminal (Admin)” option.

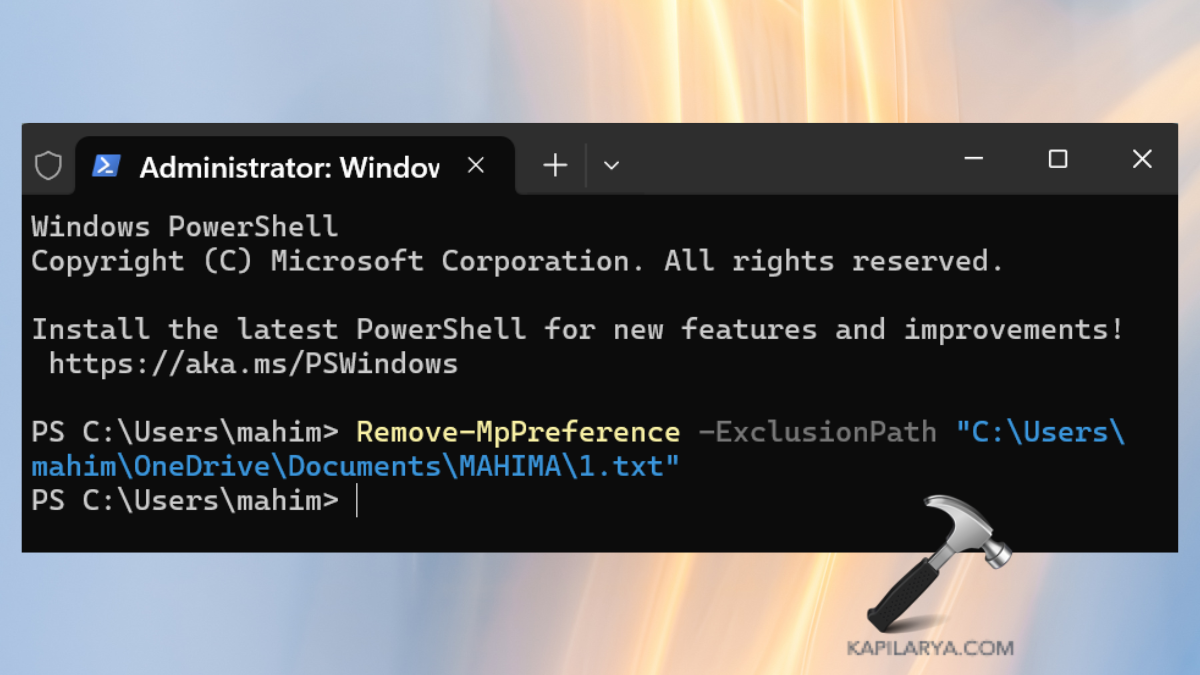
2. The following command can be used to remove a specific file exclusion-
Remove-MpPreference -ExclusionPath "" -Force
This command will delete the particular file from the list of exclusions of Windows Defender right away with regard to inclusion in the subsequent scans.
Method 3: Remove Folder Exclusion from Windows Defender Using PowerShell
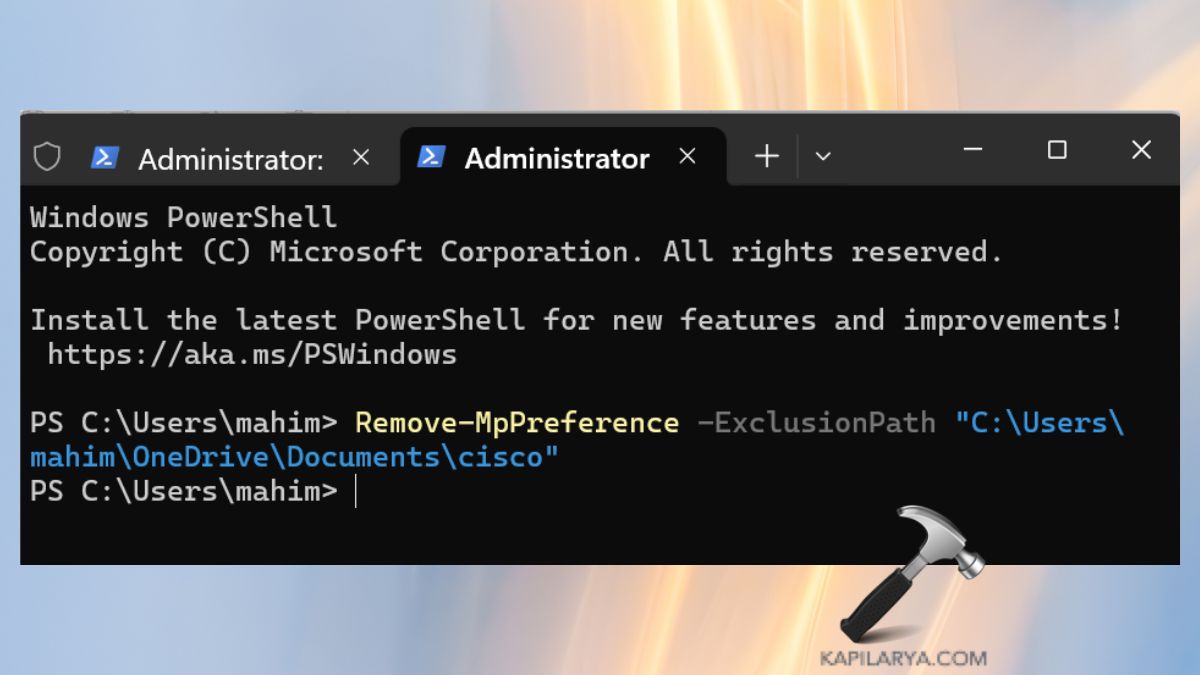
Similarly, to delete folder exclusions from the Microsoft Defender, you can do that through PowerShell. This is especially applicable where the folder contains some data or files that you would wish the scan to run again on.
1. Once more, open Terminal (Admin) as we did in previous operations and steps.
2. This command can be used to drop a folder exclusion-
Remove-MpPreference -ExclusionPath "C:\Path\To\Folder"
Method 4: Remove File Type Exclusion Using PowerShell
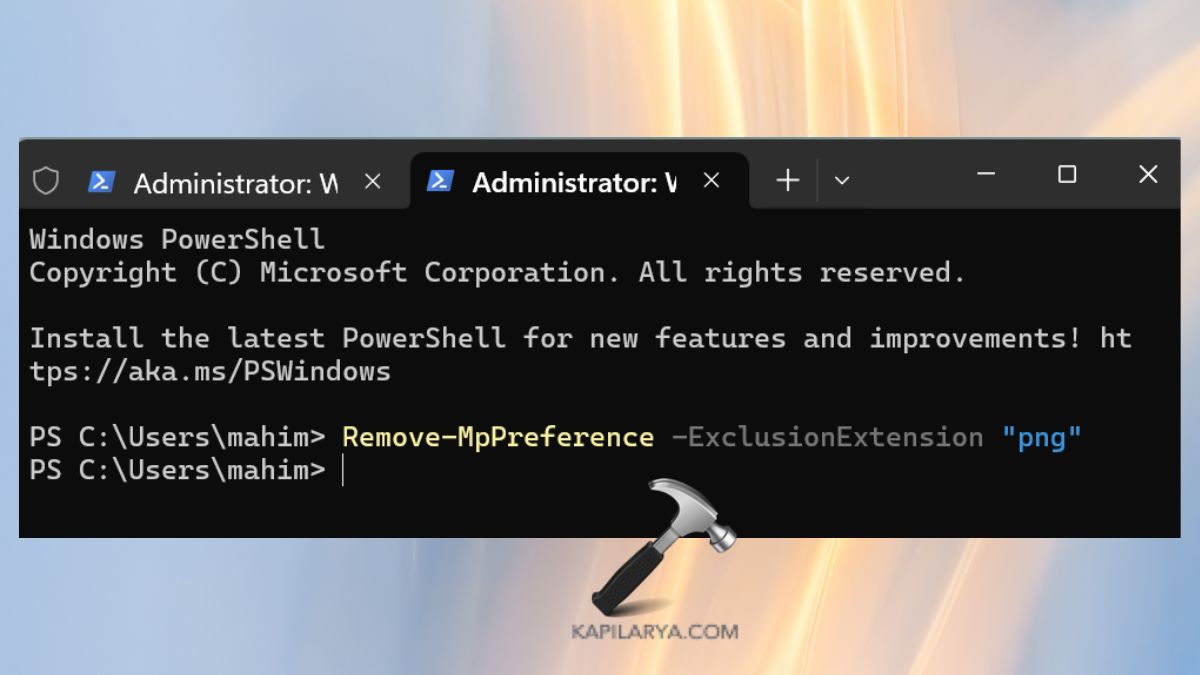
In cases where you have excluded certain extensions let’s say .exe or .pdf, it will help the Windows Defender improve the security by scanning through all the file types of such extension.
1. Open PowerShell same as before but with administrative access to it.
2. Use this command to delete an exclusion for a specific file type to remove all the protection for it from ease-
Remove-MpPreference -ExclusionExtension "fileextension"
Method 5: Remove Process Exclusion from Windows Defender Using PowerShell
Process exclusions help Windows Defender ignore specific programs or applications that could be detected by it. If in your case, you no longer need these exclusions, you can quickly get rid of them in PowerShell.
1. Do the same to open PowerShell in the administrator mode.
2. Use this command to uninstall an exclusion to a certain process-
Remove-MpPreference -ExclusionProcess "processname.exe"
Make sure to replace “processname.exe” with the exact name of the process you wish to remove.

Though, if you experience any error while performing any of these methods on how to remove exclusions from Windows Defender on Windows 11, leave a comment below so we can help you out.
That’s it!
![KapilArya.com is a Windows troubleshooting & how to tutorials blog from Kapil Arya [Microsoft MVP (Windows IT Pro)]. KapilArya.com](https://images.kapilarya.com/Logo1.svg)


![[Latest Windows 10 Update] What’s new in KB5055612? [Latest Windows 10 Update] What’s new in KB5055612?](https://www.kapilarya.com/assets/Windows10-Update.png)


Leave a Reply