Sometimes, it seems important to screen record on Windows 11 or Windows 10 PC. One can use screen recordings for many purposes. So, how to record your screen in Windows 11/10? Fortunately, Windows 11/10 come up several built-in utilities offering the screen recording feature.
In this post, we are going to discuss different screen recording ways in your Windows PC. So, let’s begin!
Page Contents
How to record your screen in Windows 11/10
Method 1: Record with Snipping tool
Snipping tool comes pre-installed with Windows 11 and great fit for this purpose.
1. Open Snipping tool app on your system. Click video icon.

2. In small window, click video icon again to start recording.

When you’re done, recording would be saved to your device.
Method 2: Record your screen with Xbox Game Bar
Windows PC features a built-in application called Xbox Game Bar. This tool allows you to record your Windows screen. Although this feature is mainly for gamers for recording gameplay clips, it can be used for recording the computer screen too. With Xbox Game Bar, users can record only one application at a time.
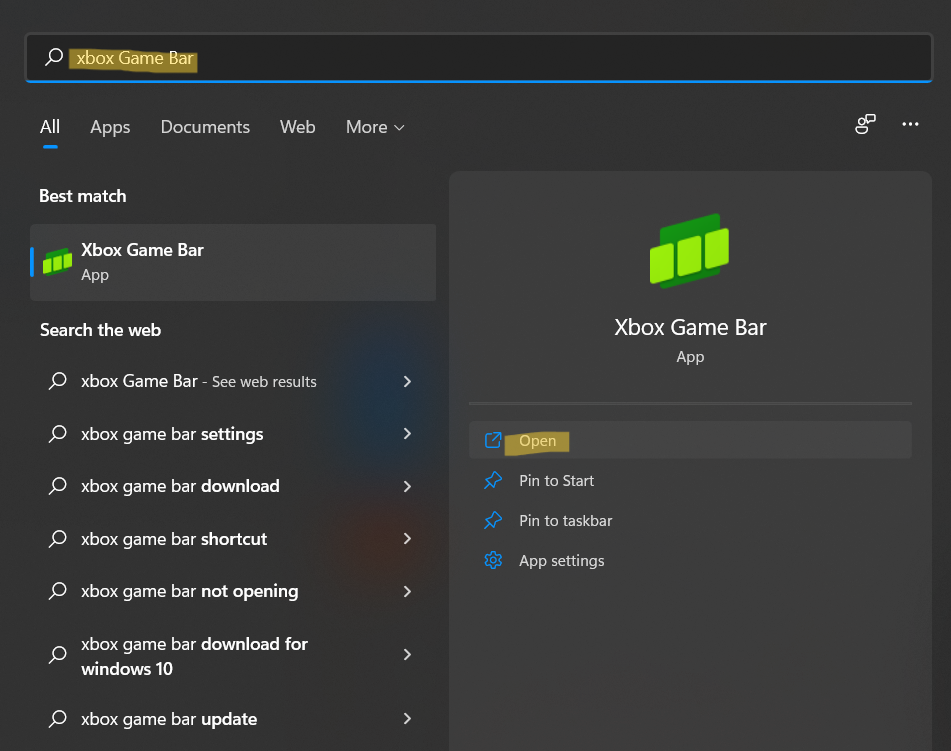
1. Open Xbox Game Bar from Search.

2. After that, click on the Record tab present on the upper-left corner.

3. Now, the screen recording will begin on your system.
4. To stop the recording, click on the Stop button.
Method 3: Record your screen with PowerPoint
PowerPoint also allows users to record their Windows screen in a slideshow form. To record it, follow the steps given below:
1. Open Microsoft PowerPoint and then, open a blank presentation.
2. Now, click on Insert and choose the Screen Recording option from Media.

3. Once done, you will get back to the last application you used. So, it is best to open the window that you want to record before you open PowerPoint.
4. Now, click on Select Area from the given options. Next, move the cursor over the area you like to record.

5. After that, click on the red-colored Record button for starting the recording.

6. Once finished, choose the blue-colored button for stopping the recording. If you cannot access the options, press Windows + Shift + Q tabs together to stop the recording.
Method 4: Record your screen with a Third-Party Tool
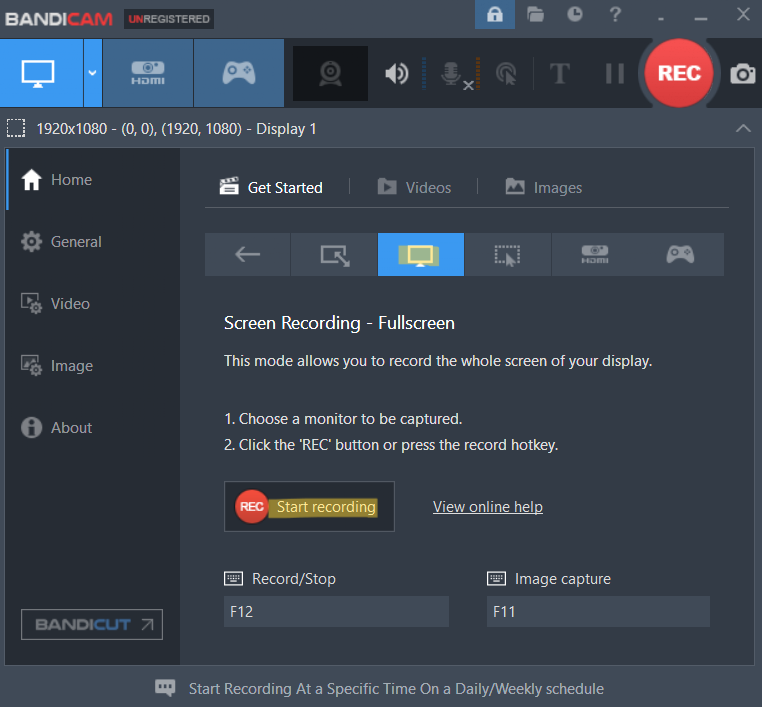
1. Download a third-party screen recorder on your system. There are many tools available online. Here, we are using Bandicam, which is available for free on the Internet at https://www.bandicam.com.
2. After downloading and installing the app, click on Record.

3. Once selected, you can select whether you can want to record a particular area or the entire screen.
4. After making the selection, click on Start Recording.

5. To stop the screen recording, click on Stop Recording.

So, this is how you can do screen recording in Windows 11/10. You can employ any of these methods to do screen recording hassle-free.
![KapilArya.com is a Windows troubleshooting & how to tutorials blog from Kapil Arya [Microsoft MVP (Windows IT Pro)]. KapilArya.com](https://images.kapilarya.com/Logo1.svg)


![[Latest Windows 10 Update] What’s new in KB5055612? [Latest Windows 10 Update] What’s new in KB5055612?](https://www.kapilarya.com/assets/Windows10-Update.png)


Leave a Reply