Diagnostic data is something that Microsoft collects from Windows 10 users, in order to improve their operating system. As per Microsoft, the collected diagnostic data is used in these ways:
- Keep Windows up to date
- Keep Windows secure, reliable, and performant
- Improve Windows – through the aggregate analysis of the use of Windows
- Personalize Windows engagement surfaces
Of course, users have complete control to allow or prevent telemetry, which is discussed in following article:
How to allow/prevent telemetry in Windows 10
Now this article talks about how you can manage the diagnostic data in your Windows 10. Microsoft has provided more UI settings for this, starting Windows 10 build 17083.
Page Contents
How To Manage Diagnostic Data In Windows 10
Manage Diagnostic Data Using Settings App
1. Right click Start Button or press  + X keys and select Settings.
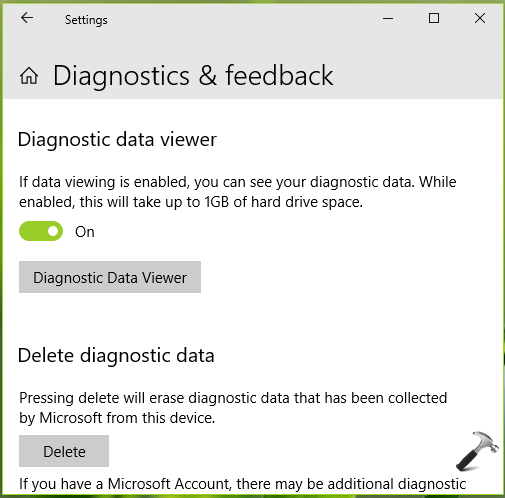
2. In the Settings app, navigate to Privacy > Diagnostics & feedback.

3. Under Diagnostic data viewer, turn On the option to enable data viewing. Then click/tap on Diagnostic Data Viewer button which takes you to the Diagnostic Data Viewer app in Microsoft Store. Click on Get button to download and install the app.

4. You can now use Diagnostic Data Viewer app to view diagnostic data sent to Microsoft from your Windows 10. It will also help you to understand, how Microsoft uses that data.
5. To erase the diagnostic data anytime, you can press Delete button under Delete diagnostic data heading (refer screenshot mentioned in step 2).
Manage Diagnostic Data Using Registry
You can below mentioned registry tweak to enable/disable Diagnostic data viewer on your Windows 10.
Registry Disclaimer: The further steps will involve registry manipulation. Making mistakes while manipulating registry could affect your system adversely. So be careful while editing registry entries and create a System Restore point first.
1. Press  + R and put regedit in Run dialog box to open Registry Editor (if you’re not familiar with Registry Editor, then click here). Click OK.

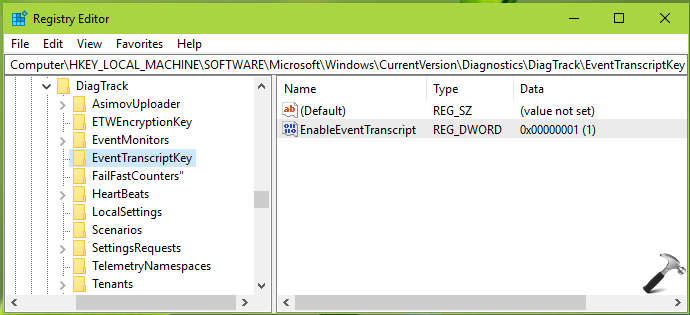
2. In left pane of Registry Editor window, navigate to following registry key:
HKEY_LOCAL_MACHINE\SOFTWARE\Microsoft\Windows\CurrentVersion\Diagnostics\DiagTrack\EventTranscriptKey

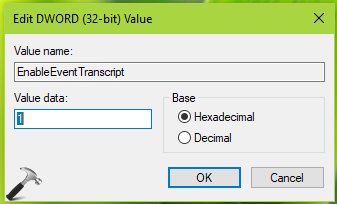
3. In the right pane of EventTranscriptKey registry key, create the registry DWORD (REG_DWORD) named EnableEventTranscript by right click in blank space and select New > DWORD Value. Double click on the DWORD to modify its Value data:

4. You can use 1 as Value data to enable Diagnostic data viewer, whereas 0 as Value data to disable Diagnostic data viewer. Click OK. Close Registry Editor and reboot the machine to make changes effective.
So this is how you can manage diagnostic data in Windows 10.
Hope you find the article useful!
![KapilArya.com is a Windows troubleshooting & how to tutorials blog from Kapil Arya [Microsoft MVP (Windows IT Pro)]. KapilArya.com](https://images.kapilarya.com/Logo1.svg)


Leave a Reply