Windows 11 comes in various editions, such as Windows 11 Enterprise, Windows 11 SE for Education, Windows 11 Education, Windows 11 in S Mode, Windows 11 Pro for Workstations, Windows 11 Pro and Windows 11 Home. It really helps if you know the edition of Windows 11 installed on your system. This provides you with knowledge about the features available to you. So, let’s have a look at how to find out installed Windows 11 edition using different ways!
Page Contents
How to Find Out Installed Windows 11 Edition
Here are some of the easiest methods to check out the edition of Windows 11 installed on your Windows PC:
Method 1: Check Windows 11 Edition Through Settings
Using Settings, users can check the edition of Windows 11 installed on their Windows system in the following manner:
1. Visit Settings by pressing Windows + I hotkey.
2. Next, click on System and then, select the About tab present on the right.
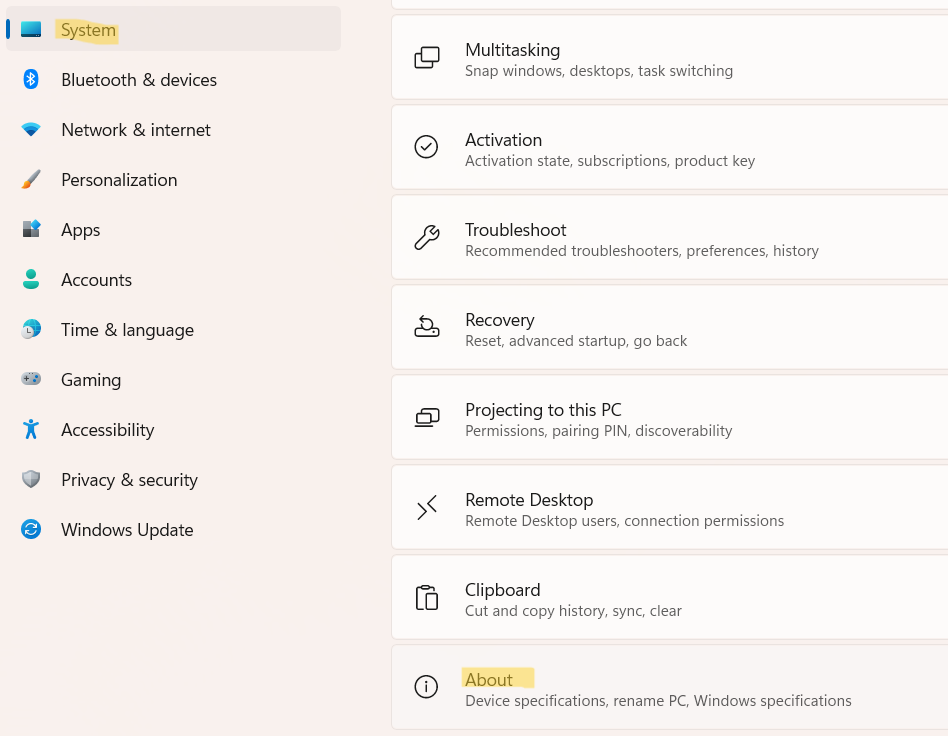
3. Under Windows specifications, check the Edition field to know about the installed Windows 11 edition.

Method 2: Find Out Installed Windows 11 Edition Through About Windows
1. Firstly, open About Windows through the Run dialog box. To do so, type winver.exe or simply winver in the Run dialog box.

2. In the next window, you will able to see the Windows edition installed on your Windows PC.

Method 3: See Windows 11 Edition Installed Through Windows Terminal
1. In the first place, open Windows Terminal. After that, choose either Command Prompt or Windows PowerShell.
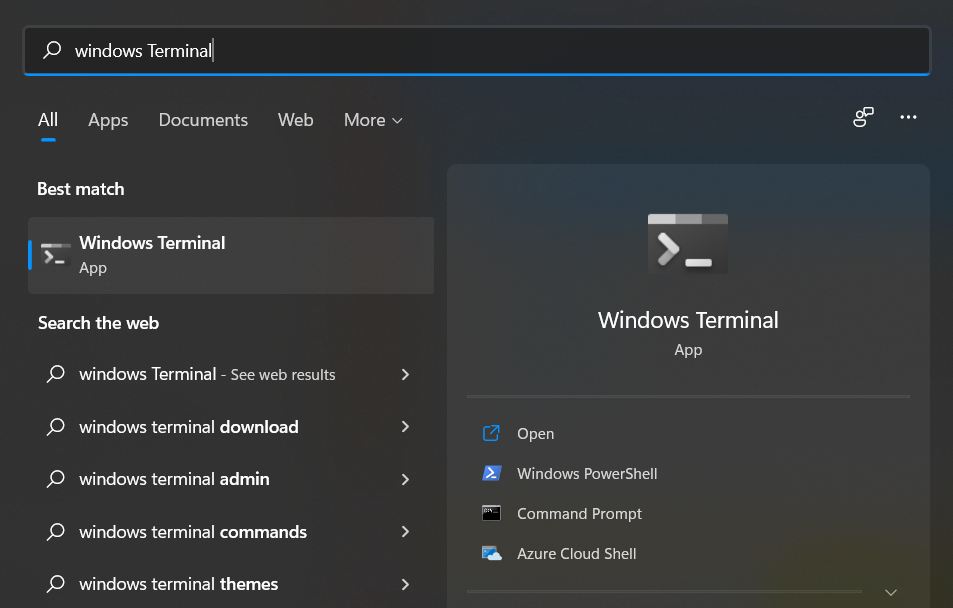
2. Now, copy-paste the following command and press Enter.
systeminfo | findstr /B /C:"OS Name"

Now, you will be able to see the Windows 11 edition installed on your system.
Method 4: Check Which Edition Is Installed Through System Information
1. To open System Information, open Run and type msinfo32.

2. From there, click on the System Summary tab and check out the OS Name.

So, these are some ways that which users can employ to find out installed Windows 11 edition on Windows systems.
![KapilArya.com is a Windows troubleshooting & how to tutorials blog from Kapil Arya [Microsoft MVP (Windows IT Pro)]. KapilArya.com](https://images.kapilarya.com/Logo1.svg)




![[Latest Windows 10 Update] What’s new in KB5055612? [Latest Windows 10 Update] What’s new in KB5055612?](https://www.kapilarya.com/assets/Windows10-Update.png)


Leave a Reply