Voice access is a new feature that allows you to control your Windows 11 and author text using your voice. For opening and switching between apps, browsing the web, and reading and authoring mail, you can use the Voice access feature. This feature leverages modern, on-device speech recognition to accurately recognize speech and is supported without an Internet connection. However, you’ll need the Internet connection to setup this feature. In this guide, we’ll see how to enable Voice access in Windows 11.
Microsoft added Voice access feature to Windows 11 starting with Preview Build 22518. As of this writing, this feature is in testing and is expected to improve in upcoming builds. Here’s how you can enable Voice access in your Windows 11.
How to enable Voice access in Windows 11
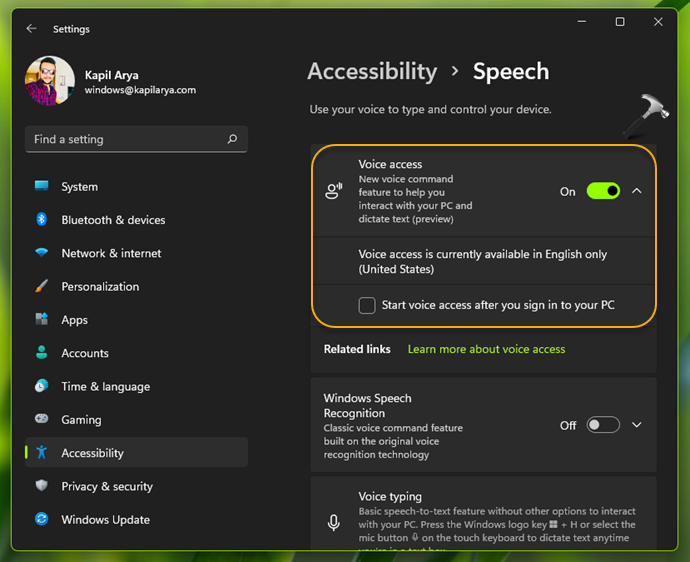
1. Press  + I keys to open Settings app.
2. Go to Accessibility. In the right pane, click on Speech.

3. Under Speech, for the Voice access, turn On the respective option to enable the feature.

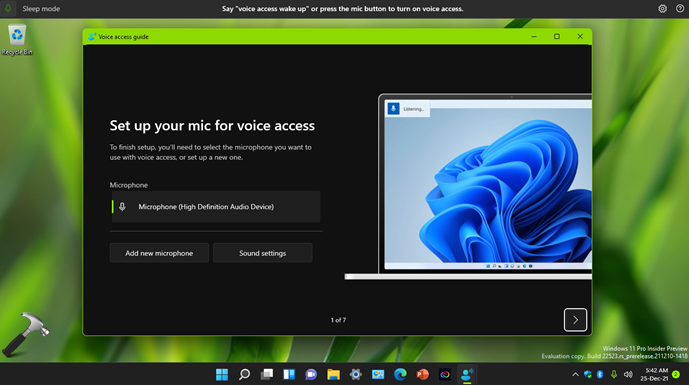
4. After that, you will be able to see Voice access being setting up. You need to make sure that you remain connected to the Internet for the set up to be completed.

5. Once the setup has been completed, you will see the Voice access guide. On the first screen, you can select the microphone you would like to use. In case if you want to skip this guide, you can click on Skip guide on second screen.

6. At the final window of this Voice access guide, you should be able to view Voice access commands. These commands will be very helpful to operate this feature efficiently.

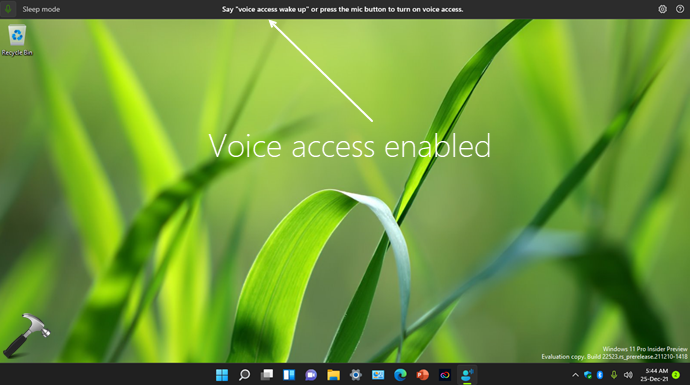
7. Finally, the Voice access feature is now enabled and is ready to use. You can try any of the Voice access command to start using this feature.

To turn off Voice access, click on the settings gear icon at top right corner, and select Turn off Voice access.
That’s it!
Related: Allow Desktop apps to use microphone in Windows 11.
![KapilArya.com is a Windows troubleshooting & how to tutorials blog from Kapil Arya [Microsoft MVP (Windows IT Pro)]. KapilArya.com](https://images.kapilarya.com/Logo1.svg)


Leave a Reply