Microsoft has introduced the Timeline feature to Windows 10, since its build 17063. Timeline, also known as Activity Feed, will display the collected user activities on Windows 10 Task View screen. As of today, Microsoft is expected to roll out Windows 10 V1803 in some upcoming weeks. Timeline will be one of the biggest feature of the V1803 release.
However, the Timeline feature needs to be enabled from the user side as it is disabled by default. Timeline has been introduced for the convenience of users, to track their past activities in a simplified way. This aim of this article is to show you how to enable the Timeline feature on your Windows 10 and use it.
So without wasting the time anymore, let us see the how-to part:
How To Enable Timeline In Windows 10
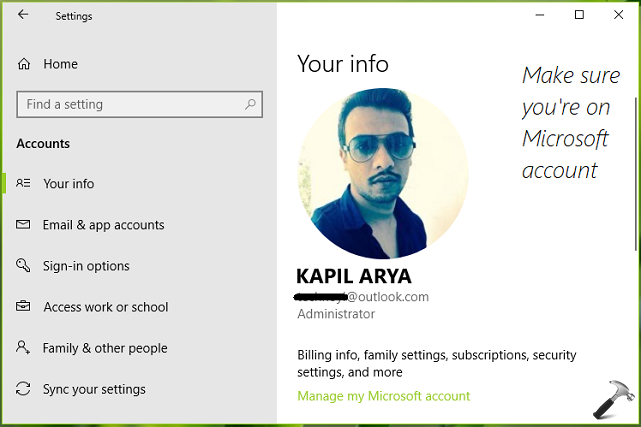
1. First of all, make sure you’re on Microsoft account. Following guide illustrates the steps to convert local account into Microsoft account:
Steps to switch to Microsoft account in Windows 10

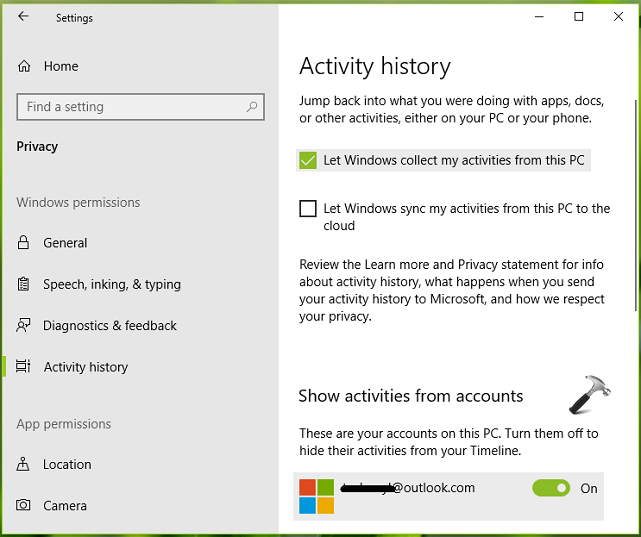
2. Then in the Settings app, navigate to Privacy > Activity history. In the right pane of Activity history, enable Let Windows collect my activities from this PC option. Then under Show activities from accounts heading, turn On the email account from which you want to show activities on the Timeline.

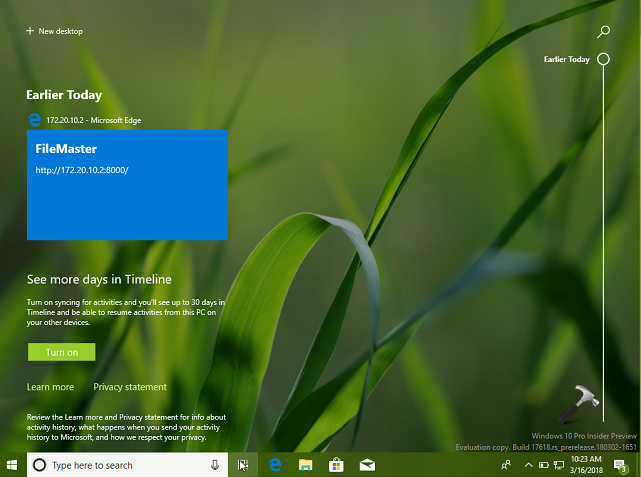
3. Close Settings app and return back to the Desktop. Click on Task View button and you should be able view the Timeline now. Note that initially Timeline would need some time to collect your activities and show them. So once you enabled Timeline, you can give it some time such as a day or more and you can enjoy timeline with more activities and in a better view.

So this is how you can enable and use Timeline in Windows 10.
Hope you find the Timeline feature useful!
Read next: Fix for Timeline not working in Windows 10 V1803 or later.
![KapilArya.com is a Windows troubleshooting & how to tutorials blog from Kapil Arya [Microsoft MVP (Windows IT Pro)]. KapilArya.com](https://images.kapilarya.com/Logo1.svg)


Leave a Reply