Have you ever been concerned or worried about unknown apps using the camera of your device? Or, have you ever found it difficult while connecting through Teams video calls, recording videos or taking pictures in your Windows 11 device? If yes, then you can conveniently follow the below mentioned methods to enable or disable camera in Windows 11 of your device. After using any of these methods your device will either turn on its camera light or will send you a notification to let you know whenever the camera turns on or off.
Page Contents
How to enable or disable camera in Windows 11
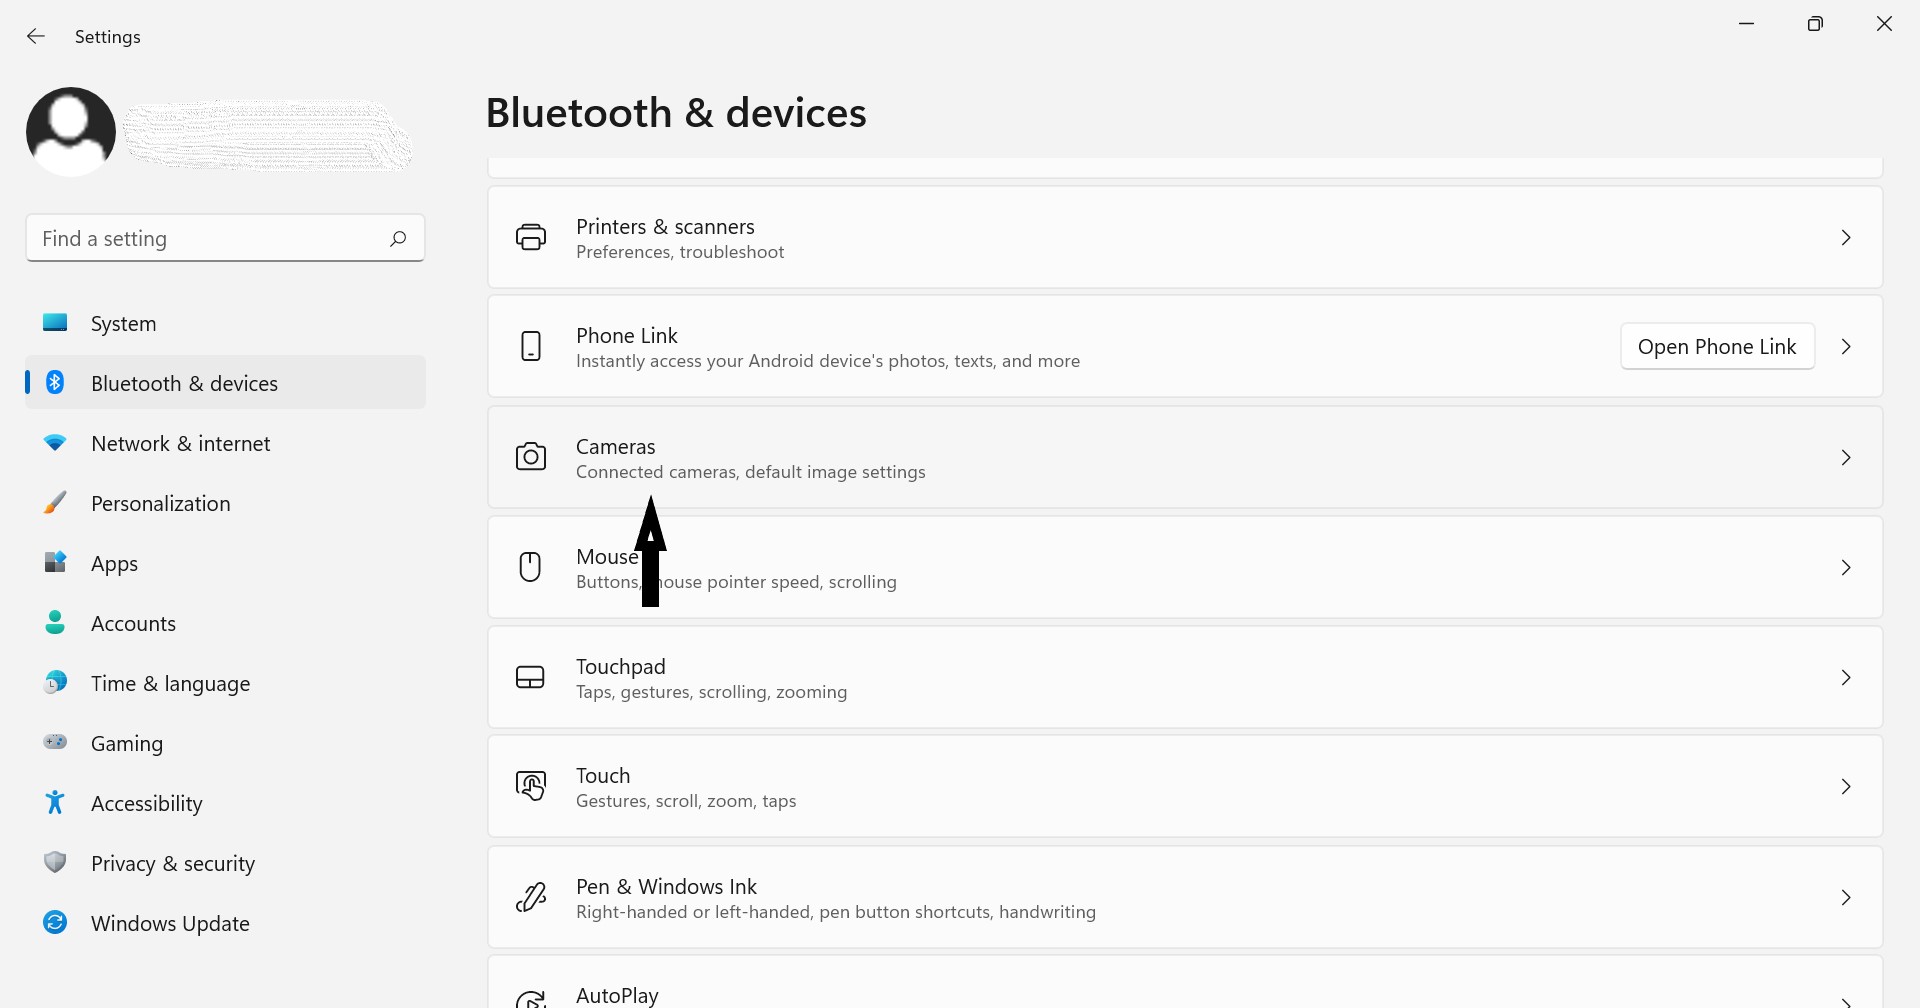
Method 1: Using Settings to enable or disable camera in Windows 11
1. Open Settings directly or by pressing Windows + I keys together.
2. Select Bluetooth & devices from the left pane.
3. Click on Camera from the right side.

4. Now, you can either enable the disabled camera or select a particular camera you wish to disable, followed by pressing disable.
5. Press Ok to confirm the changes.
Method 2: Using Kill Switch
For this method you can conveniently toggle on or off the privacy camera Kill Switch based on your device (refer screenshot below).

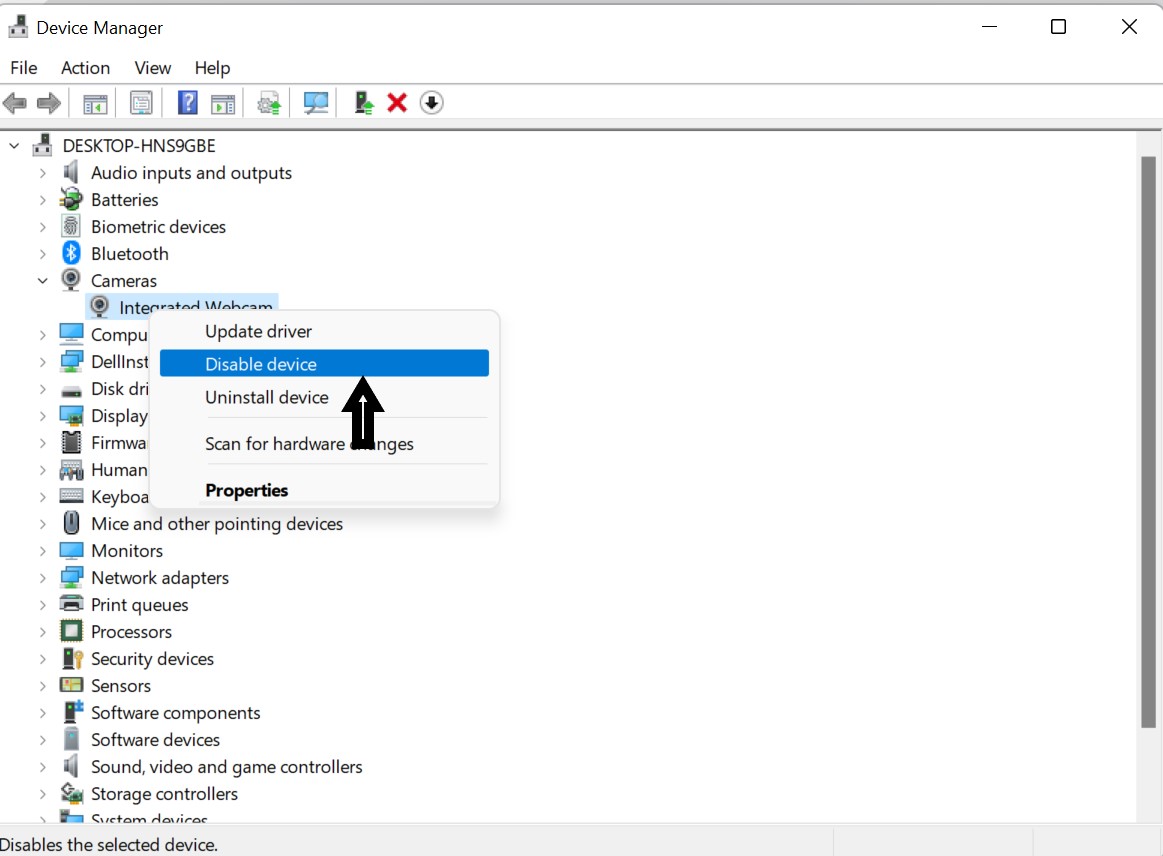
Method 3: Using Device Manager
1. Open the Drive Manager of your device.
2. Follow these steps if you wish to Enable camera of your device.
- Start by expanding Camera or Imaging devices.
- Now, right click on the camera device you want to enable, followed by pressing on Enable device.
3. Follow these steps if you wish to Disable camera of your device.
- Start by expanding Camera or Imaging devices.
- Now, right click on the camera device you want to disable, followed by pressing on Disable device.

4. Click on Ok to complete the process of either enabling or disabling the camera.
The selection and use of any of these methods will help the user with swift enable or disable camera in Windows 11 of your device.
![KapilArya.com is a Windows troubleshooting & how to tutorials blog from Kapil Arya [Microsoft MVP (Windows IT Pro)]. KapilArya.com](https://images.kapilarya.com/Logo1.svg)


Leave a Reply