To keep running your computer smoothly, Windows keeps performing maintenance tasks on its own. This is known as Automatic Maintenance which is enabled by default and perform maintenance tasks, when system is idle.
The maintenance tasks may include software updates, complete security scanning of the operating system and system diagnostics. If Automatic Maintenance is disabled, you need to perform each of these operations individually. In case if your system is not idle when Windows attempts to perform Automatic Maintenance, it will logically shift the maintenance tasks to next time, when it finds your system idle. Automatic Maintenance can only be operated with administrative user account.
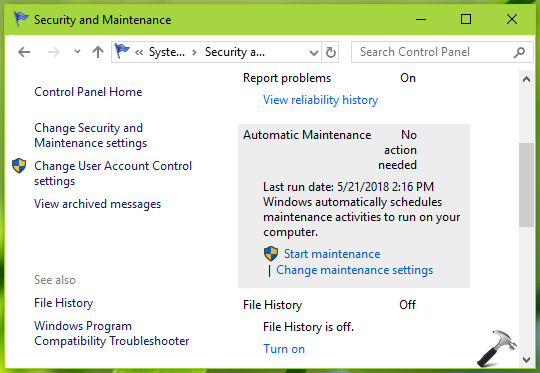
You can change Automatic Maintenance settings and specify a time when Windows should perform it. For this, go to Control Panel > System and Security > Security and Maintenance > Change Maintenance settings and select your preferred time to run maintenance tasks. You can also start the maintenance at your own by clicking Start Maintenance, when you find it needful.

Here’s how you can enable or disable – in short manage Automatic Maintenance feature in Windows 10.
How To Enable/Disable Automatic Maintenance In Windows 10
Registry Disclaimer: The further steps will involve registry manipulation. Making mistakes while manipulating registry could affect your system adversely. So be careful while editing registry entries and create a System Restore point first.
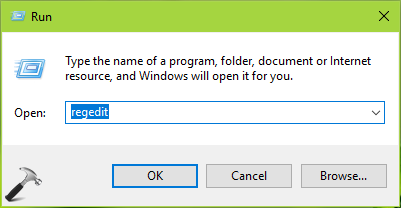
1. Press  + R and put regedit in Run dialog box to open Registry Editor (if you’re not familiar with Registry Editor, then click here). Click OK.

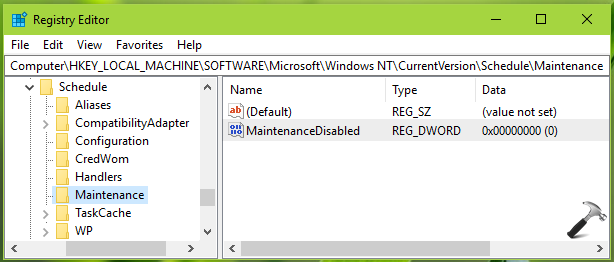
2. In left pane of Registry Editor window, navigate to following registry key:
HKEY_LOCAL_MACHINE\SOFTWARE\Microsoft\Windows NT\CurrentVersion\Schedule\Maintenance

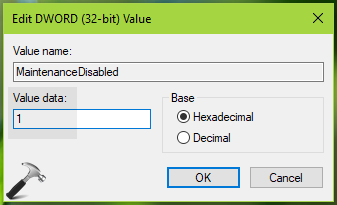
3. Now in the right pane of Maintenance registry key, right click and select New > DWORD Value. Name the newly created registry DWORD (REG_DWORD) as MaintenanceDisabled. Double click to modify the DWORD’s Value data:

4. Finally, set the Value data to 1 to disable Automatic Maintenance. Click OK. Close Registry Editor and reboot to make changes effective.
To enable Automatic Maintenance later, simply set the MaintenanceDisabled DWORD to Value data 0 or delete it.
That’s it!
Related: How to enable or disable maintenance messages for Windows 10.
![KapilArya.com is a Windows troubleshooting & how to tutorials blog from Kapil Arya [Microsoft MVP (Windows IT Pro)]. KapilArya.com](https://images.kapilarya.com/Logo1.svg)


Leave a Reply