When you upgrade Windows 10 from existing version to newer version, you can downgrade within 10 days after completing update. You can follow our guide to go back to your previous Windows 10 version:
How To Downgrade Windows 10 To Earlier Windows Edition
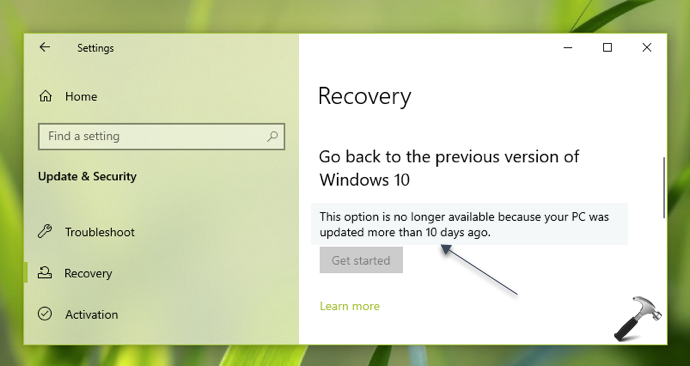
However, when you opt to downgrade after 10 days of your upgrade, you can’t. The option to go back is greyed out with following mentioned:
Page Contents
This option is no longer available because your PC was updated more than 10 days ago.

This option may also be greyed out, even before 10 days, if you deleted previous version files. Those files are located in Windows.old folder. For rollback to earlier version, those files play prime role.
So if still have previous version file but you want downgrade after 10 days, here is how you can. In this article, we’ll use DISM command-line tool to extend the limit for downgrade period. Hence you can set this limit to even 30 days. Let’s check out how to make it possible.
How To Downgrade Windows 10 After 10 Days
1. Right click Start Button or press  + X keys and select Command Prompt (Admin) to open Command Prompt as administrator.
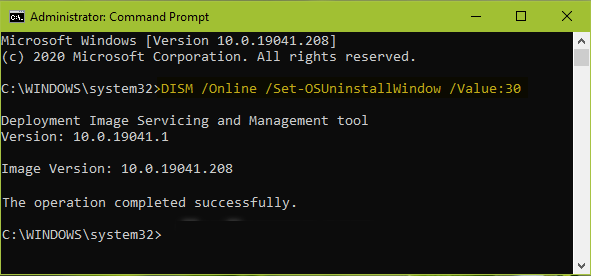
2. Type following command and press Enter key:
DISM /Online /Set-OSUninstallWindow /Value:<days>
*Replace <days> with actual number of days limit you want to set for downgrade.

3. Once you received ‘The operation completed successfully‘ message, you’ve extended the limit for downgrade. Close Command Prompt and return to Desktop.

![KapilArya.com is a Windows troubleshooting & how to tutorials blog from Kapil Arya [Microsoft MVP (Windows IT Pro)]. KapilArya.com](https://images.kapilarya.com/Logo1.svg)


![[Latest Windows 10 Update] What’s new in KB5055612? [Latest Windows 10 Update] What’s new in KB5055612?](https://www.kapilarya.com/assets/Windows10-Update.png)


Leave a Reply