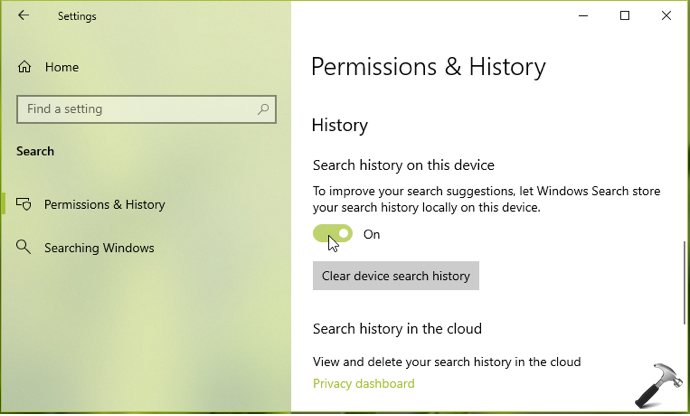
With Windows 10 Version 1903, Microsoft separated Windows Search and Cortana. So in the later versions, Windows Search is managed independently. This has opened doors to new settings regarding search. If you’re looking to disable and remove search history from your Windows 10 machine, this article is for you.
In Windows 10 V1903 or later, you can easily disable the search history using dedicated setting. Additionally, you can also disable it using the registry manipulation. Both the methods are mentioned below, try them as per your convenience.
Page Contents
How To Disable Search History In Windows 10
Method 1 – Using Settings App
1. Right click Start Button or press  + X keys and select Settings.
2. In the Settings app, navigate to Search > Permissions & History.

3. Then in right pane of Permissions & History, under Search history on this device, turn Off the option to disable search history.
4. Your settings should be saved and applied, so you can now close Settings app.
Method 2 – Via Registry Editor
1. Press  + R and type
 regedit in Run dialog box to open Registry Editor (if you’re not familiar with Registry Editor, then click here). Click OK.
2. In left pane of Registry Editor window, navigate to following registry key:
HKEY_CURRENT_USER\SOFTWARE\Microsoft\Windows\CurrentVersion\SearchSettings

3. At this registry location, in the right pane of SearchSettings registry key, look for registry DWORD (REG_DWORD) named IsDeviceSearchHistoryEnabled. It might be set to 1, by default. Double click on it to modify the value.

4. Set the Value data to 0 to disable search history in Windows 10. Click OK.
5. Close Registry Editor and reboot the machine to make changes effective.
That’s it!
![KapilArya.com is a Windows troubleshooting & how to tutorials blog from Kapil Arya [Microsoft MVP (Windows IT Pro)]. KapilArya.com](https://images.kapilarya.com/Logo1.svg)


Leave a Reply