We all know that OneDrive is closely integrated into Windows 10. Microsoft has made efforts to reduce complexity so that users can easily use OneDrive feature. As soon as you install Windows 10, you’ll notice OneDrive sync icon in the taskbar. This is actually because OneDrive starts as soon as you start the system.
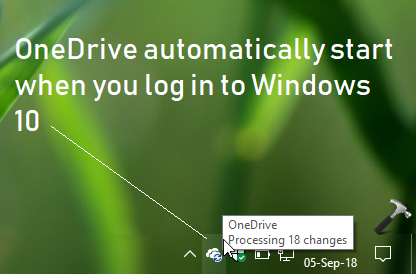
Whether you’ve linked your system to OneDrive or not, it starts automatically after the logon. After linking your system to OneDrive, sometimes you may also notice that system is slow at startup, as OneDrive is syncing.
So if you want to disable OneDrive at Windows 10 startup, here’s how to do this.
Page Contents
How To Disable OneDrive At Startup In Windows 10
Method 1 – Via OneDrive Settings
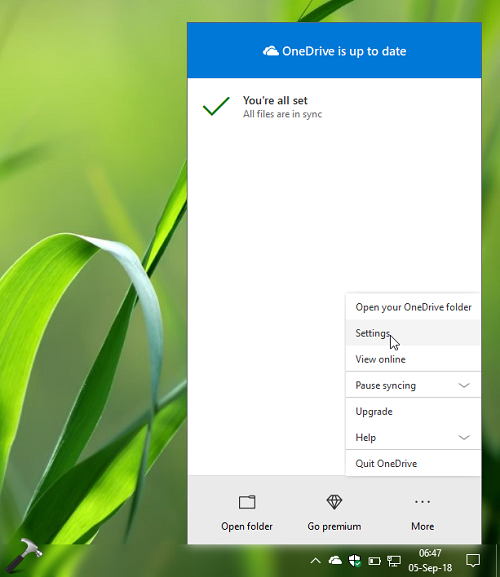
1. Right click on OneDrive icon at taskbar. Then click/tap on Settings option.
2. In the Microsoft OneDrive window, under Settings, uncheck Start OneDrive automatically when I sign in to Windows option. Click OK.
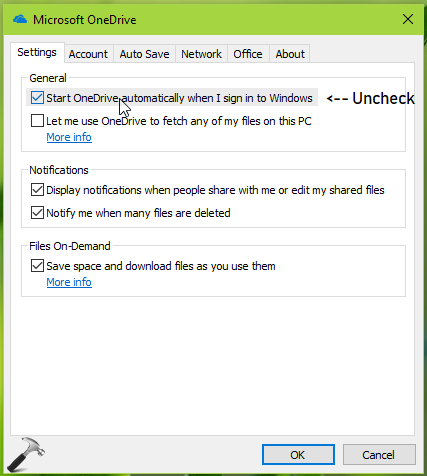
This should disable OneDrive at startup. You can reboot the system to check.
Method 2 – Via Registry
Registry Disclaimer: The further steps will involve registry manipulation. Making mistakes while manipulating registry could affect your system adversely. So be careful while editing registry entries and create a System Restore point first.
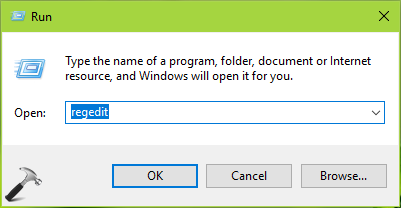
1. Press  + R and put regedit in Run dialog box to open Registry Editor (if you’re not familiar with Registry Editor, then click here). Click OK.
2. In left pane of Registry Editor window, navigate to following registry key:
HKEY_CURRENT_USER\SOFTWARE\Microsoft\Windows\CurrentVersion\Run
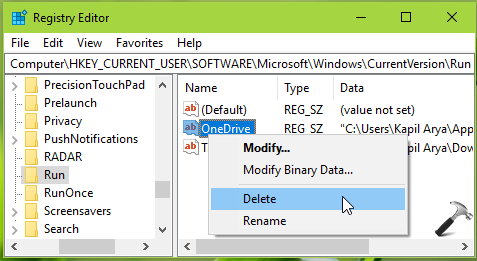
3. Now in the right pane of Run registry key, you might see OneDrive named registry string (REG_SZ). This registry string allows OneDrive to run at startup in Windows 10. Right click on the registry string and select Delete. Select Yes on the confirmation prompt shown below:

Once the registry string is deleted, reboot the machine to make changes effective.
After restarting your system, you’ll find that OneDrive is no longer starting with Windows.
That’s it!
![KapilArya.com is a Windows troubleshooting & how to tutorials blog from Kapil Arya [Microsoft MVP (Windows IT Pro)]. KapilArya.com](https://images.kapilarya.com/Logo1.svg)




![[Latest Windows 10 Update] What’s new in KB5055612? [Latest Windows 10 Update] What’s new in KB5055612?](https://www.kapilarya.com/assets/Windows10-Update.png)


Leave a Reply