We all know that dump files in Windows are helpful for analysis of system crashes/failures. Earlier, we’ve shared you following article regarding dump files:
How To Allow Or Prevent Windows 10 To Create Dump Files
If your system is low on disk space, Windows will automatically delete memory dumps. Memory dump files may sometimes grow to a larger size. The size of these dump files are dependent upon size of paging file and the type of dumps you’ve allowed as mentioned in above linked guide.
So if you come to a situation when you system is low on disk space but you still need memory dumps for crash analysis, you can try below mentioned registry manipulation to keep dump files. You can then delete dumps manually at %SYSROOT%\MEMORY.DMP.
Page Contents
How To Disable Automatic Deletion Of Memory Dumps On Low Disk Space
Method 1 – Via System Properties
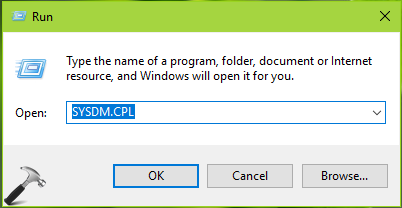
1. Press  + R and type
 SYSDM.CPL in Run. Click OK or press Enter key.
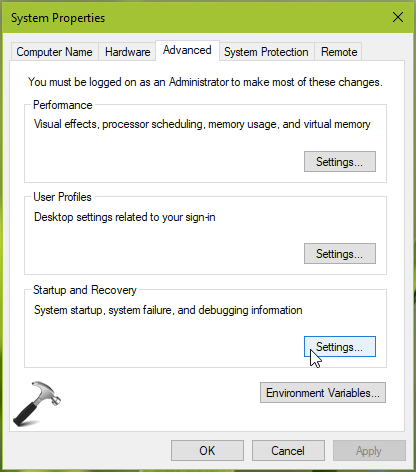
2. In System Properties window, switch to Advanced tab and under Startup and recovery heading, click Settings.
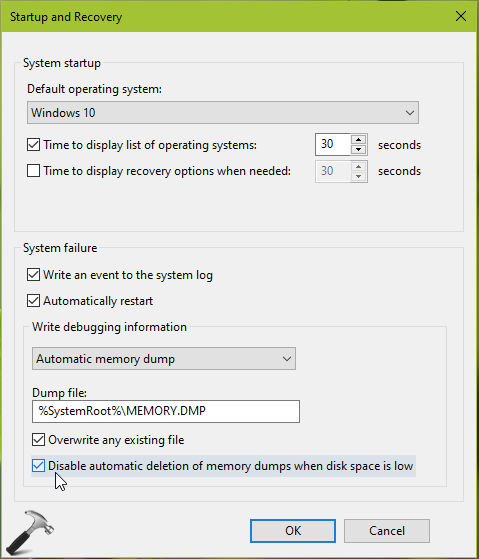
3. In Startup and Recovery window, under System failure, check Disable automatic deletion of memory dumps when disk space is low option. Click OK.
Close System Properties window and return to Desktop, if you like.
Method 2 – Via Registry
Registry Disclaimer: The further steps will involve registry manipulation. Making mistakes while manipulating registry could affect your system adversely. So be careful while editing registry entries and create a System Restore point first.
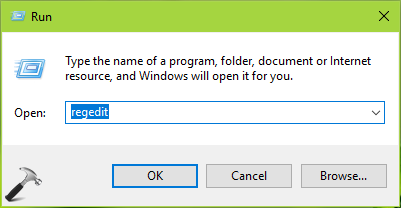
1. Press  + R and put
 regedit in Run dialog box to open Registry Editor (if you’re not familiar with Registry Editor, then click here). Click OK.
2. In left pane of Registry Editor window, navigate to following registry key:
HKEY_LOCAL_MACHINE\SYSTEM\CurrentControlSet\Control\CrashControl
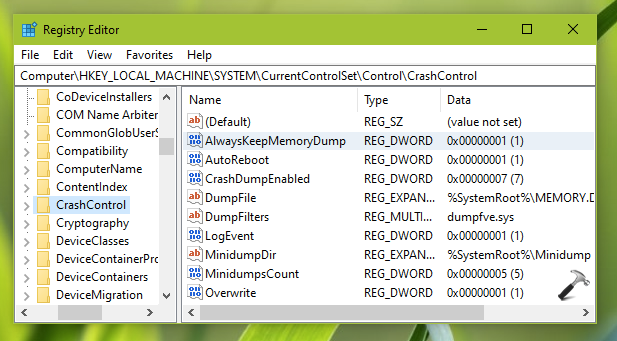
3. In the right pane of CrashControl registry key, double click on registry DWORD (REG_DWORD) named AlwaysKeepMemoryDump to modify its Value data:
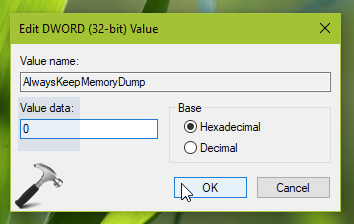
4. Set the Value data to 1 and click OK. Close Registry Editor, reboot to make changes effective.
That’s it!
![KapilArya.com is a Windows troubleshooting & how to tutorials blog from Kapil Arya [Microsoft MVP (Windows IT Pro)]. KapilArya.com](https://images.kapilarya.com/Logo1.svg)


![[Latest Windows 10 Update] What’s new in KB5055612? [Latest Windows 10 Update] What’s new in KB5055612?](https://www.kapilarya.com/assets/Windows10-Update.png)


Leave a Reply