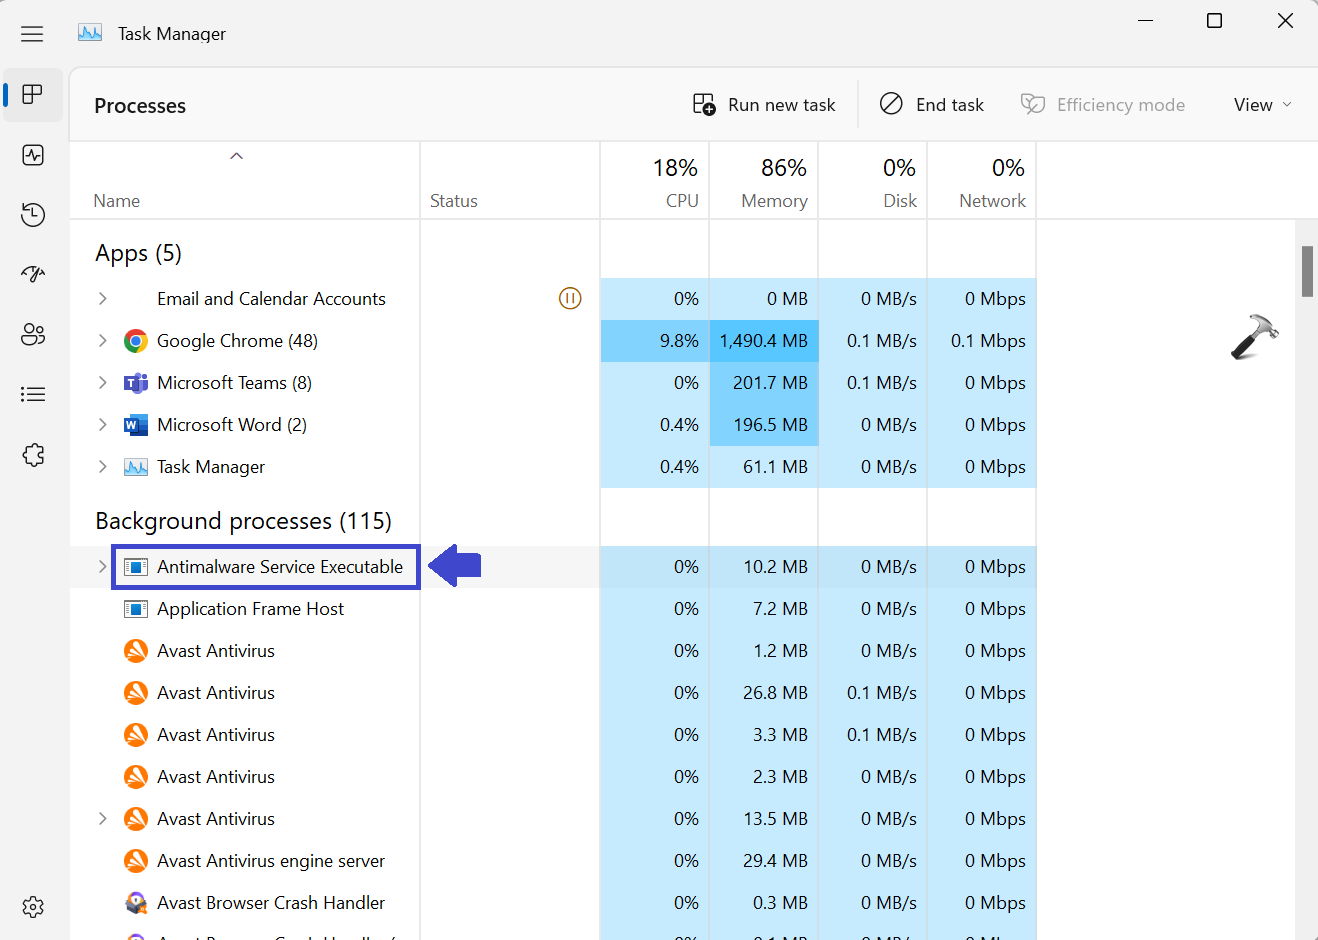
Antimalware Service Executable is a component of Windows Security that runs in the background and also know as MsMpEng.exe. It is a Windows Security process that executes real-time protection against malware. It uses too much CPU because it always runs in the background. While running in the background, it scans programs and files whenever it detects anything malicious. In this article, we will teach you how to disable Antimalware Service Executable in Windows 11.
Page Contents
How to Disable Antimalware Service Executable in Windows 11
Here we have three methods using which you can disable Antimalware Service Executable:
Method 1: Disable Antimalware Service Executable by Disabling Real-time Protection
Here we have two methods by which you can disable Real-time Protection:
1. Using Local Group Policy Editor
1: Press the Windows key + R. Type gpedit.msc and click OK.
2: Navigate the following path:
Computer Configuration\Administrative Templates\Microsoft Defender Antivirus
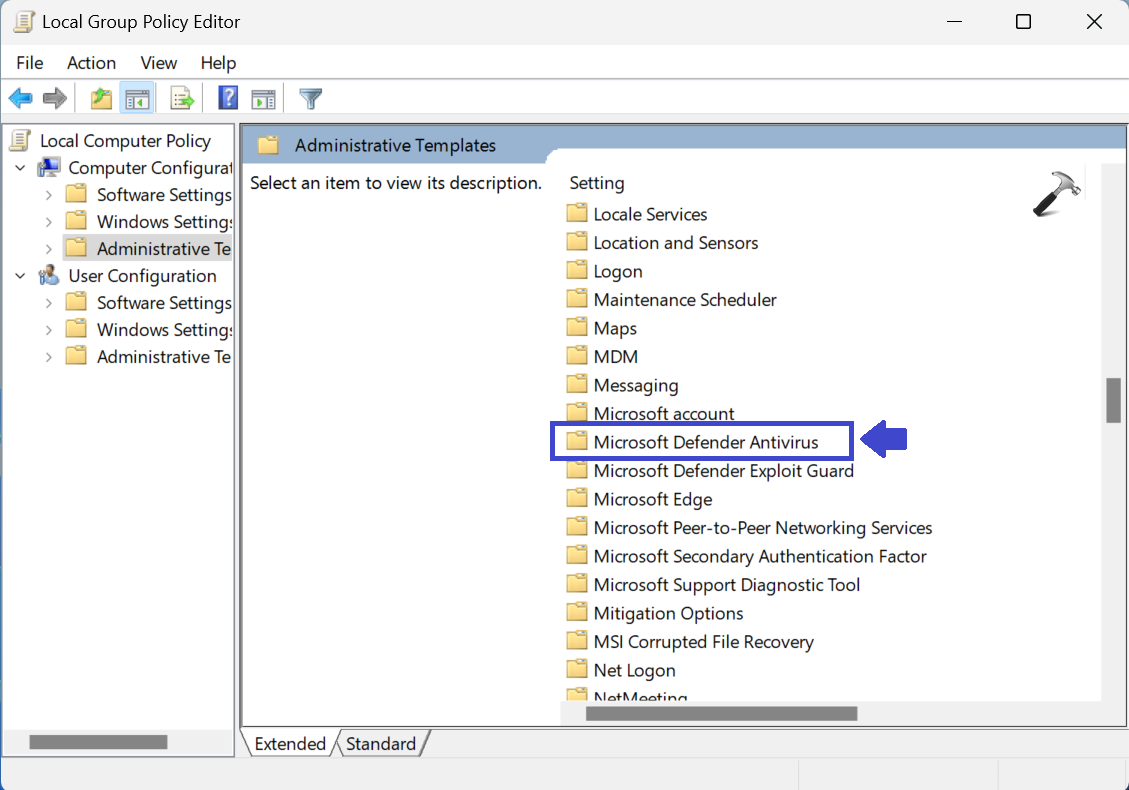
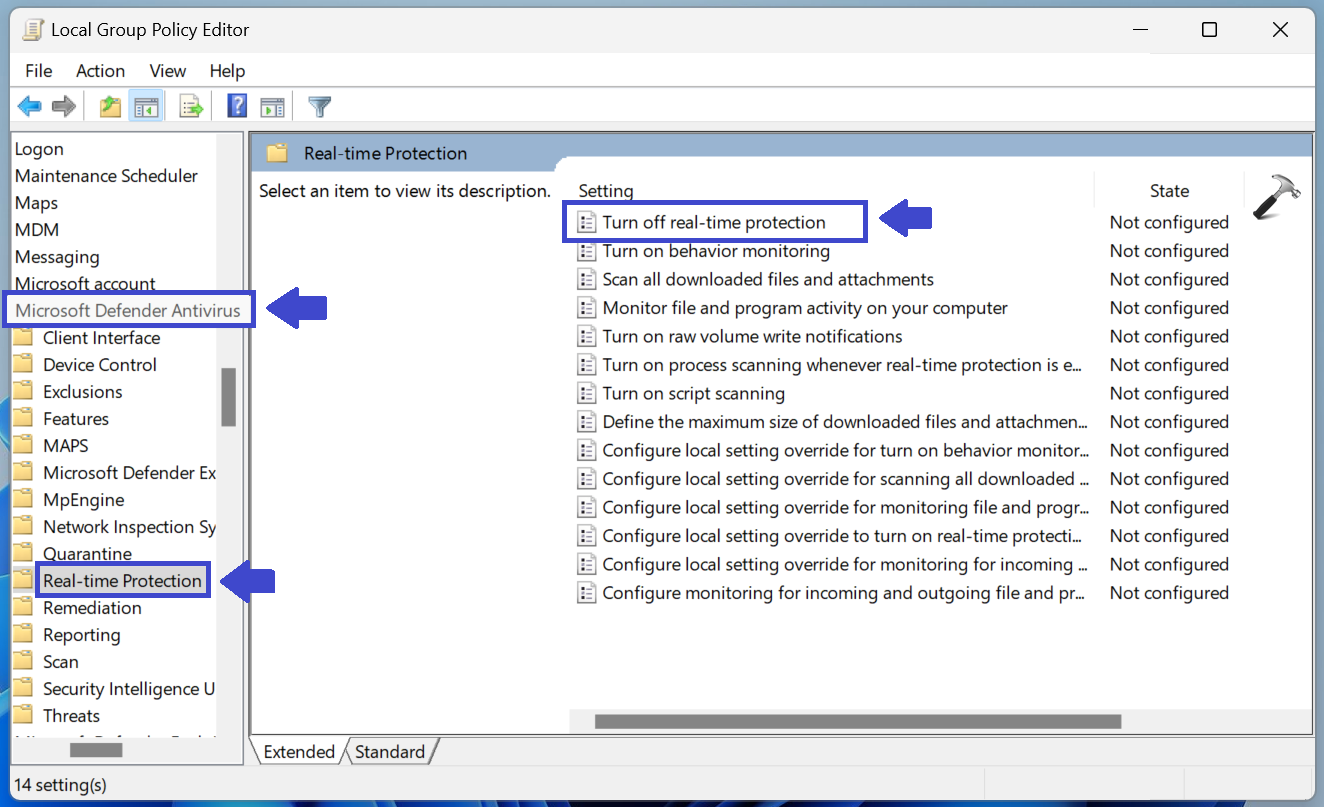
3: Click Real-time Protection. Double-click on “Turn off real-time protection”.
4: Prompt box will appear. Now, select Enabled to disable real-time protection.
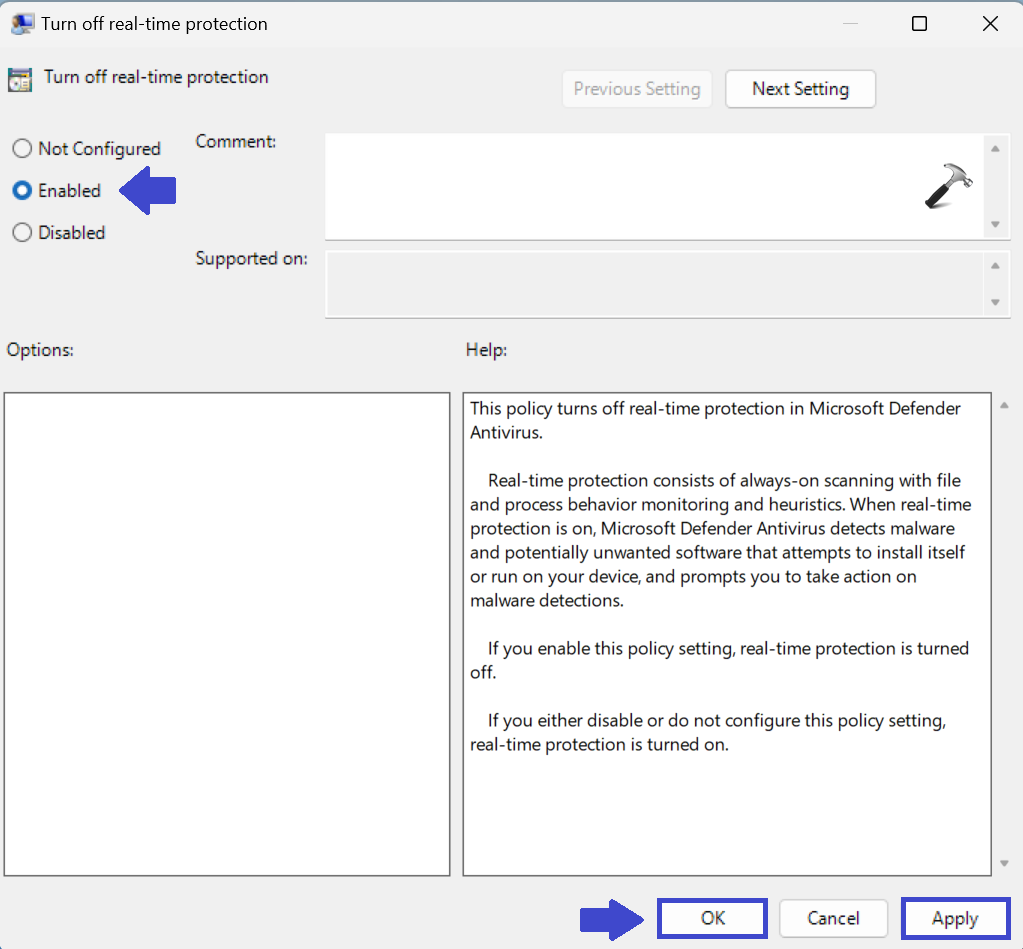
5: Click OK followed by Apply.
6: Close the Local Group Policy Editor Window and restart your computer.
2. Using Settings App
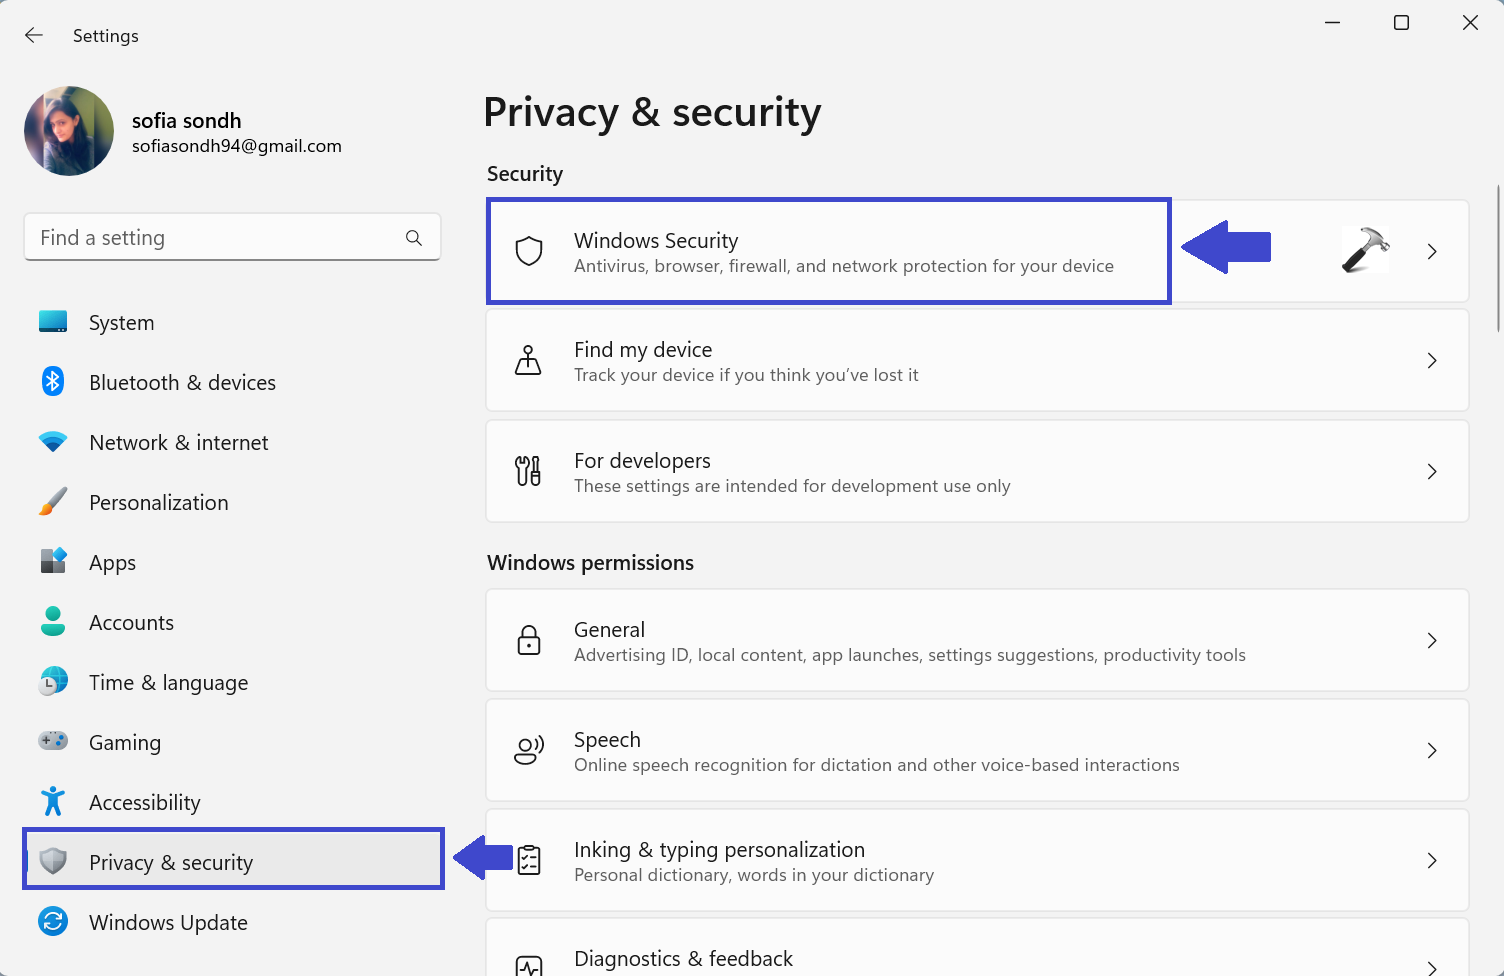
1: Open Settings App.
2: In Privacy & security, select Windows Security.
3: Select Virus & threat Protection settings and click Manage settings.
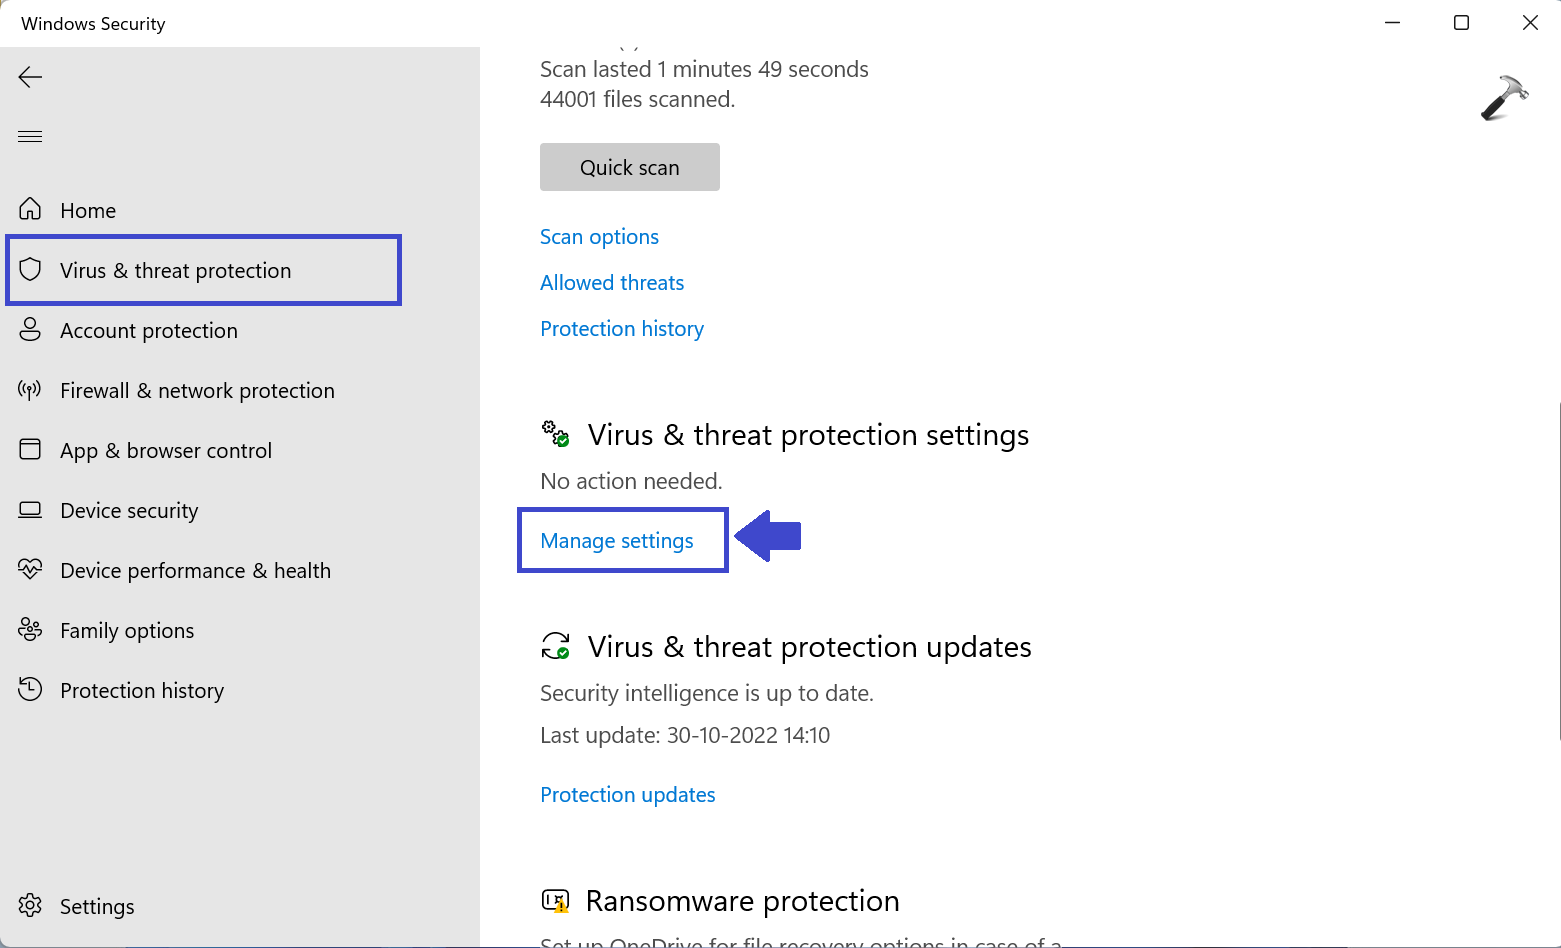
4: Under Real-time protection, turn it off.
5: Close the Window and restart the computer.
Method 2: Disable Antimalware Service Executable using Task Manager
1. Press the Windows key + X to open the WinX menu.
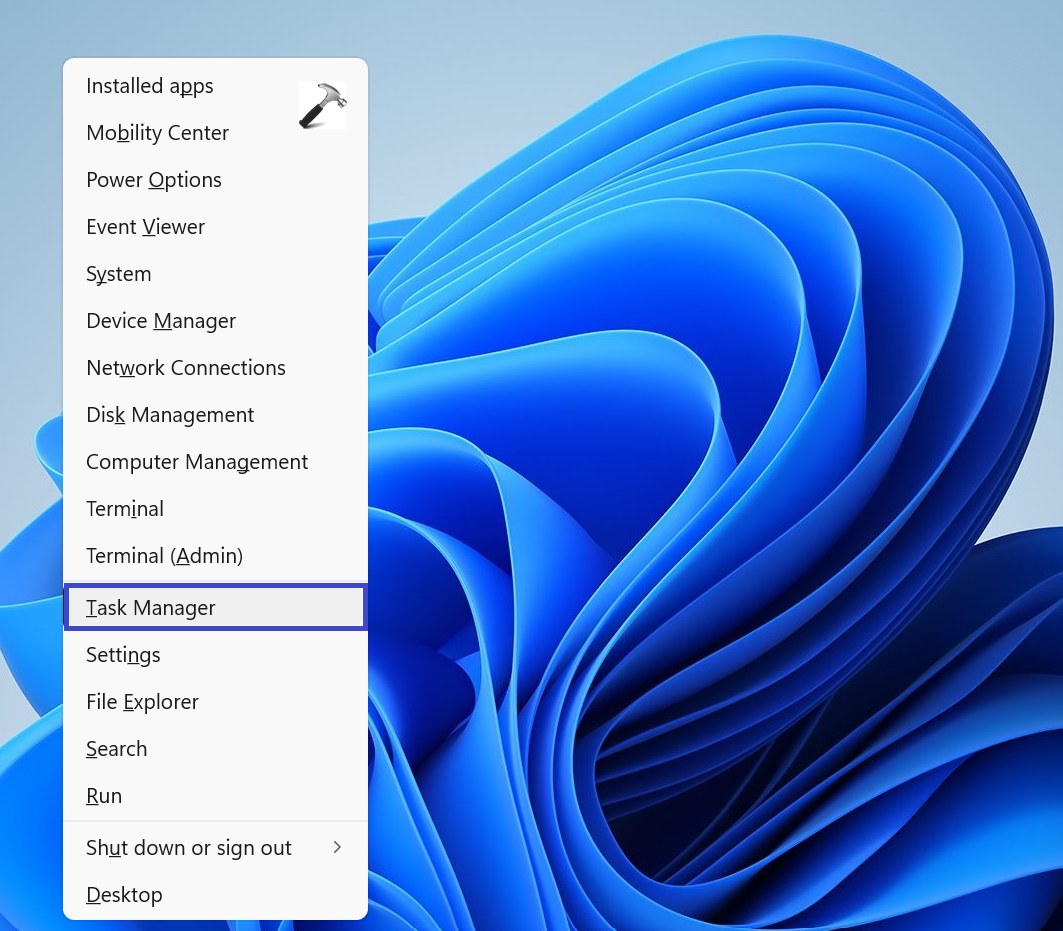
2. Select Task Manager.
3. Select the Antimalware Service Executable process from the list.
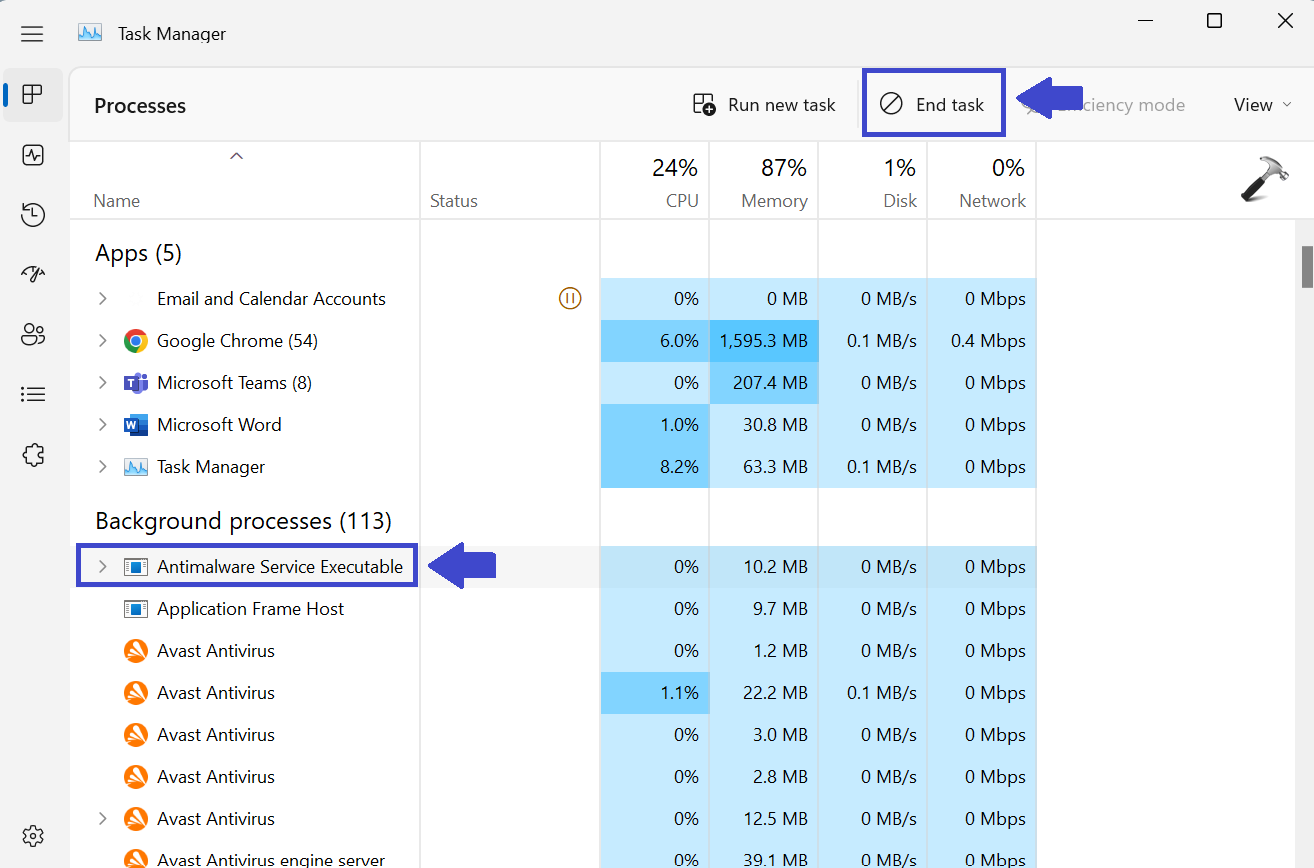
4. Click on the End Task button.
Method 3: Disable Antimalware Service using PowerShell
If the Services panel doesn’t allow you to disable the Antimalware Service Executable, then you can disable it using Windows PowerShell. Follow the below steps to do so:
1. Open Windows PowerShell and select “Run as administration”.
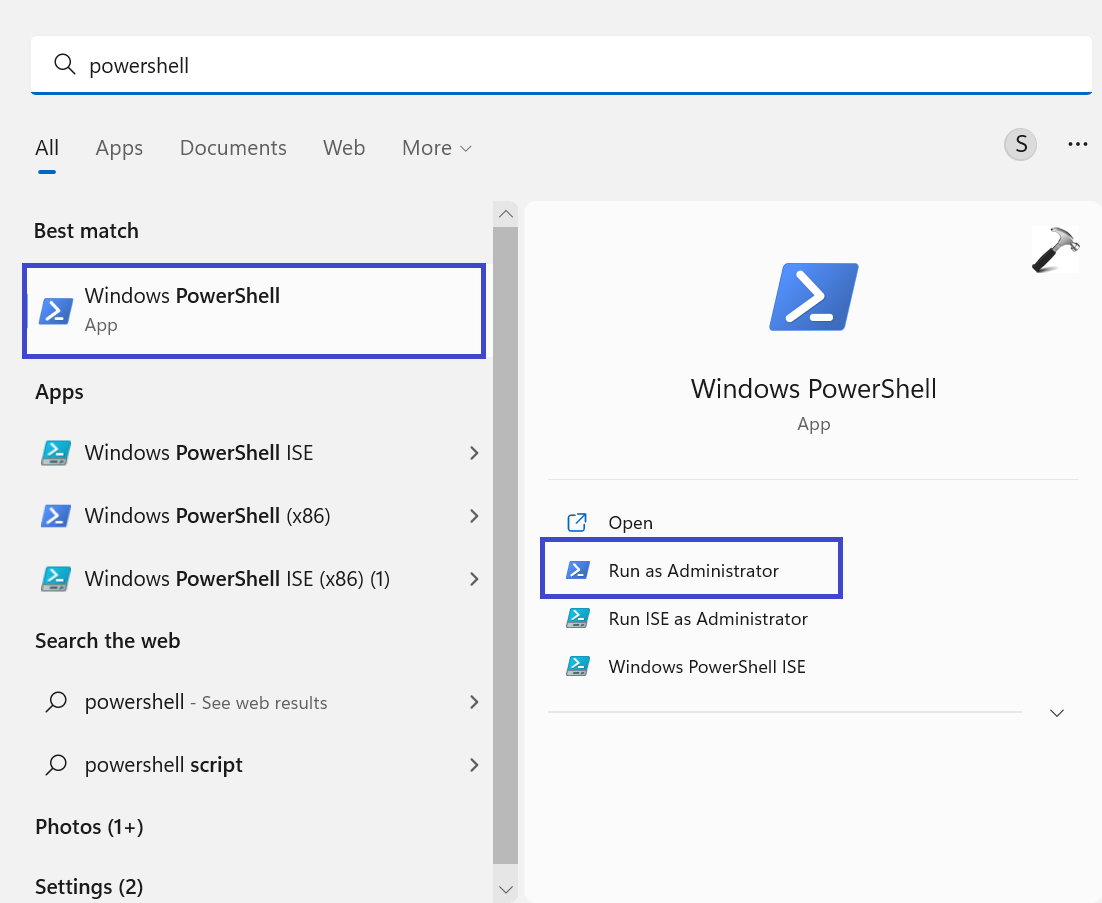
2. Copy and paste the below command:
Stop-Service -Name “WinDefend”
3. Hit Enter.

4. Close the PowerShell Window and restart your computer to apply the settings.
That’s it!
![KapilArya.com is a Windows troubleshooting & how to tutorials blog from Kapil Arya [Microsoft MVP (Windows IT Pro)]. KapilArya.com](https://images.kapilarya.com/Logo1.svg)


Leave a Reply