Erasing System Restore Points in Windows 11 is a critical Disk Space Management and Optimal System Performance process that needs to be enacted. System Restore works in a way that takes the system backups at set periods of time and enables you to restore to the last backup you made. However, these restore points can consume quite a large amount of disk space on the computer system. If you can’t expand the memory, this article will help you. Read this article to find out the two best ways to delete the System Restore Points properly and tune up your Windows 11.
Page Contents
How To Delete System Restore Points In Windows 11?
Method 1: Delete Most Recent Restore Points
In this solution, delete the most recent Restore Points using the Disk Cleanup tool to. To do that, get ahead with the below steps:
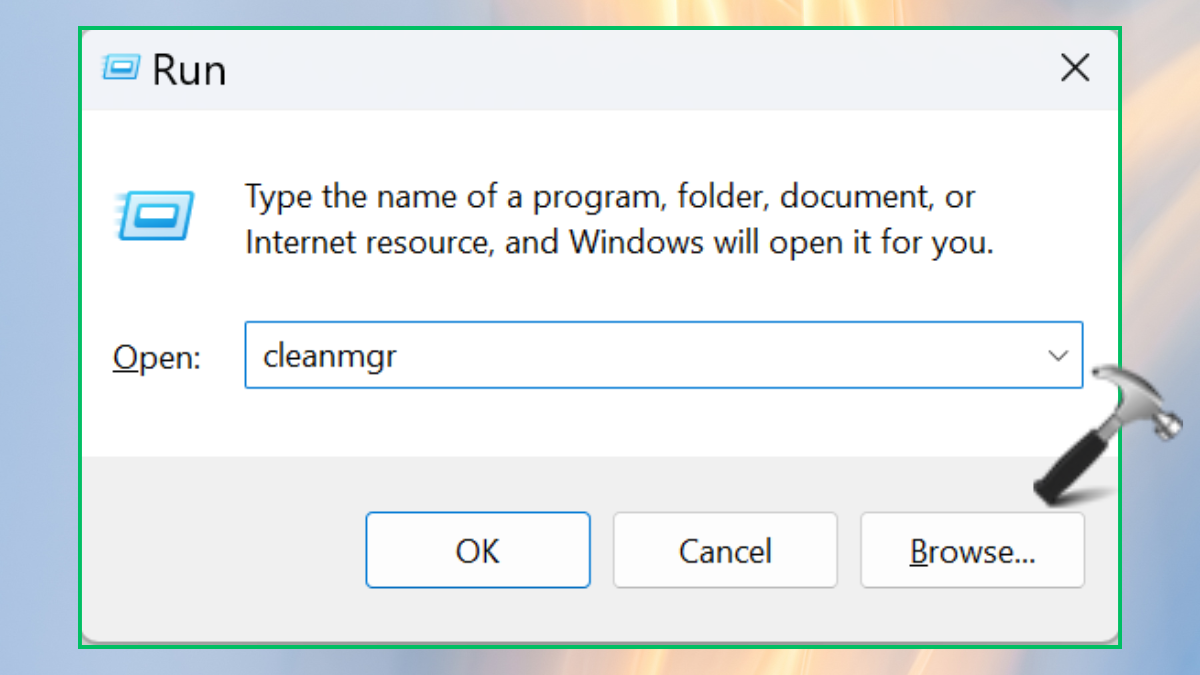
1. Press Win+R to open the Run box and type the below command in it:
cleanmgr
2. Now, choose the “Clean up system files”.
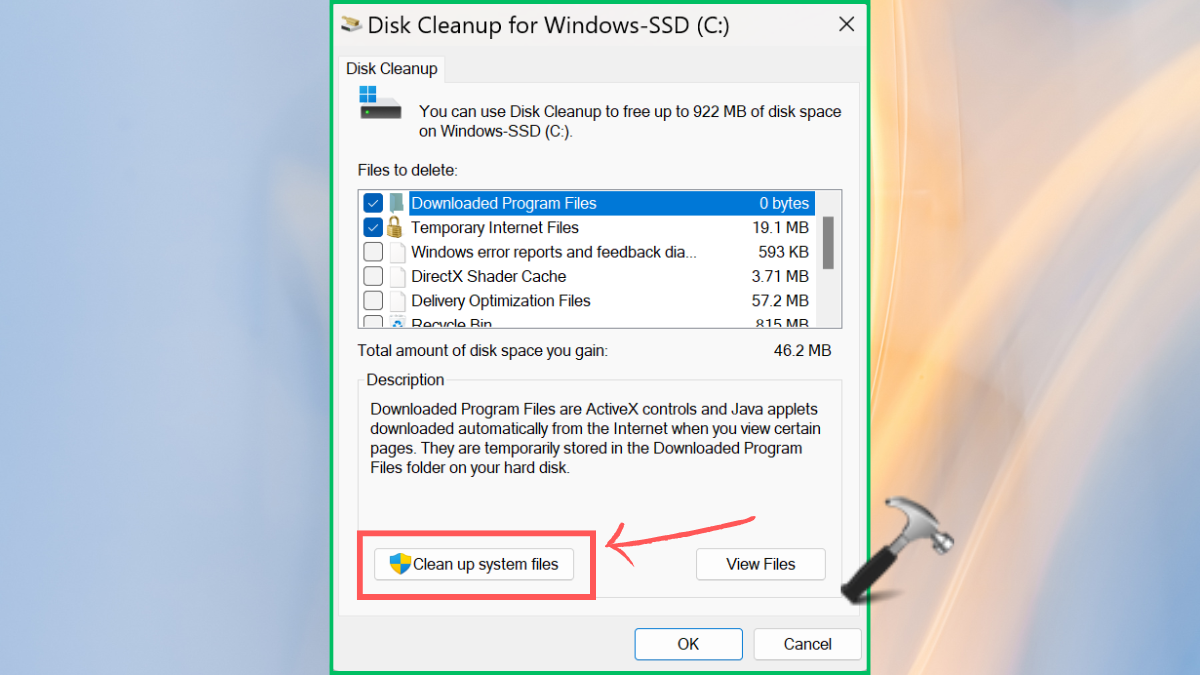
3. Select the “More Options” section and then “Clean up” option from System Restore and Shadow Copies.
4. Press “Ok” to save.

Method 2: Delete All Points and Previous Version Files in Windows 11
This solution will help you remove all the restore points and previous version files in Windows 11. For that, go ahead with the following steps:
1. Hit the Windows+R keys to open the Run dialog box. Enter the below command and press the “OK” button:
sysdm.cpl

2. Go to the System Protection section. Select “Configure” button.
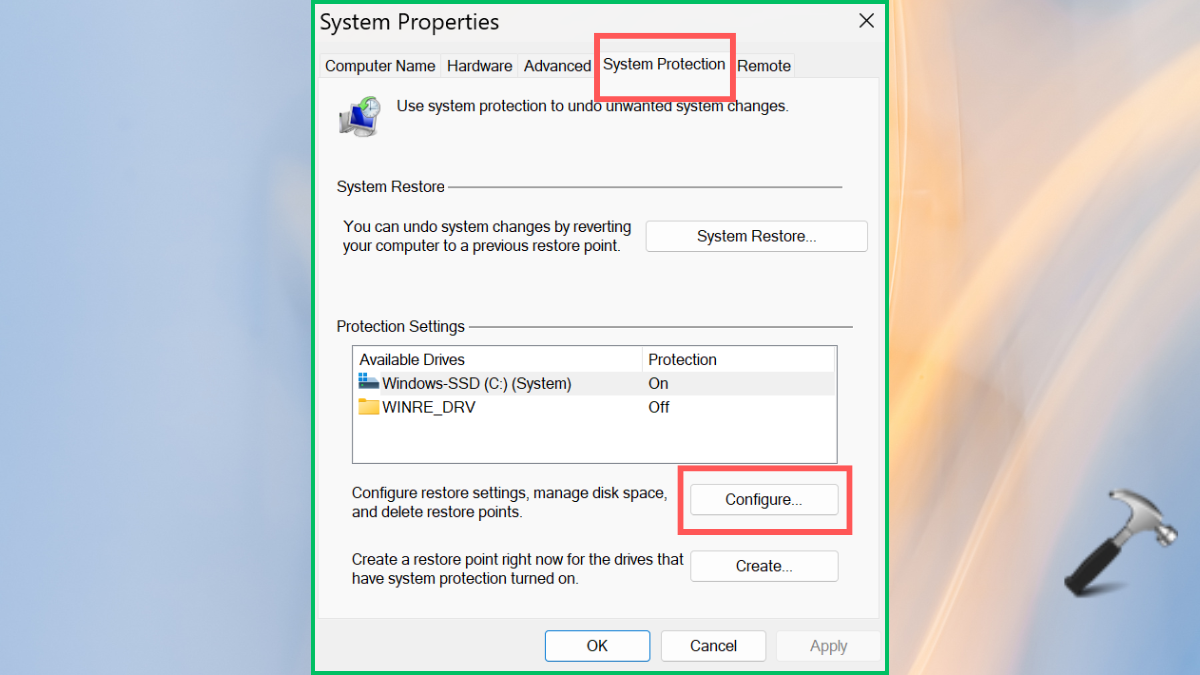
Here, you can do two things:
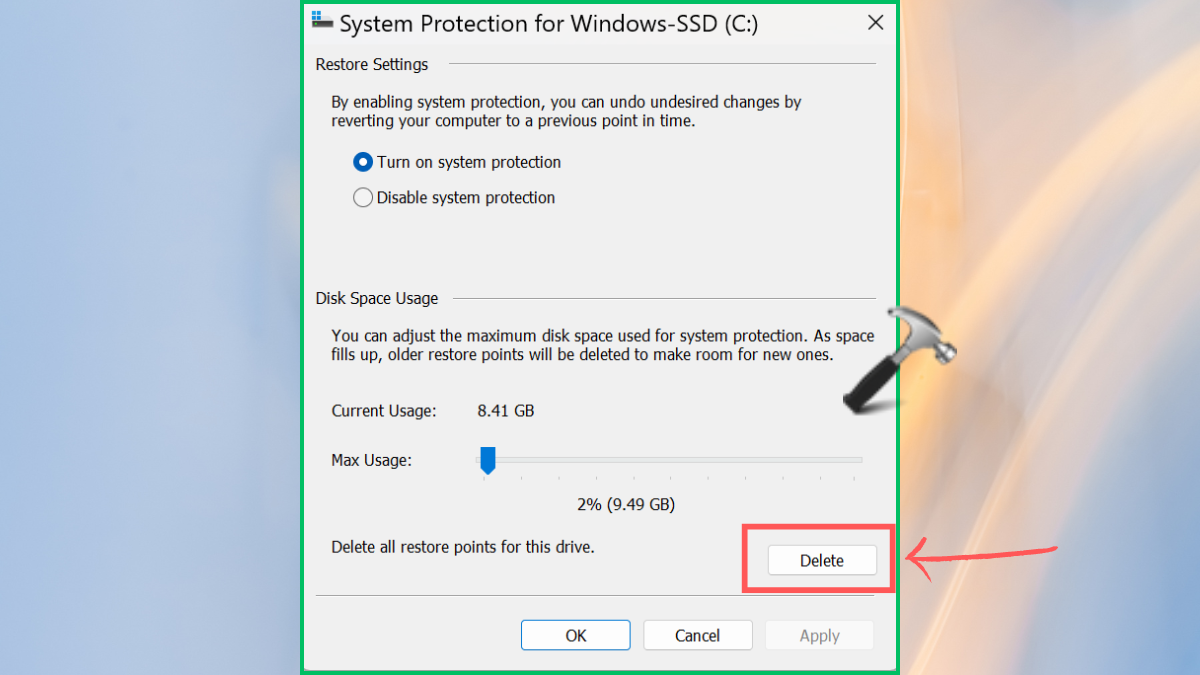
a. Change the memory usage for Restore Points:
In the Disk Space Usage section, slide the “Max Usage” to decrease the memory space. Press “OK” to save.
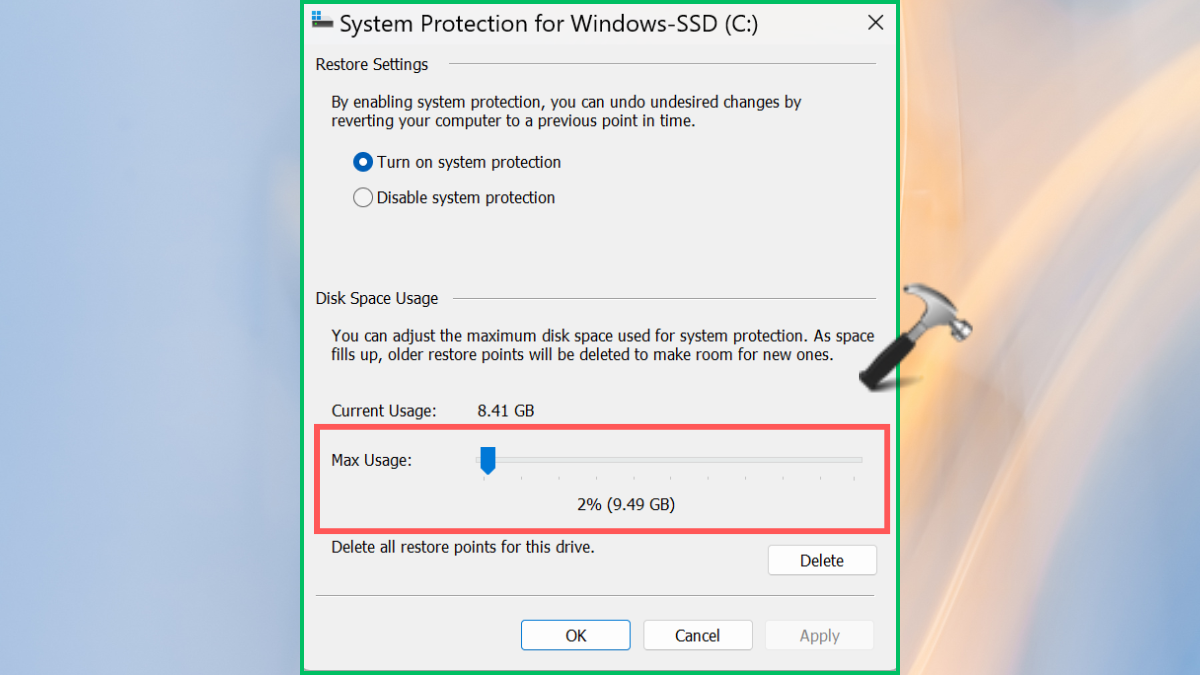
b. Delete the Restore Points:
Click on “Delete” button in the Disk Space Usage section. Tap “Continue” to confirm.
Tip: After deleting, you can create a System Restore Point in Windows 11. And, if any error pops up, you can fix the system restore points that cannot be created.
That’s it!
![KapilArya.com is a Windows troubleshooting & how to tutorials blog from Kapil Arya [Microsoft MVP (Windows IT Pro)]. KapilArya.com](https://images.kapilarya.com/Logo1.svg)


Leave a Reply