In Windows operating system, different background services are operating for smooth functioning of your device. Many features relies on these services and if these services are broken, relative feature may not work. In such case, you need to troubleshoot services. In this article, we’ll see how to delete services in Windows 11.
To delete services in Windows, first open Services snap-in using services.msc command. Locate the service you want to remove and double click on it.

On the service property sheet, locate the Service name. You can use this Service name mentioned here to delete the service.

Once you got Service name, you can use either of the methods mentioned below to remove a service in Windows 11/10.
Page Contents
How to delete services in Windows 11/10
Method 1: Using Command Prompt
For installing the language, you’ve to open Command Prompt. For this you can press  + X keys and select Windows Terminal (Admin). Then press Ctrl+Shift+2 to open Command Prompt.
Type sc delete "<SERVICE NAME>" and press Enter key. You need to substitute <SERVICE NAME> with actual service name in your case and the service you want to remove.
Once the service is deleted, you’ll see [SC] DeleteService SUCCESS, which confirms the delete action has completed.

Method 2: Using Registry
 Registry Disclaimer: It is recommended to create a System Restore point first, if you’re not familiar with registry manipulation.
1. Run regedit command to open Registry Editor.
2. In left pane of Registry Editor window, navigate to:
HKEY_LOCAL_MACHINE\SYSTEM\CurrentControlSet\Services

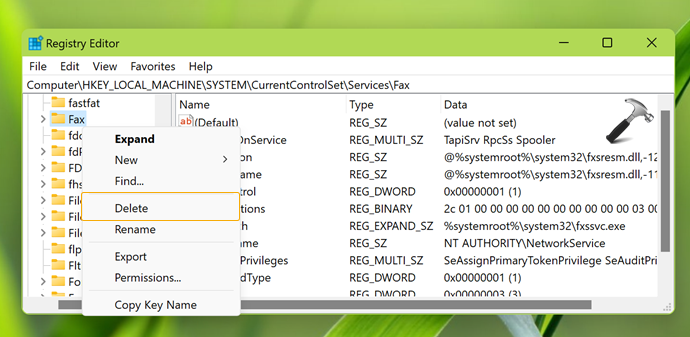
3. Under Services, locate the registry sub-key for the service you want to delete. This sub-key should be named same as the Service name. Once you locate the registry key for the service you opt to remove, right click on it and select Delete. Click Yes in the confirmation prompt.

Once the registry key has been deleted, service should be removed from your system. You can reboot the system to make changes effective.
Video guide
You can checkout this video guide for further assistance:
That’s it!
![KapilArya.com is a Windows troubleshooting & how to tutorials blog from Kapil Arya [Microsoft MVP (Windows IT Pro)]. KapilArya.com](https://images.kapilarya.com/Logo1.svg)


Leave a Reply