

The new and updated version of Windows 11, Windows 11 24H2 is now available. To install this new version, we will outline 3 different ways to create a Windows 11 24H2 bootable USB for your PC. For this you’ll a USB flash drive with at least 8GB of space. Also, remember to back up any files on the drive, since the process will erase everything on it.
Page Contents
Method 1: Create Windows 11 24H2 Bootable USB using the Media Creation Tool
The easiest way to create a Windows 11 24H2 bootable USB is by using the Media Creation tool.
1. Open Microsoft’s Windows 11 download page (https://www.microsoft.com/en-us/software-download/windows11).
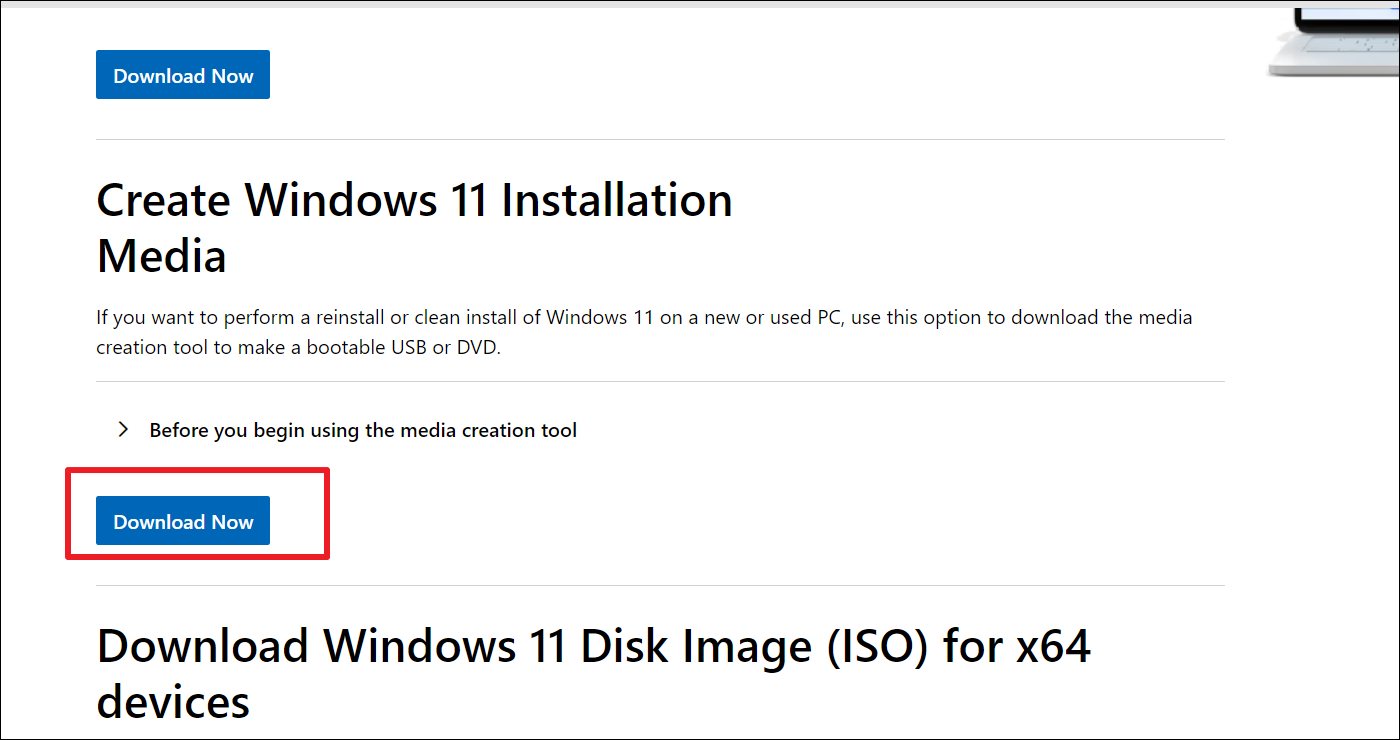
2. Click the “Download Now” button under the Create Windows 11 installation media section.
3. Double-click the “mediacreationtool.exe” file to launch the tool.
4. In the Windows 11 Setup, click the “Accept” button.

5. Then, click the “Next” button.

Tip: Uncheck “Use the recommended options for this PC” to customize the language, architecture, and edition.
6. Choose the “USB flash drive” option and click “Next”.

7. After that, select your USB flash drive from the list and click “Next”.

8. Click the “Finish” button.
Once created, you can use this USB drive to install Windows 11 24H2 on your computer.
Method 2: Create Windows 11 24H2 Bootable USB using Command Prompt
Download the Windows 11 24H2 ISO Image
1. Go to the Microsoft’s Windows 11 Download page (https://www.microsoft.com/en-us/software-download/windows11) again.
2. This time choose “Windows 11 (multi-edition ISO for x64 device” from the drop down under the Download Windows 11 Disk Image (ISO) for x64 devices section. Then, click the “Download Now” button.

3. Select your desired installation language and click the “Confirm” button.

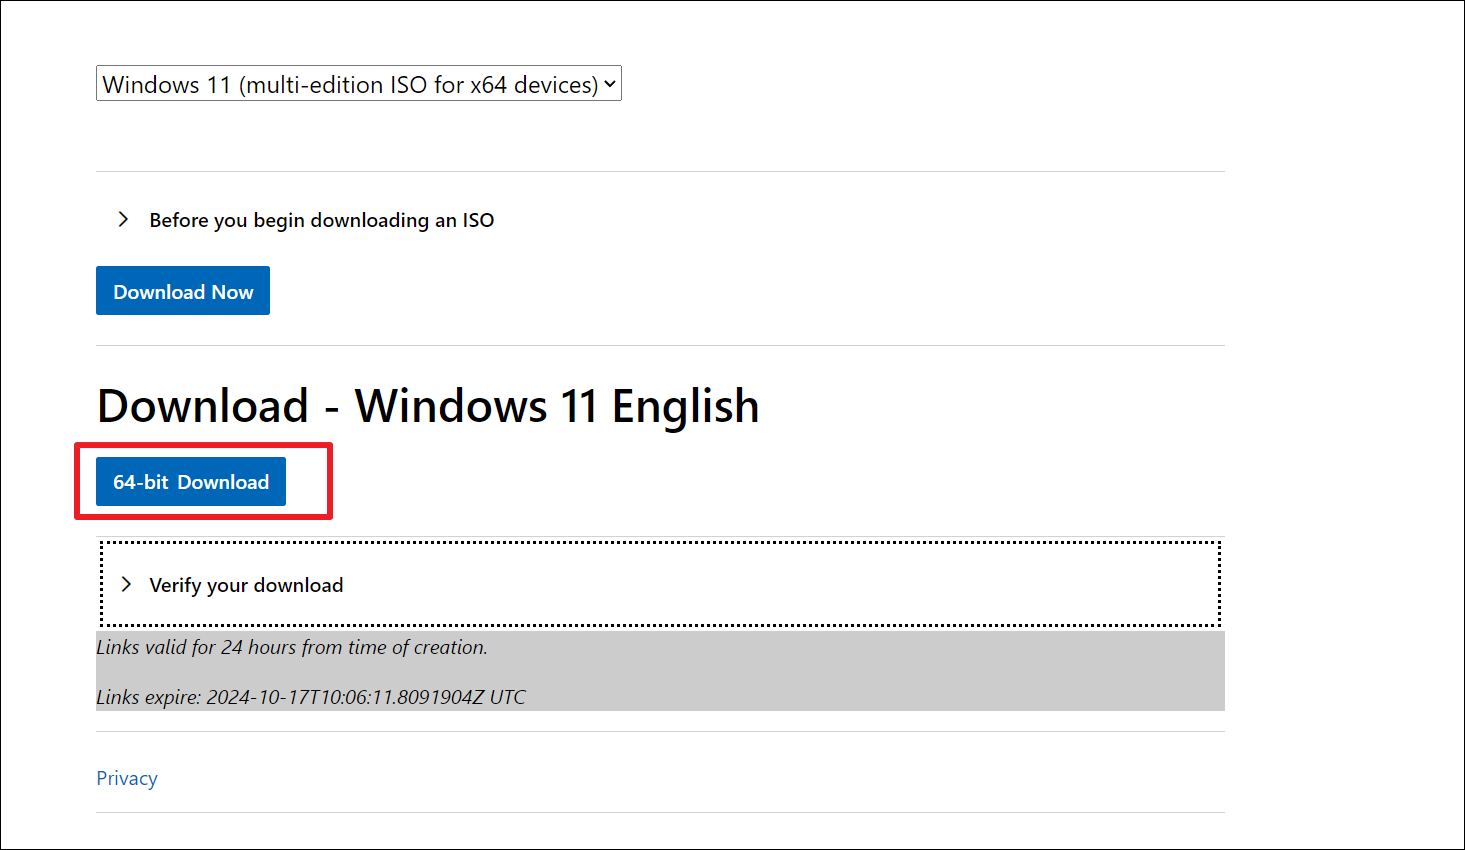
4. Click the “64-bit Download” button to download the Windows 11 24H2 ISO file to your computer.
Create the Windows 11 24H2 Bootable USB
Once the Windows 11 ISO file is downloaded, plug a USB drive with at least 8 GB of storage space and follow these steps:
1. Search for cmd in the Start menu and select “Run as administrator” to open Command Prompt with administrative privileges.

2. Type the following command and press Enter to open the Diskpart tool:
diskpart
3. Then type the following command to list all disks and find the disk number of your USB drive (the disk with the smallest size is usually the USB drive):
list disk
4. Select your USB flash drive by typing:
select disk 2
(Replace “2” with the correct number for your USB flash drive.)
5. To clean the USB, type:
clean

6. Next, you need to create a primary partition by running this command:
create partition primary
7. Select the new partition by typing:
select partition 1
8. Make the USB bootable by formatting it:
format FS=NTFS quick
9. To assign a volume and drive letter to the drive, type this:
assign letter=X
You can replace “X” with any available letter you prefer.)
10. Exit Diskpart by typing:
exit

11. After exiting the Diskpart, mount the Windows 11 24H2 ISO by typing the below command:
PowerShell Mount-DiskImage -ImagePath "G:\Software\New folder\Win11_24H2_English_x64.iso"
Replace “G:\Software\Newfolder\Win11_24H2_English_x64.iso” with the correct path to where you saved your ISO file. Ensure there’s no space in between your file path, otherwise you might encounter the ‘A positional parameter cannot be found’ error.

12. After mounting the ISO file, relaunch Diskpart by typing:
diskpart
13. Then, list all the available volumes and find the mounted ISO’s drive letter:
list volume
As you can see the mounted ISO drive letter is here “J:“.
14. Exit Diskpart again by running :
exit

15. Access the mounted ISO drive by typing the correct drive letter, for example:
J:
16. Next, open the “boot” folder by typing:
cd boot
17. Update the USB’s volume boot code with this command:
bootsect /nt60 X:
18. Move back to the root directory of the mounted drive:
cd..
19. Finally, run the following command to copy all Windows 11 installation files to the USB drive:
xcopy J:*.* X: /E /F /H
Make sure to replace J: with your mounted ISO drive letter.

20. Once the files are copied, your bootable USB drive is ready for installation.

Method 3: Create Windows 11 24H2 Bootable USB using Rufus
1. Visit the Rufus website (https://rufus.ie/en) and download the latest version.

2. Launch the Rufus tool by double-clicking the downloaded exe file.
3. Under the Device section, choose the USB flash drive.

4. From the Boot selection drop-down, choose “Disk or ISO image (please select)”.
5. Click the down arrow (on the right) and select “Download”.

6. Click the “Download” button.

7. In the Download ISO Image dialog window, choose the “Windows 11” option and click “Continue“.

8. After that, select the “24H2″ option from the Release menu, then click “Continue“.

9. Next, pick “Windows 11 Home/Pro/Edu” and click “Continue”.
10. Choose the installation language and click “Continue”.

11. Select the “x64″ architecture and click “Download“.

12. Choose the location to save the Windows 11 24H2 ISO.
13. Under the Image option, choose “Standard Windows 11 Installation“.
14. On the Windows User Experience page, clear all options to create unmodified installation media and click “OK”.

Once the steps are completed, Rufus will download and create a bootable USB with the Windows 11 24H2 edition.
That’s it.


Leave a Reply