If your Windows PC do not start, then using a recovery drive to restore the system is the solution. One can restore from a system restore point. This helps in recovering your Windows system. It is a good idea to create a recovery drive. In this post, learn how to create recovery drive in Windows 11.
If your Windows system experiences a major problem like hardware failure, you can use the recovery drive for reinstalling Windows 11. Windows gets updates periodically that improve system and security performance. That’s why it is a good option to recreate recovery drive annually. However, it won’t include personal files or any other applications that did not come with the system.
Now, let’s have a look at the detailed guide showing how you can create a bootable recovery drive to restore, recover, or troubleshoot Windows 11.
How to Create Recovery Drive in Windows 11
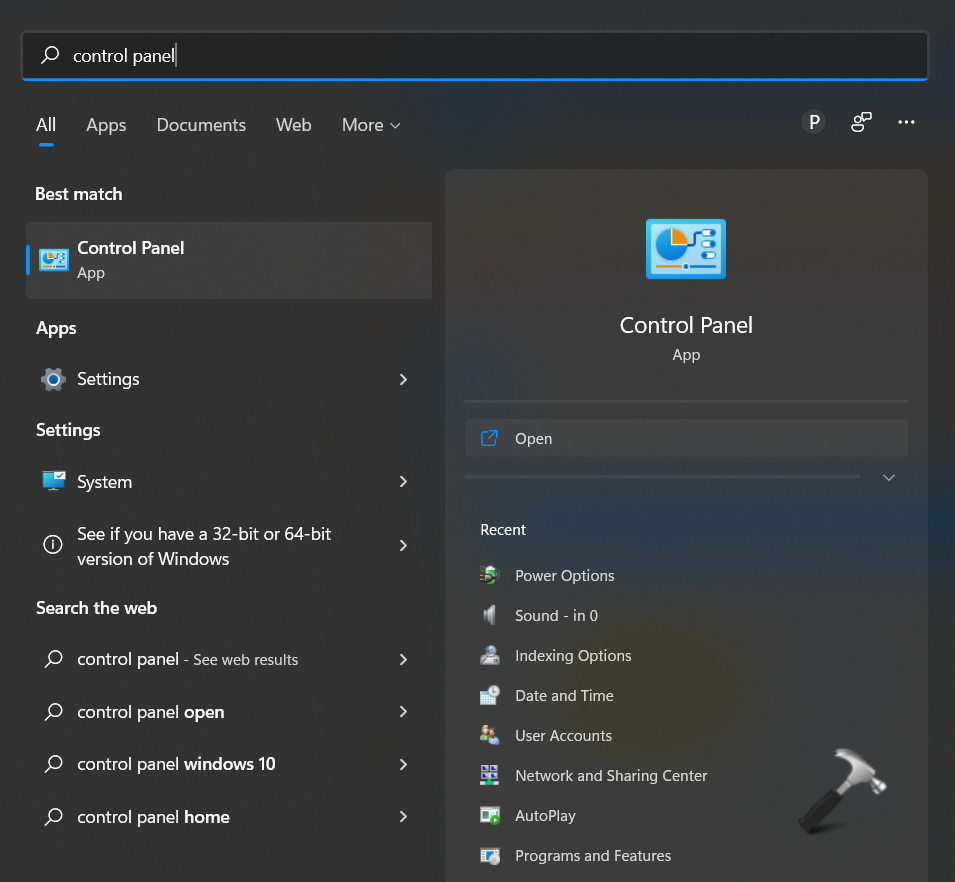
1. In the first place, open Control Panel on your system. To open Control Panel, type control panel in Windows Search.

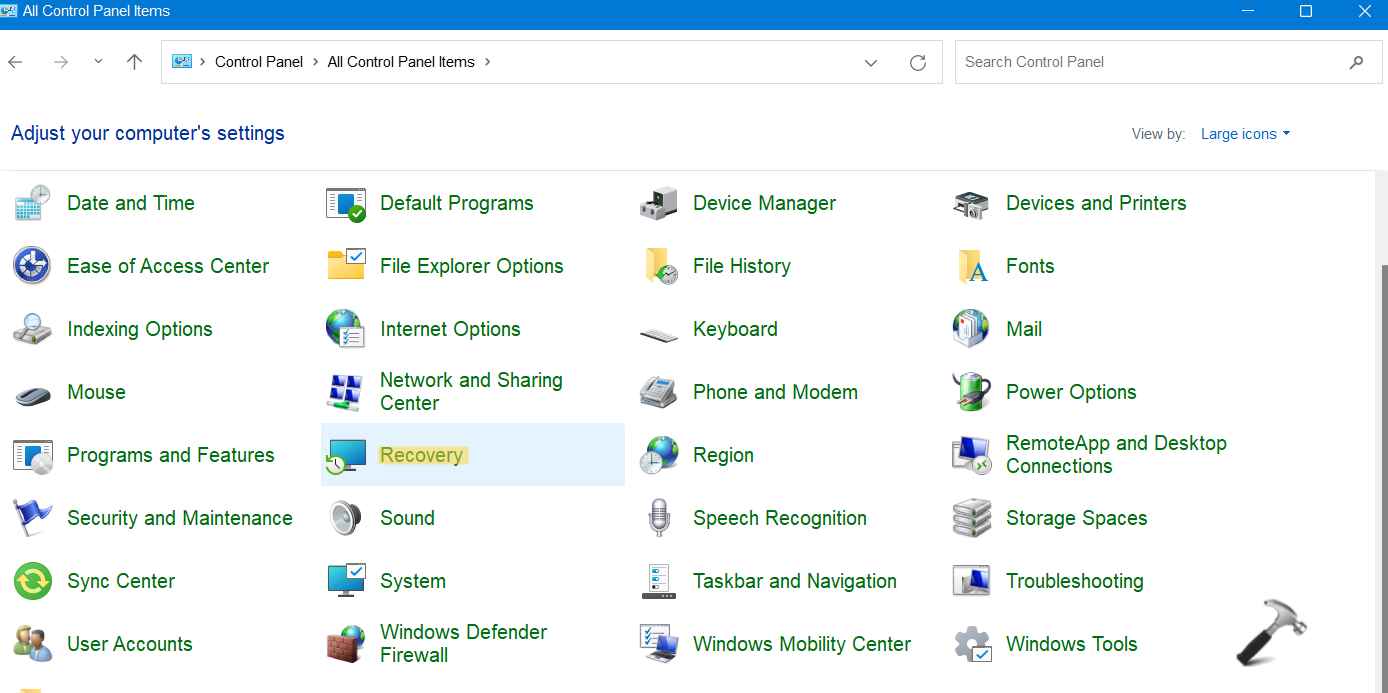
2. From the All Control Panel Items window, click on the Recovery tab.

3. After that, click on the Create a recovery drive option for opening RecoveryDrive.exe.

4. Check Back up system files to the recovery drive and click on the Next button. Once you have selected the USB drive, click on the Create button.

5. Now, the recovery drive will be created. It will take a while to copy all the files to the recovery drive. Once the recovery drive is ready, click on Finish.
So, this is how one can create the backup in Windows 11. One can use this recovery backup for restoring or recovering the Windows system. Even if you are facing a big issue on your computer, then this recovery drive helps in troubleshooting it too. Now, create a recovery drive using the above-mentioned steps hassle-free!
![KapilArya.com is a Windows troubleshooting & how to tutorials blog from Kapil Arya [Microsoft MVP (Windows IT Pro)]. KapilArya.com](https://images.kapilarya.com/Logo1.svg)


Leave a Reply