If you’re configuring a Windows Server and you need to create a domain, this step-by-step guide is for you. Creating a domain on a server is three-phase process including:
1. Activation of Active Directory Domain Services
2. Creation of domain or forest
3. Creating users for the domain
Before we start this guide, let us get familiar with these terms which is involved in this process:
1. Domain: Domain is basically logical grouping of machines. It is created so that users, computers and other security peripherals can be registered on a central database, known as domain controller.
2. Domain Controller: It is a server which can manage all security aspects of a domain. Whether it is interaction of users to domain, security management, or centralized administration, a domain controller can do all of these things.
3. Active Directory: Active Directory Domain Services (AD DS) is used to store information about network objects and it ensures that this information is available to network administrators and users.
4. NetBIOS: Network Basic Input/Output System basically provides session layer of networking model, allowing applications on separate systems to communicate on local network.
Page Contents
How To Create Domain In Windows Server 2019
Part 1: Enable Active Directory Domain Services
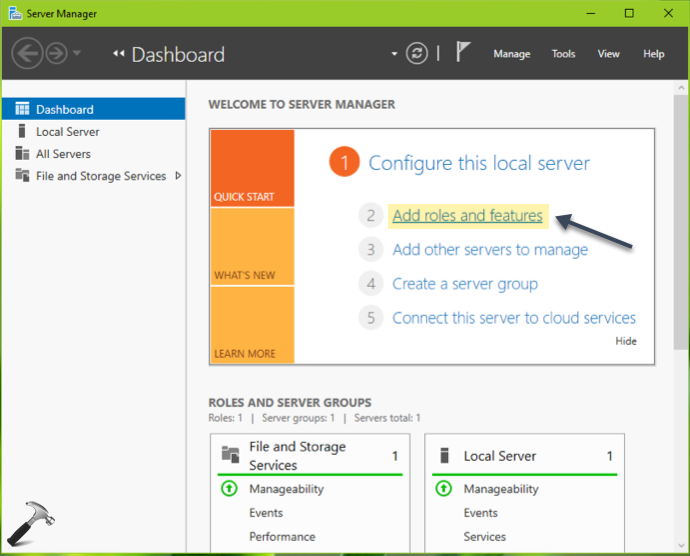
1. Open Server Manager. Under Dashboard, click on Add roles and features.
2. In Add Roles and Features Wizard window, click on Next in Before You Begin section.

3. Now choose the Installation Type as Role-based or feature-based installation and hit Next.

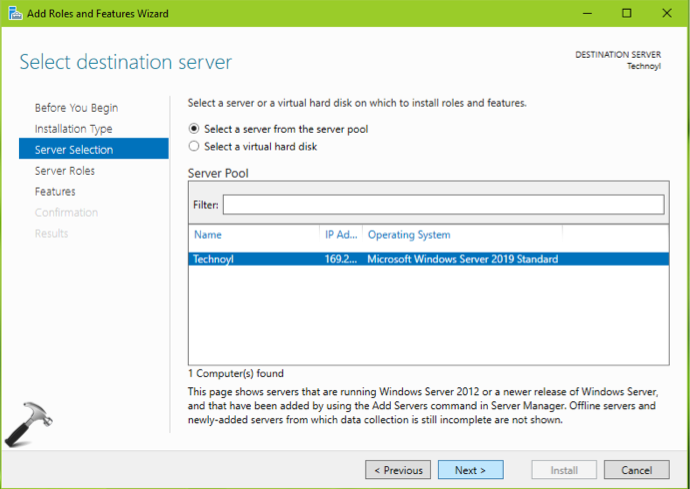
4. Select the server now and then hit Next.
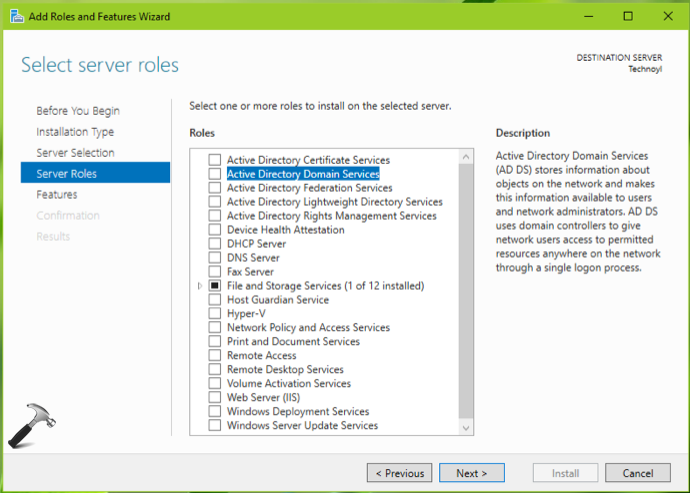
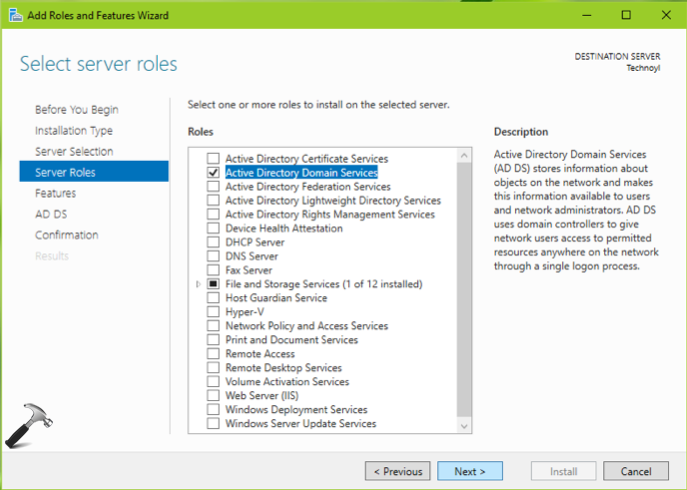
5. Under Server Roles, select Active Directory Domain Services.
6. You’ll next get a pop-up window, click Add Features in it.

7. Then ensuring Active Directory Domain Services checked in, click Next.
8. Moving on, under Features section, make sure you enable or select Group Policy Management and hit Next.

9. Then click Next in AD DS section.

10. On Confirmation, click Install.

11. The installation may take few moments and you’ll confirmed in Results section, click Close then.

Part 2: Create A Domain/Forest
1. Open Server Manager and click on notifications icon. Then click on Promote this server to a domain controller.

2. This will open Active Directory Domain Services Configuration Wizard. Under Deployment Configuration, select Add a new forest.

3. Next, under Domain Controller Options, type the DRSM password and hit Next. You can reset DRSM password later, using this guide.
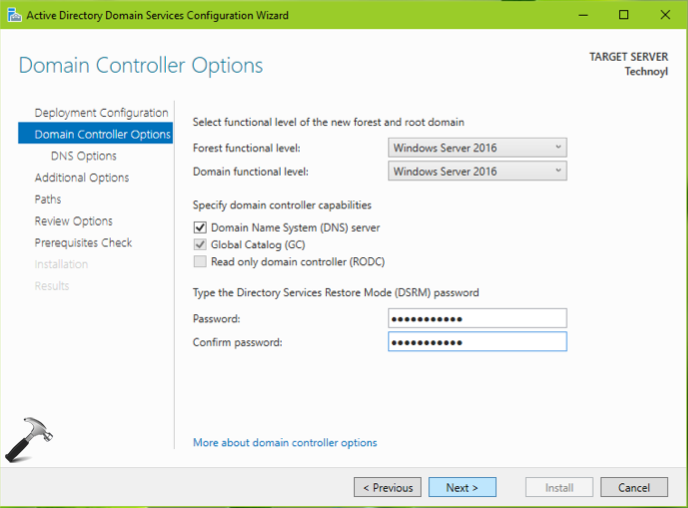
4. Moving on, under DNS Options, skip warning and click Next.

5. Under Additional Options, let the NetBIOS domain name auto-detected, click Next.

6. Let the default paths/foders remain set and click Next.
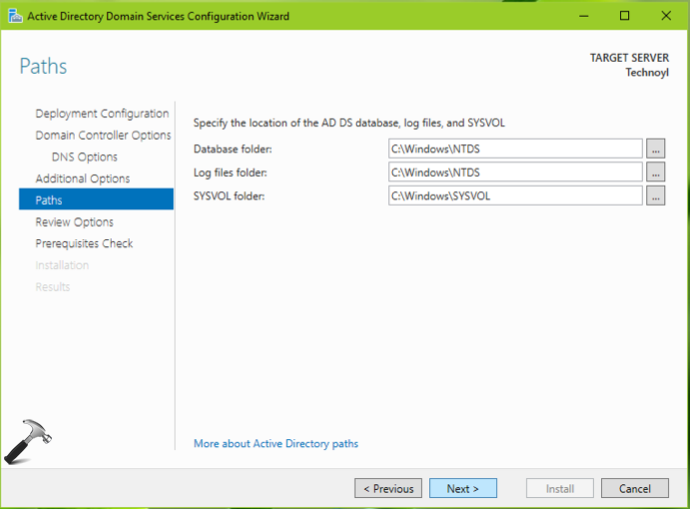
7. Now review all settings and if you like to re-configure, click Previous, else click Next.

8. So far let all prerequisites checked and click Install finally.

9. Once the installation is completed, you’ll asked to reboot server. Click Close and let reboot complete.

Part 3: Creating User Account On Domain
1. After reboot, open Active Directory Users and Computers using search feature.

2. In Active Directory Users and Computers window, go to your domain name > Users. In right pane of Users, right click on empty space and select New > User.
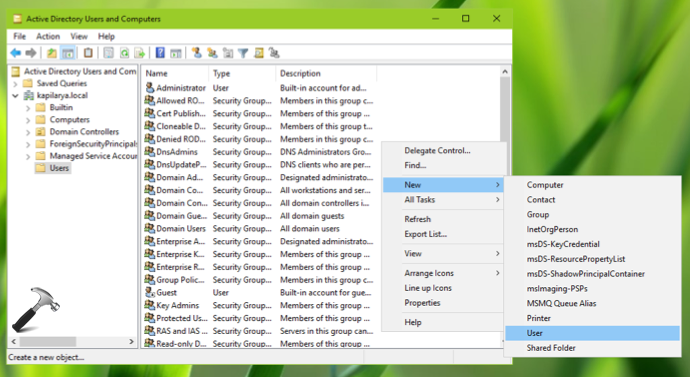
3. Then type in new user information and click Next.

4. Now type a strong password for this user account and hit Next.

5. Finally, click on Finish to complete this wizard.

So in this way, we’ve created a domain and also created user account on it.
Here is the video showing how to promote Windows Server 2019 as domain controller:
Next, learn how to allow Windows 10 clients to join this domain.
That’s it!
![KapilArya.com is a Windows troubleshooting & how to tutorials blog from Kapil Arya [Microsoft MVP (Windows IT Pro)]. KapilArya.com](https://images.kapilarya.com/Logo1.svg)




Leave a Reply