In some cases, you may need to create dial-up connection to get online on your Windows, in case if WiFi or Ethernet is not working. Dial-up connection is one of the veteran methods of connecting to the Internet by dialing the Internet Service Provider‘s number followed by network credentials.
As I mentioned, dial-up connection is no longer used by bulk of users nowadays but in some countries or regions of the world, this might be the only to connect to web. So for those users, in this beginner’s guide, we’ll show you how to set up a dial-up connection in Windows 10. See, to establish a dial-up connection, you either need a mobile or telephone connection connected to Windows machine, so that it will allow the dialing mechanism to enable the network connectivity.
The steps you need to follow are mentioned below.
How To Create Dial-up Connection In Windows 10
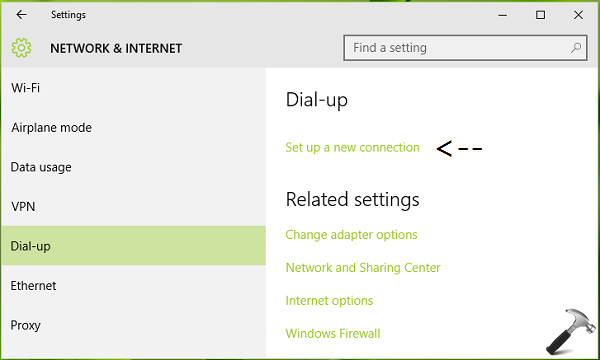
1. Open Settings app, navigate to Network & Internet > Dial-up. Click Set up a new connection.
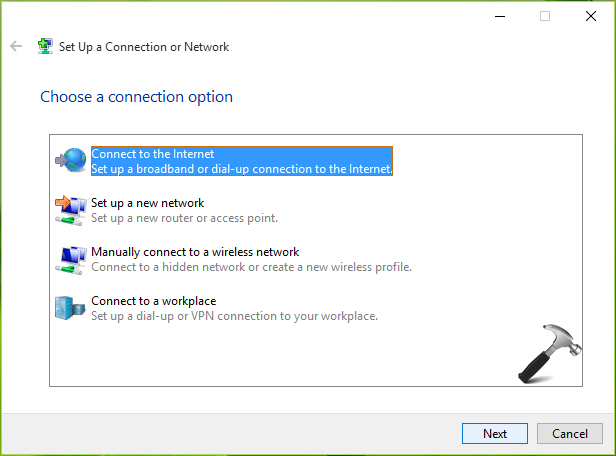
2. Then in Set Up a Connection or Network window, select Connect to the Internet option. Click Next.
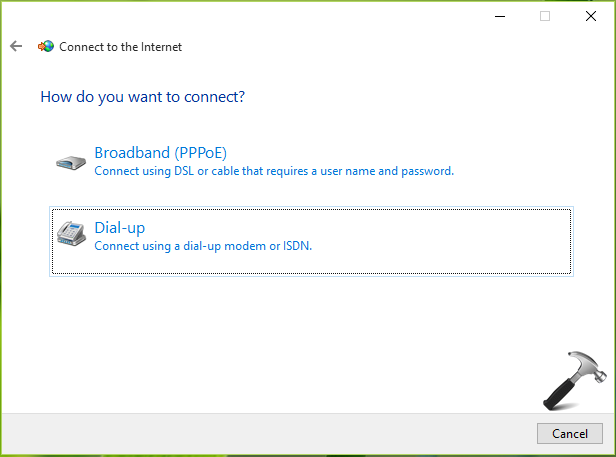
3. Moving on, select Dial-up option against How do you want to connect?
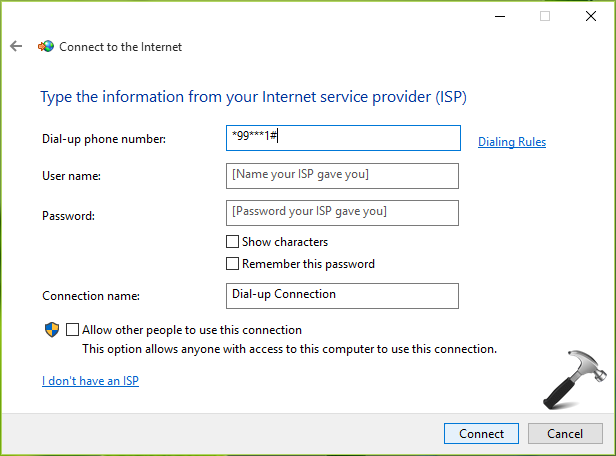
4. Then in the next screen, type the required information. The dial-up number and credentials are usually provided by Internet Service Provider or cellular network you’re using. You can call them to obtain this information. Once you input the mandatory details, click Connect.
You’ll see the dialing tone on next screen, it is skip able.
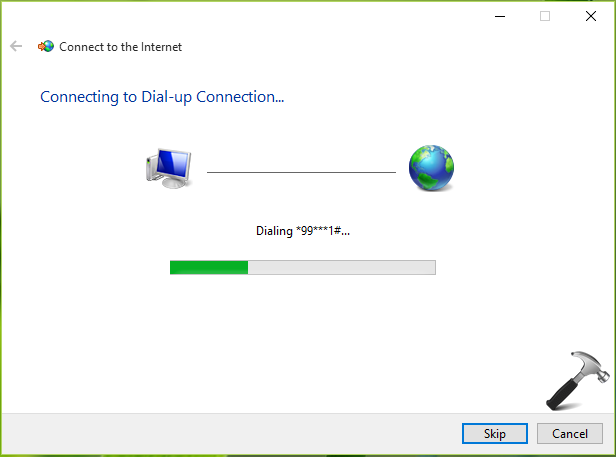
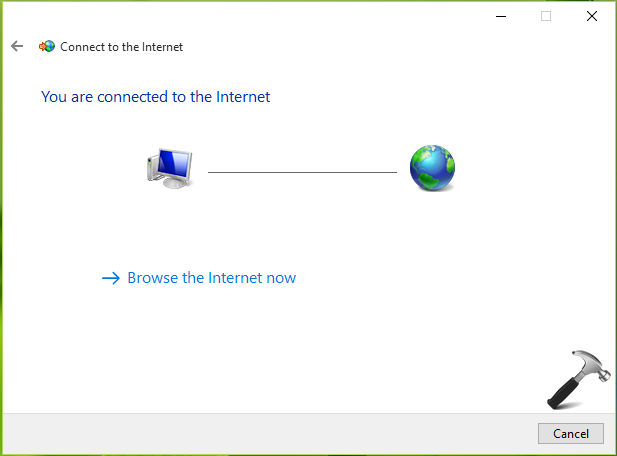
5. If dialing tone successfully authorized you on the network, you’re connected to the Internet. Clicking on Browse the Internet now link will open your default web browser.
So this is all about how you create a dial-up connection in Windows 10. To access this dial-up connection anytime, simply click the network icon on taskbar and hit the dial-up connection name you just provided in step 4.
That’s it!
![KapilArya.com is a Windows troubleshooting & how to tutorials blog from Kapil Arya [Microsoft MVP (Windows IT Pro)]. KapilArya.com](https://images.kapilarya.com/Logo1.svg)


![[Latest Windows 10 Update] What’s new in KB5055612? [Latest Windows 10 Update] What’s new in KB5055612?](https://www.kapilarya.com/assets/Windows10-Update.png)


Leave a Reply