System Image may not be a new term for many of you. It is basically a backup taken at a particular state, which contains all your PC stuff information. Just like we create System Restore point at some state, System Image also works on similar principal. Both of these recovery options can be utilized for backup purpose and are used to restore Windows to some earlier point, when your system fails in current state.
System Image is much helpful when your system hard-drive or any other hardware fails and you need to get back your machine to working state. When you create a System Image, it will include your system root drive on which Windows is installed, plus other necessary volumes such as System Reserved Partition, which may be required to function your PC correctly.
You can create a System Image in Windows 10 either using user interface (UI) or Command Prompt, both ways mentioned below.
Page Contents
How To Create A System Image In Windows 10
Way 1 – Using UI/Control Panel
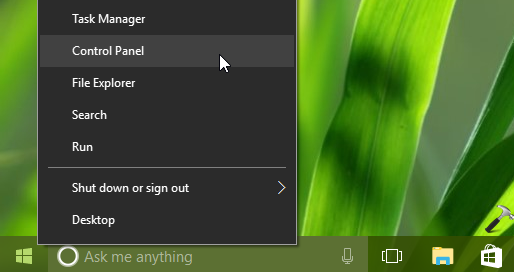
1. Right click on Start Button and select Control Panel.
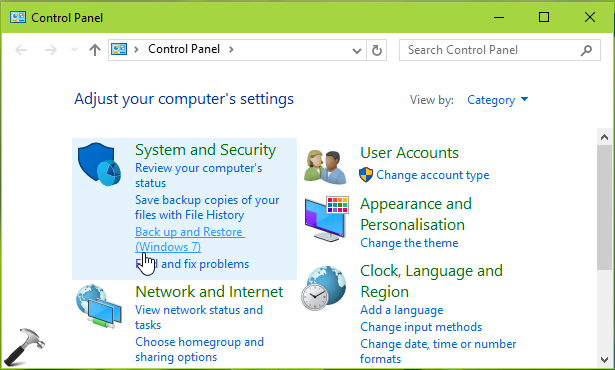
2. Next, in Control Panel window, under System and Security, select Back up and Restore (Windows 7).
3. Then click on Create a system image link in left pane on next screen.

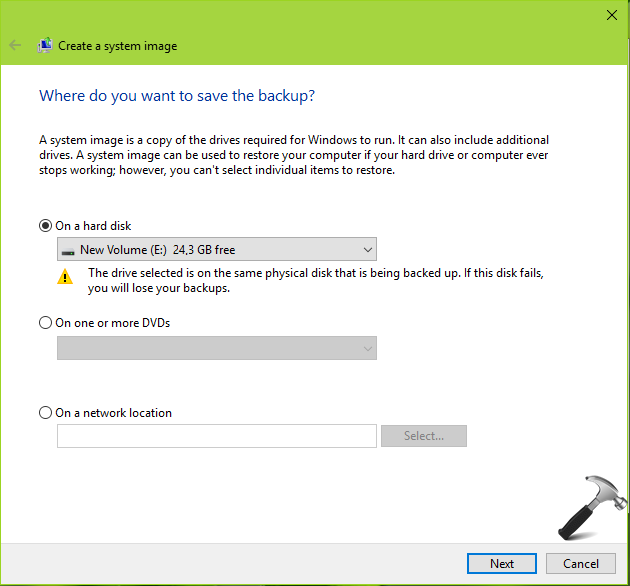
4. This will start image creation wizard. So in the below shown window, select the image backup location. If you select a volume on same hard drive on which Windows is installed, you’ll the see a warning message saying ‘The drive selected is on the same physical disk that is being backed up…‘. When you select different drive such USB drive or any other portable hard-drive, the warning will disappear. If you select any network location here, note that previously created image will be overwritten with new one, for that option. After making location selection, click Next.
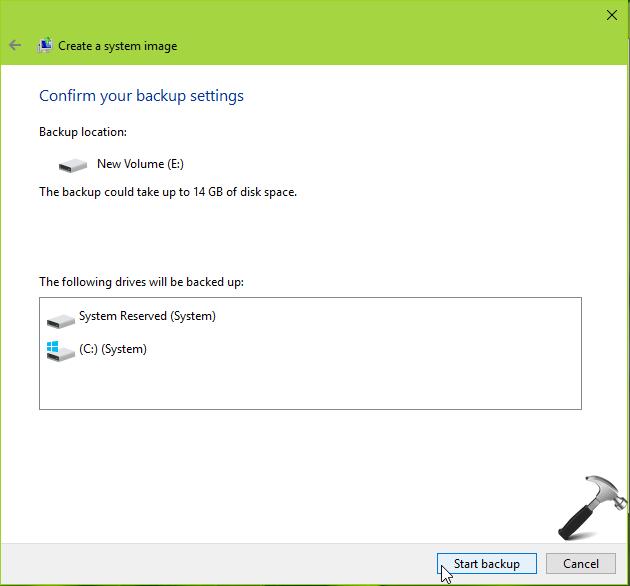
5. Then review the backup settings and the System Image‘s approximate size and click Next.
6. In few seconds, Windows will create system image and notify you:
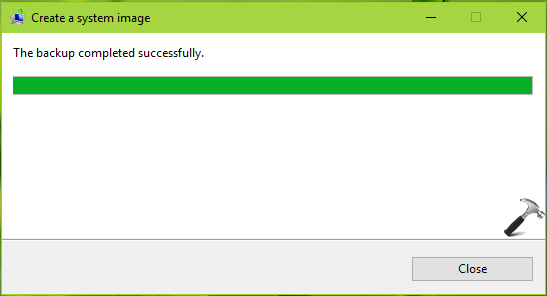
See this fix if System Image creation fails. You can close Control Panel and return to Desktop, if you like.
Way 2 – Using Command Prompt
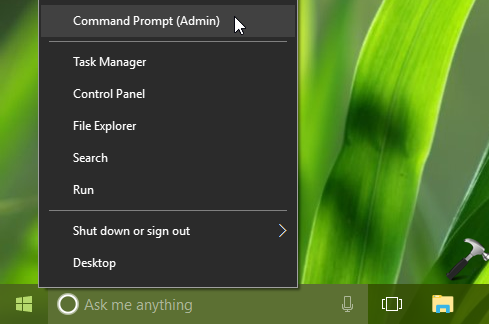
1. Right click on Start Button and select Command Prompt (Admin).
2. In the administrative Command Prompt window, type following and hit Enter key:
wbadmin start backup-backup target: E:-include: C:-quiet-allCritical
* Substitute C: with your system root drive and E: with backup drive/location.
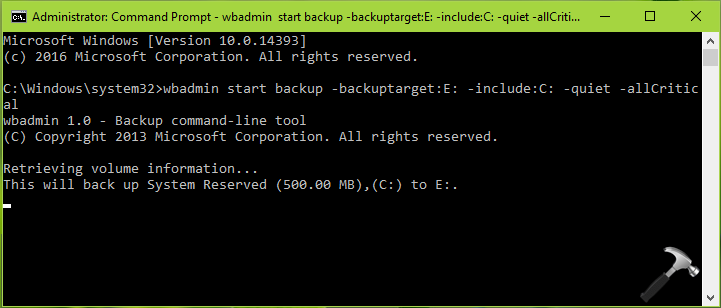
In few moments, System Image will be created. You can use the created System Image under Advanced System Recovery Options, at the time of crisis such as system failure. Here’s how:
How to restore Windows 10 System Image backup
That’s it!
![KapilArya.com is a Windows troubleshooting & how to tutorials blog from Kapil Arya [Microsoft MVP (Windows IT Pro)]. KapilArya.com](https://images.kapilarya.com/Logo1.svg)


Leave a Reply