In Windows 10, you can setup two type of accounts. First is local account, which is available in all Windows operating systems. It doesn’t require your email address and is easy to setup, even if your computer is offline. While second type is Microsoft account, which is available in Windows 8, 8.1 and 10. It requires your email address and connection to Internet for setup. You can anytime switch from local account to Microsoft account and revert back.
This article will show you step-by-step process to setup local account in Windows 10. You’ll need administrative privileges to add a local user account to the system.
Page Contents
How To Create A Local User Account In Windows 10
Setup a local account without using Microsoft account
Please refer these steps to create local user account:
1. Right click Start Button or press  + X keys and select Settings.
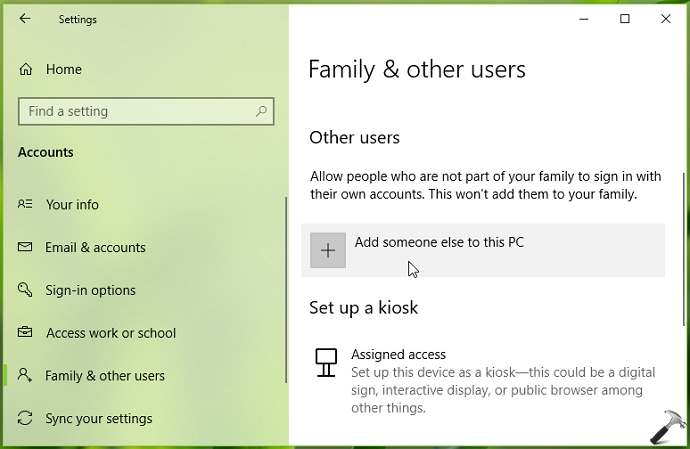
2. In the Settings app, navigate to Accounts > Family & other users.
3. Now in right pane of Family & other users, under Other users, click on Add someone else to this PC.
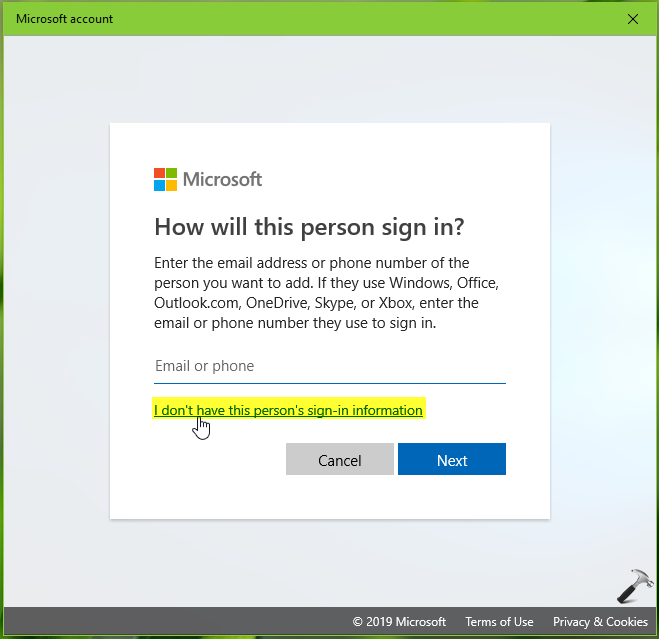
4. Next, under Microsoft account window, for How will this person sign in, click I don’t have this person’s sign-in information link. If your system is offline, you will not see this screen and you’re directly skipped to step 6.
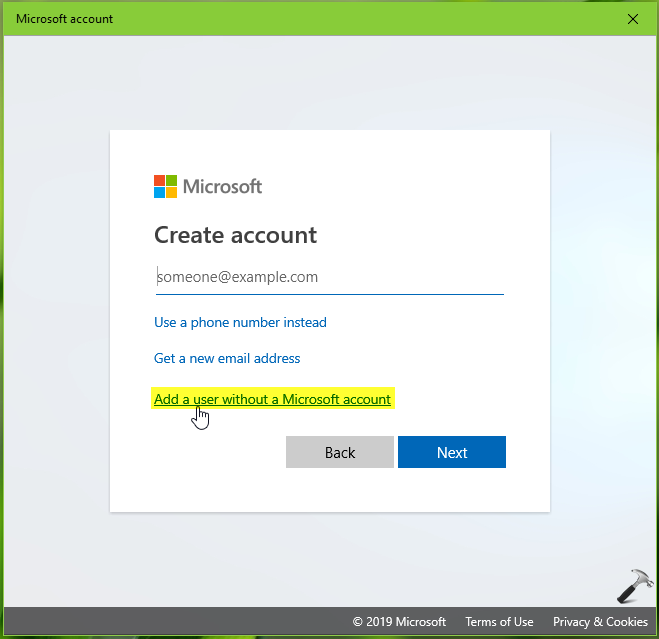
5. In next screen, click on Add a user without a Microsoft account link.
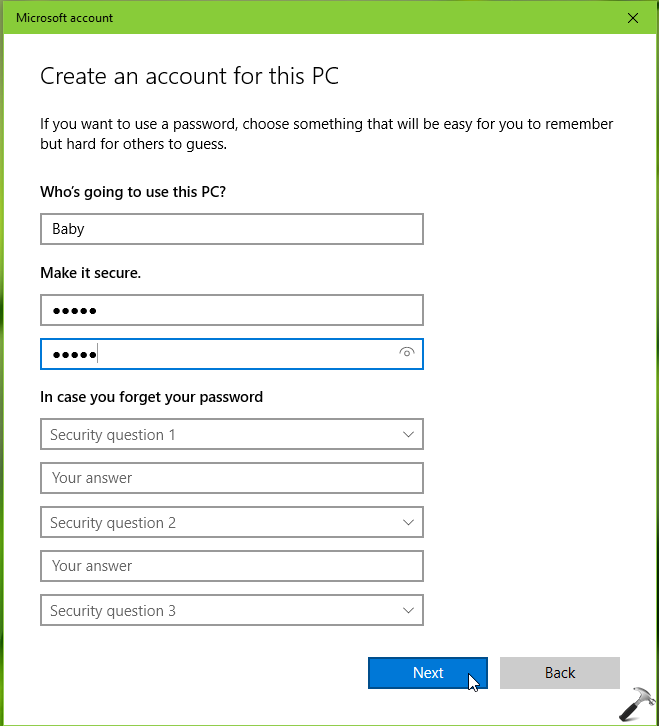
6. Then in Create an account for this PC, you can fill out the details for your new local account. Once you’re done, click Next button.
Finally, your local account is created. You can spot it under Settings app > Accounts > Family & other users > Other users.
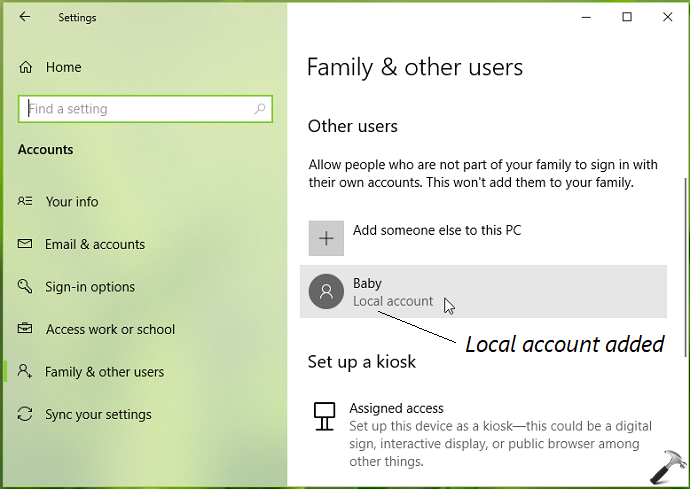
So you can now start using the local account you created so far. See this fix, if you can’t add local user account using above mentioned steps.
That’s it!
![KapilArya.com is a Windows troubleshooting & how to tutorials blog from Kapil Arya [Microsoft MVP (Windows IT Pro)]. KapilArya.com](https://images.kapilarya.com/Logo1.svg)




Leave a Reply