Before you add or upgrade memory on your system, it is quite important to find out RAM speed. In addition, you need to examine whether your Windows 11 or Windows 10 system has any empty slots. So, if you want to know how to check RAM speed in Windows 11/10, read this article.
In this post, we are going to cover different methods to find out RAM speed on Windows PC without employing any third-party tools. So, let’s get started without further ado!
Page Contents
How to Check RAM Speed in Windows 11/10
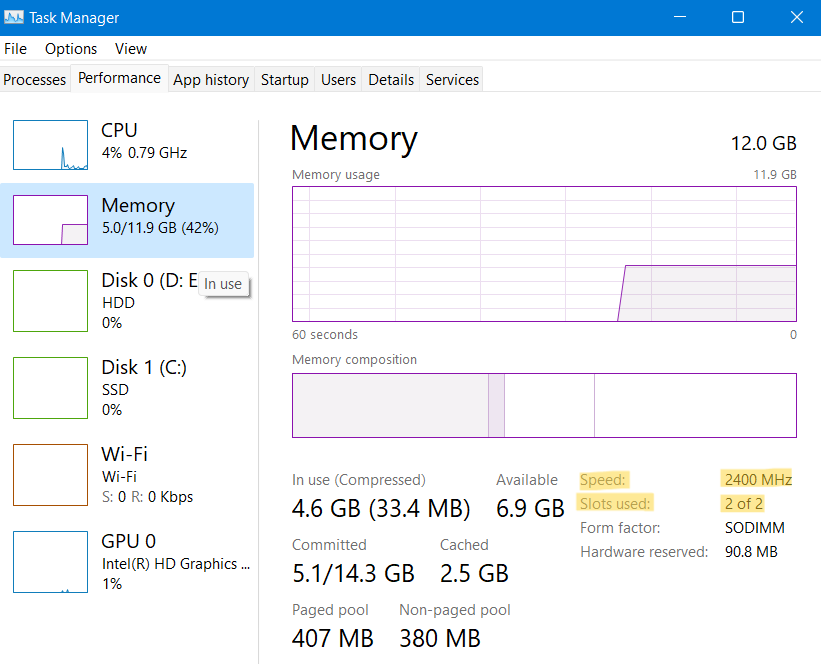
Way 1: Find Out RAM Speed with Task Manager
Read the instructions given below to examine your RAM speed using Task Manager:
- In the first place, you need to open Task Manager on your Windows PC. To do so, press Ctrl+Shift+Esc tabs together on the keyboard.
- After that, choose the Performance option and from there, tap on Memory.
- Here, you will be able to see information like your RAM speed and slots used on the system.

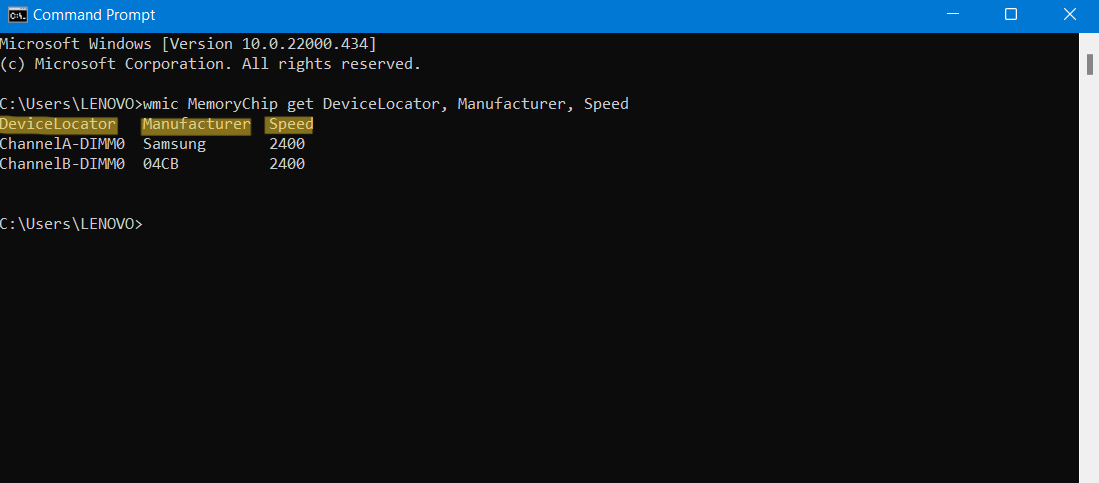
Way 2: Examine RAM Speed with Command Prompt
Go through the following instructions to see the RAM speed in Windows 11/10:
- Firstly, open Command Prompt by typing cmd in the Run dialog box.
- Now, run the command as follows:
wmic MemoryChip get DeviceLocator, Manufacturer, Speed
- Once executed, you can find out about the number of memory slots used as well as the RAM speed.

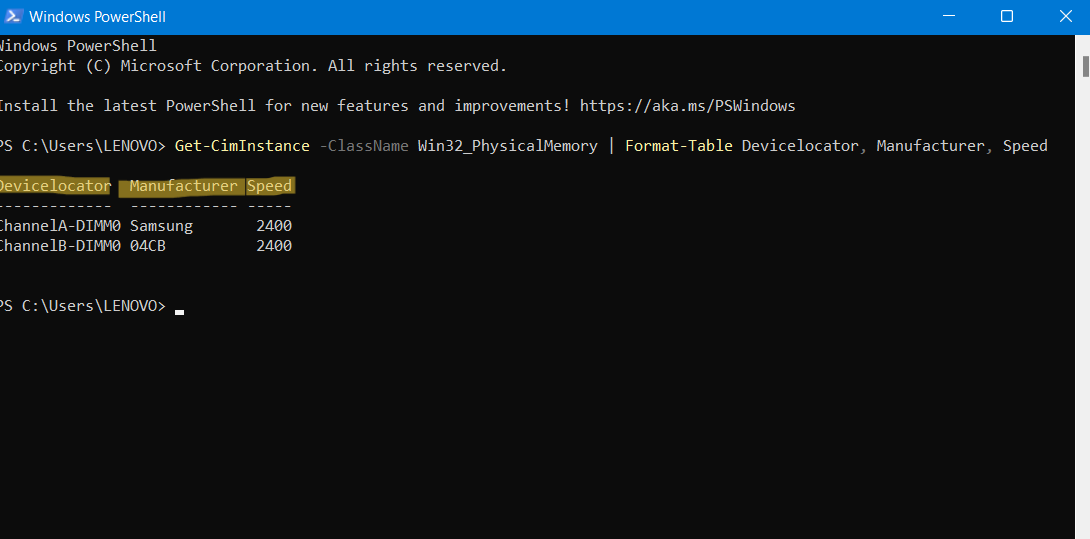
Way 3: Check RAM Speed with Windows Powershell
Using Windows PowerShell, find out RAM speed in the following manner:
- Initially, open Windows PowerShell on your Windows PC.
- Once opened, run the command as follows:
Get-CimInstance -ClassName Win32_PhysicalMemory | Format-Table Devicelocator, Manufacturer, Speed
- After the command is executed, you can check your system’s RAM speed.

As you can see, it is very easy to find out RAM speed in Windows 11. This can be done in three different ways with Task Manager, Command Prompt, or Windows PowerShell. Now, you do not have to worry about how to check RAM speed in Windows 11/10 anymore.
Read next: Your computer has a memory problem error in Windows.
![KapilArya.com is a Windows troubleshooting & how to tutorials blog from Kapil Arya [Microsoft MVP (Windows IT Pro)]. KapilArya.com](https://images.kapilarya.com/Logo1.svg)


![[Latest Windows 10 Update] What’s new in KB5055612? [Latest Windows 10 Update] What’s new in KB5055612?](https://www.kapilarya.com/assets/Windows10-Update.png)


Leave a Reply