In Windows 11, users decide how and when to get the latest Windows Updates for keeping their devices running securely and smoothly. With the current update, you get the latest fixes and security improvements. This will help in keeping your Windows device protected and run efficiently. In many cases, restarting the system finishes off the update process. Also, ensure that your system is plugged in when you are updating your Windows PC. If you do not wish to get recommended updates, there is an option to pause them temporarily from being downloaded and installed automatically. Now, how to check for updates in Windows 11?
Usually, Windows releases feature updates twice a year. This update comes with new functionality and potentialities along with security updates and potential fixes. On the other hand, there are quality updates, which are more frequent and include minor fixes and security updates. Both of these updates are delivered through Windows Update.
In this post, you will learn how to check for updates in Windows 11. Now, let’s get started.
How to check for updates in Windows 11
1. In the first place, open Settings by pressing the Windows + I keys together on your system. After that, click on the Windows Update tab and select Check for updates.
2. If available, click on the Install now button.
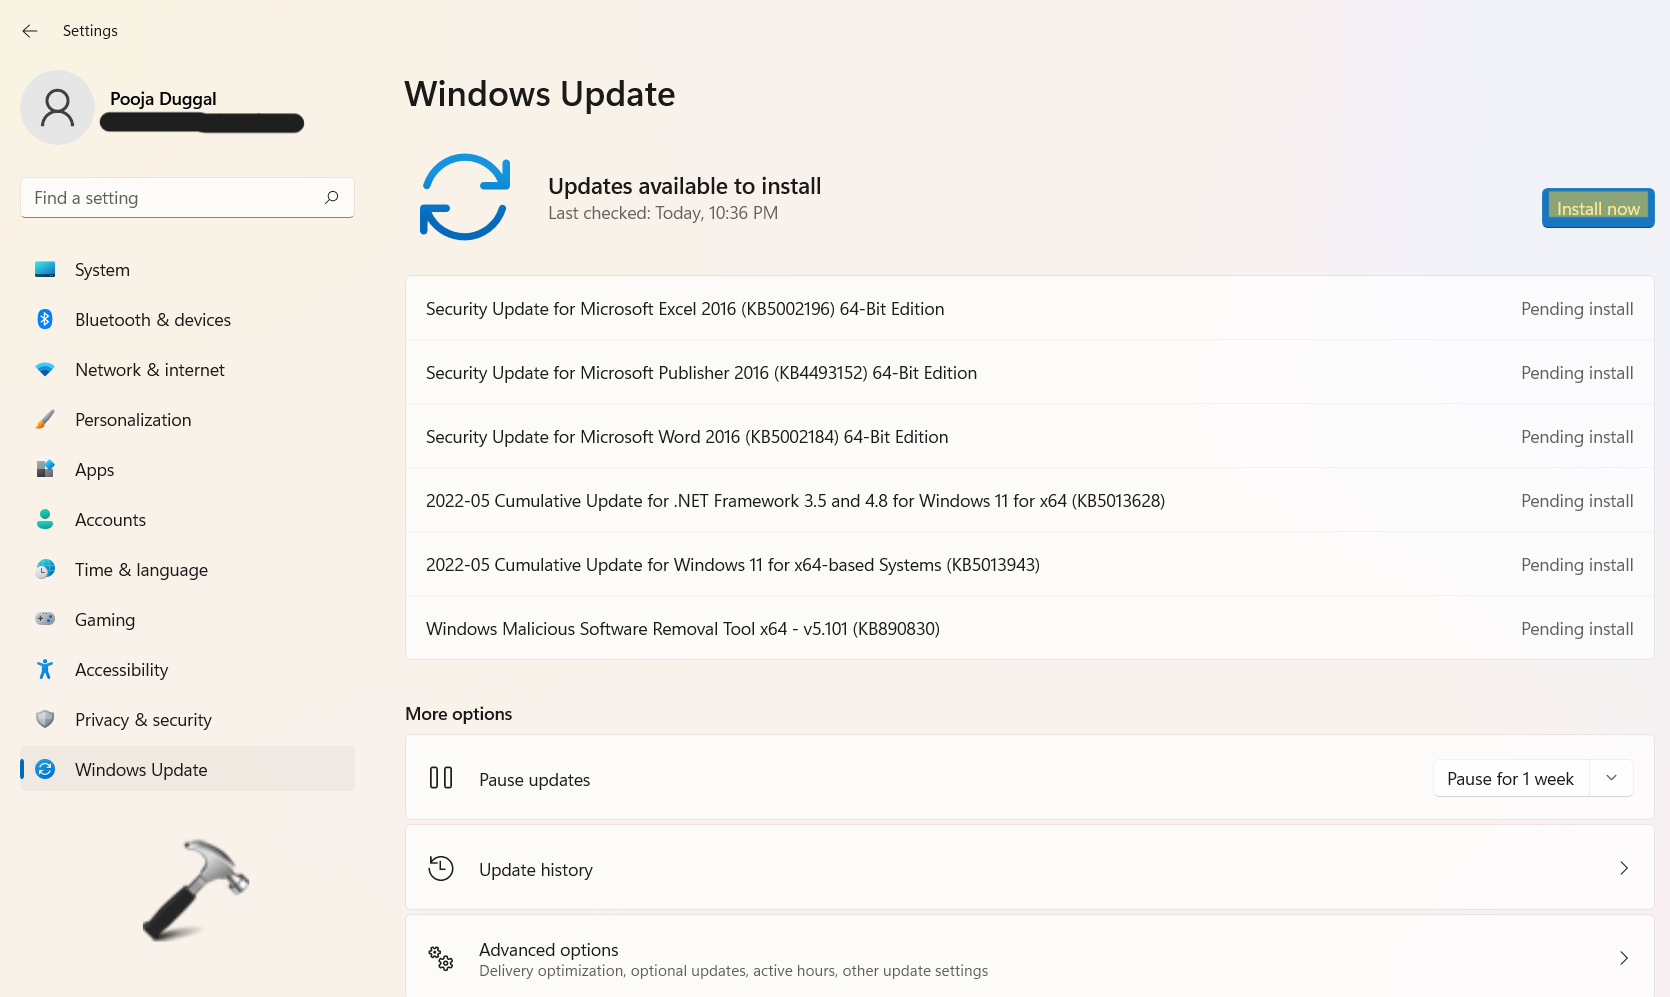
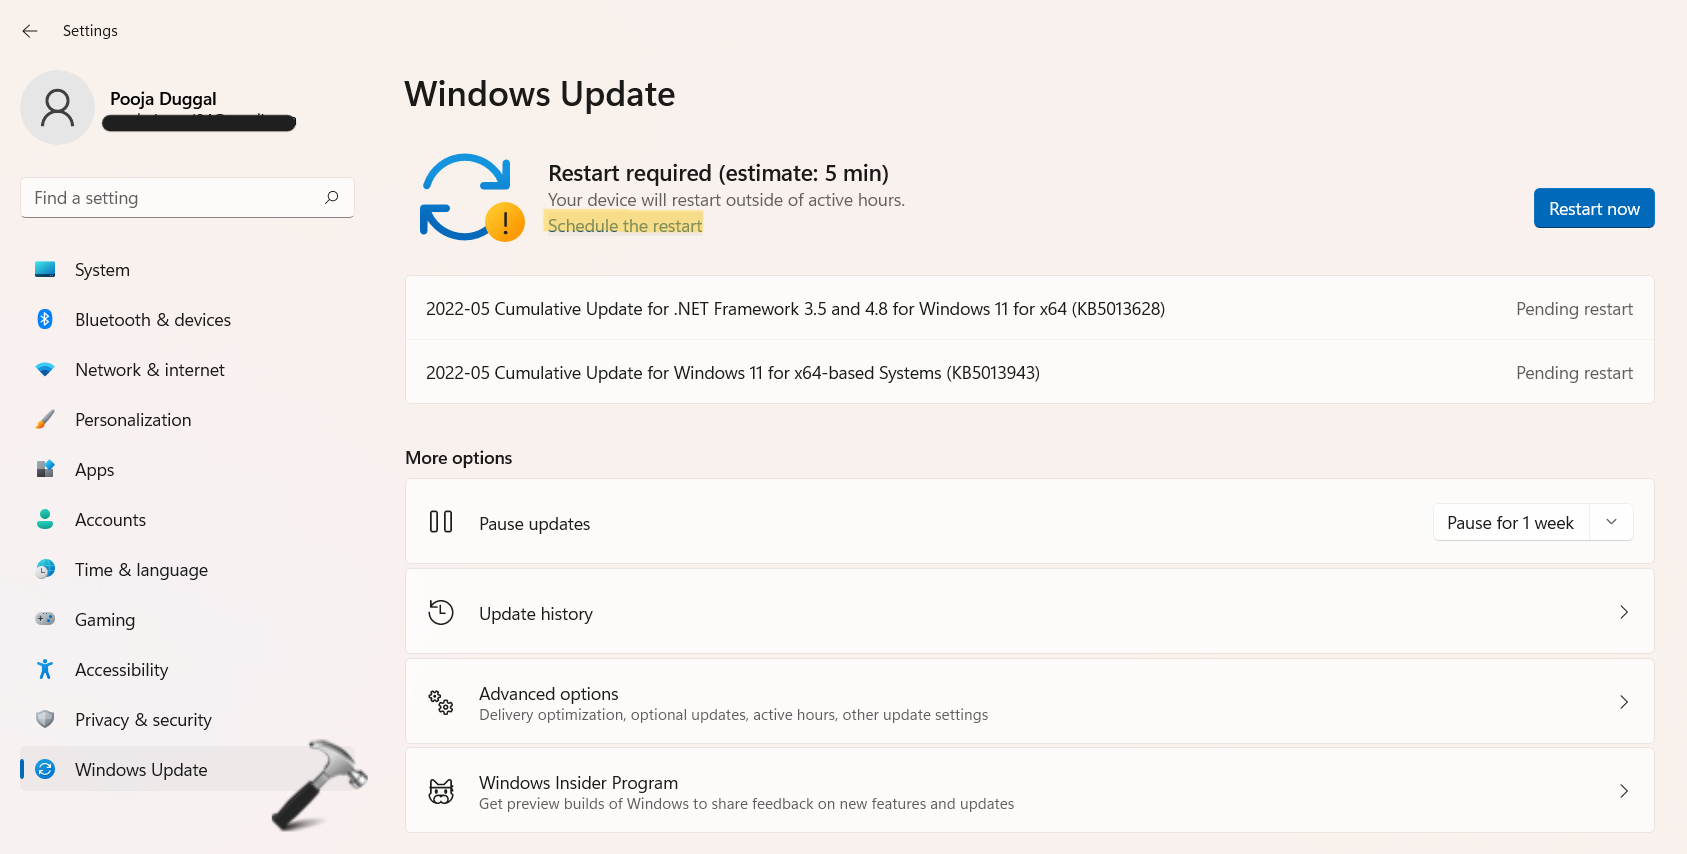
3. Next, choose the Restart now button. This is needed to finish installing updates.

So, it is important that you restart your Windows PC to finish the process. Windows 11 will automatically restart your system outside of the set active hours. In that case, you are not required to do anything.
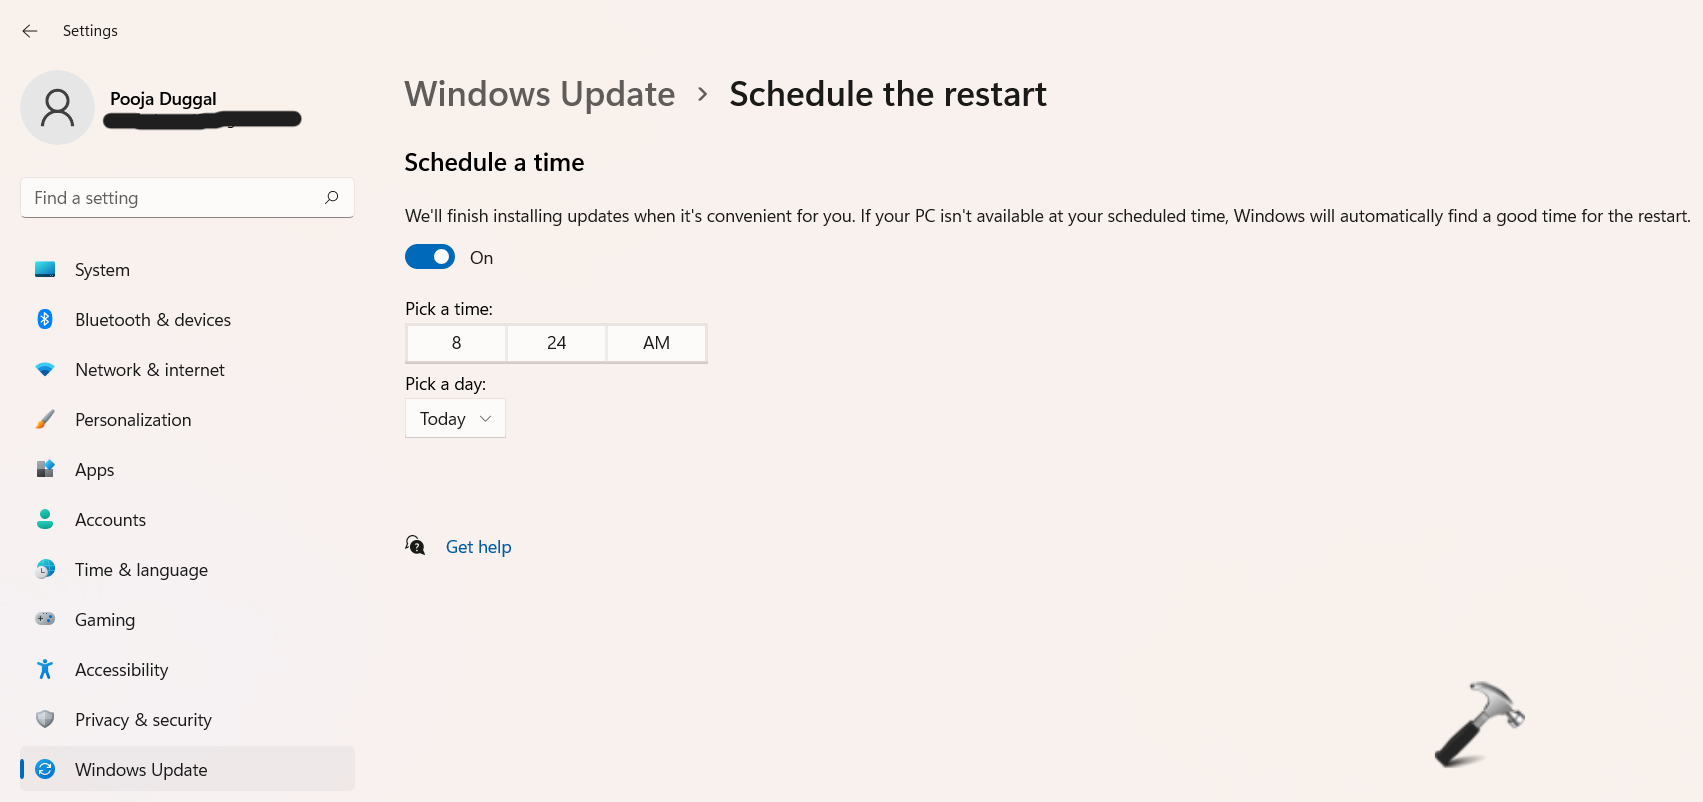
Or else, you can schedule a restart. For that, click on the Schedule the restart tab in Settings.
And then, click on Pick a time and Pick a day.
So, this is how to check for updates in Windows 11.
![KapilArya.com is a Windows troubleshooting & how to tutorials blog from Kapil Arya [Microsoft MVP (Windows IT Pro)]. KapilArya.com](https://images.kapilarya.com/Logo1.svg)




Leave a Reply